
Creating a user
Management
- Before you add a new user, first create a Data Access Profile. A Data Access Profile is a collection of accounts. Users only have access to the Data Access Profiles that are connected to their account. By default, the Data Access Profile 'All Accounts' is selected. If a user is not allowed to have access to All Accounts, you can create a specific Data Access Profile.
- First, request an Access Card for each new user. Then follow the steps shown below to create the user in Access Online.
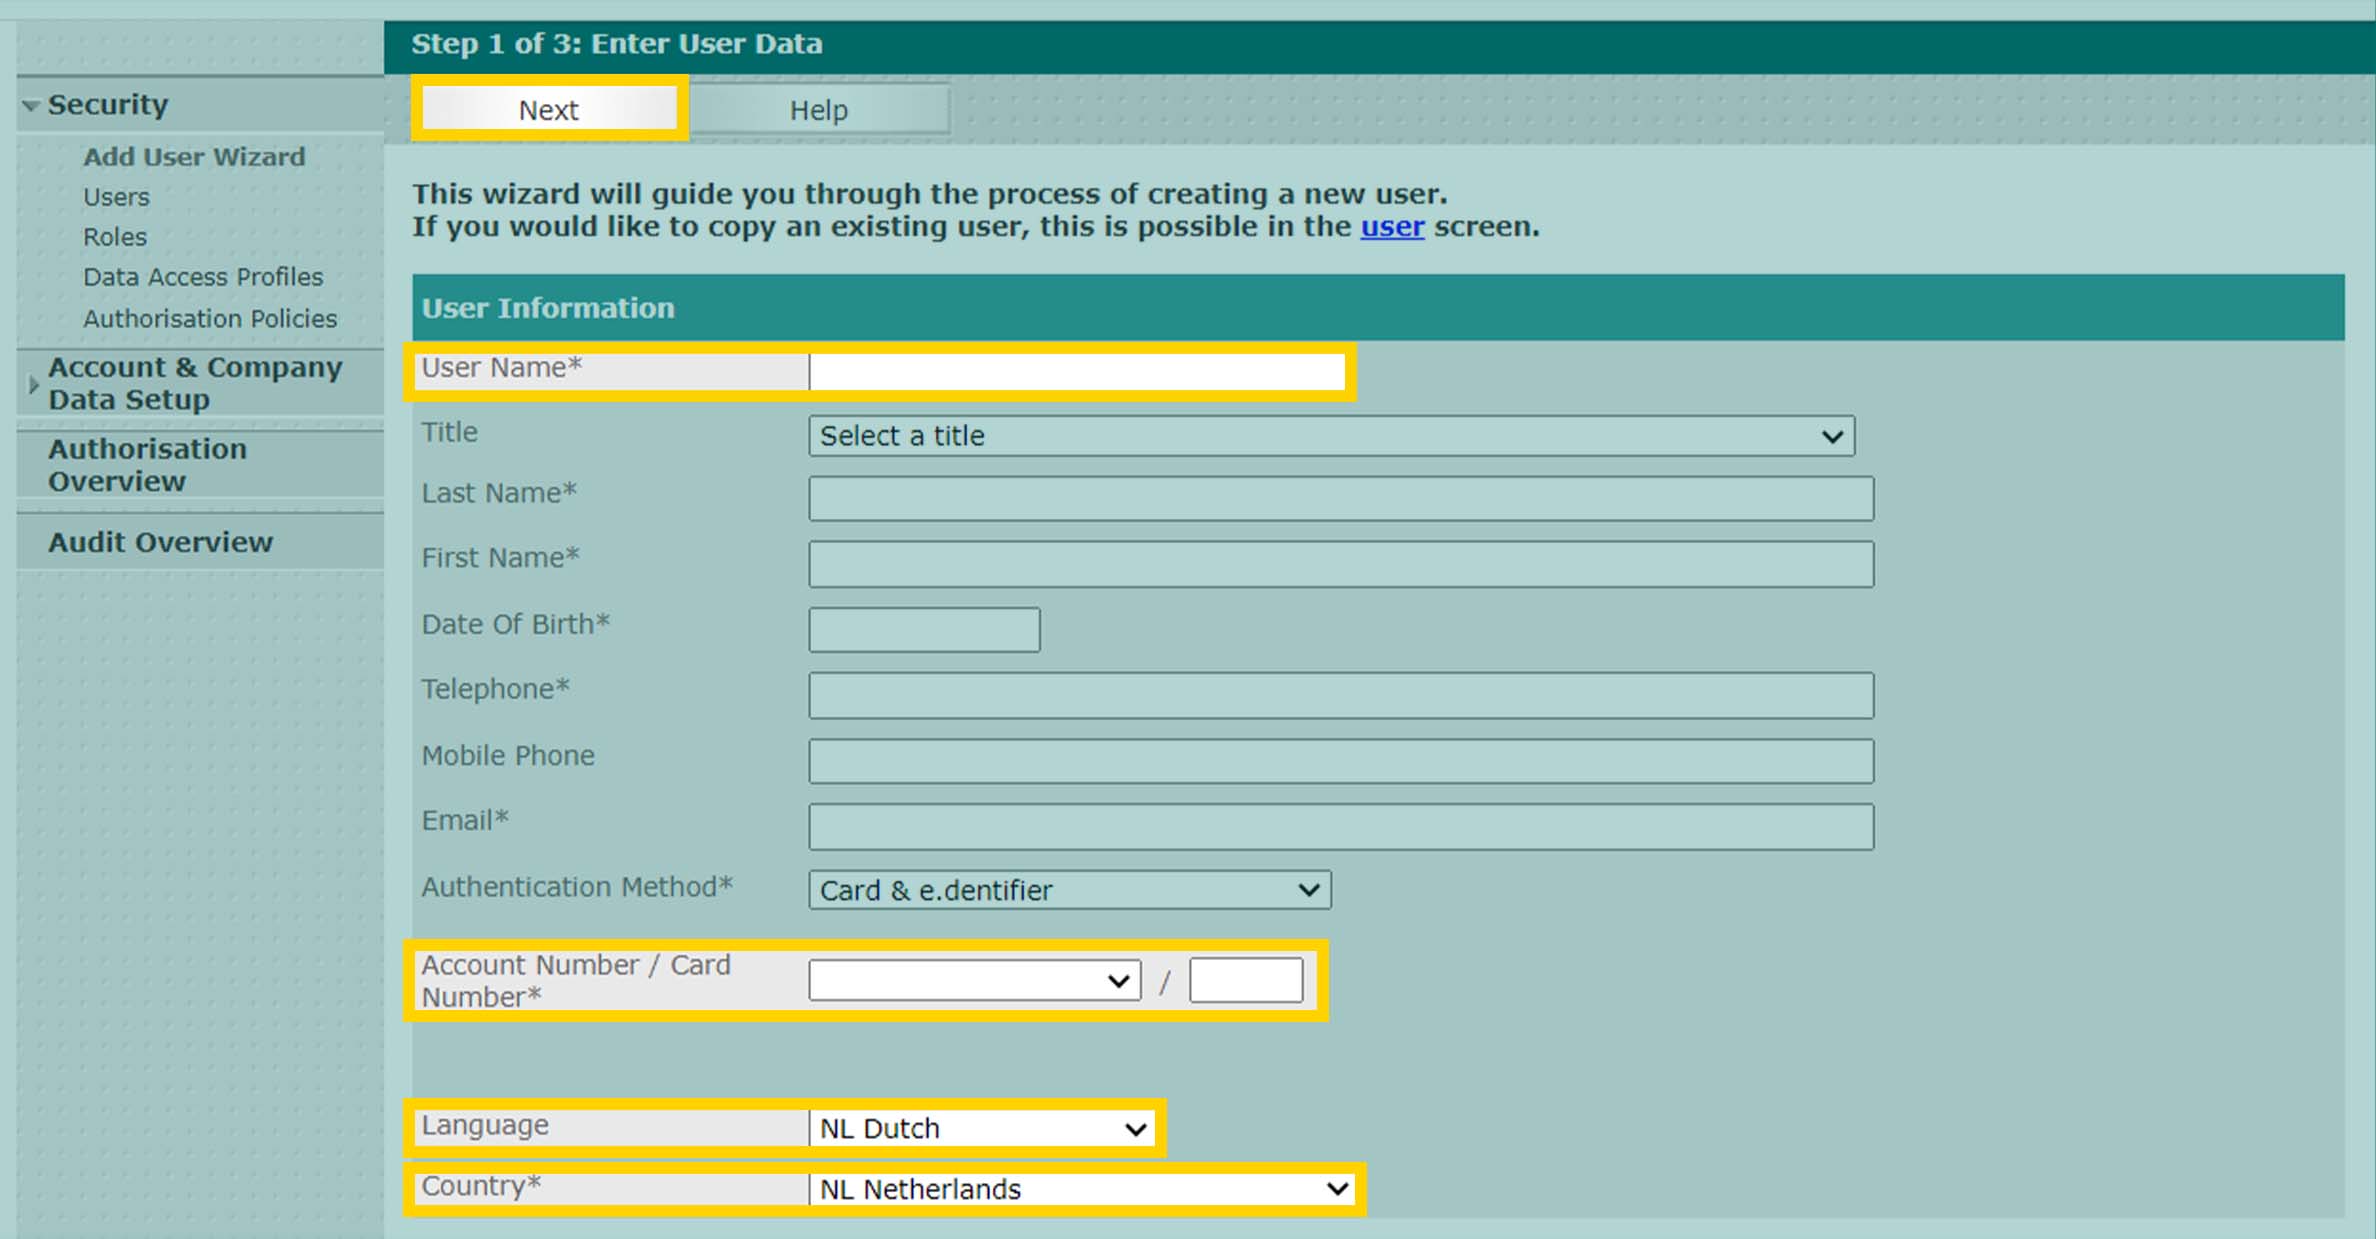
Go to: AOL Classic > administration > Security > Add User Wizard
Part 1 – Personal Data
- Enter a username in User Name.
Every username must be unique and comprise at least five characters. - Enter at least the compulsory information.
- Select the Account Number and enter the 3-figure Card Number of this user's Access Card
- Select the Language.
- Select the Country.
- Click Next.
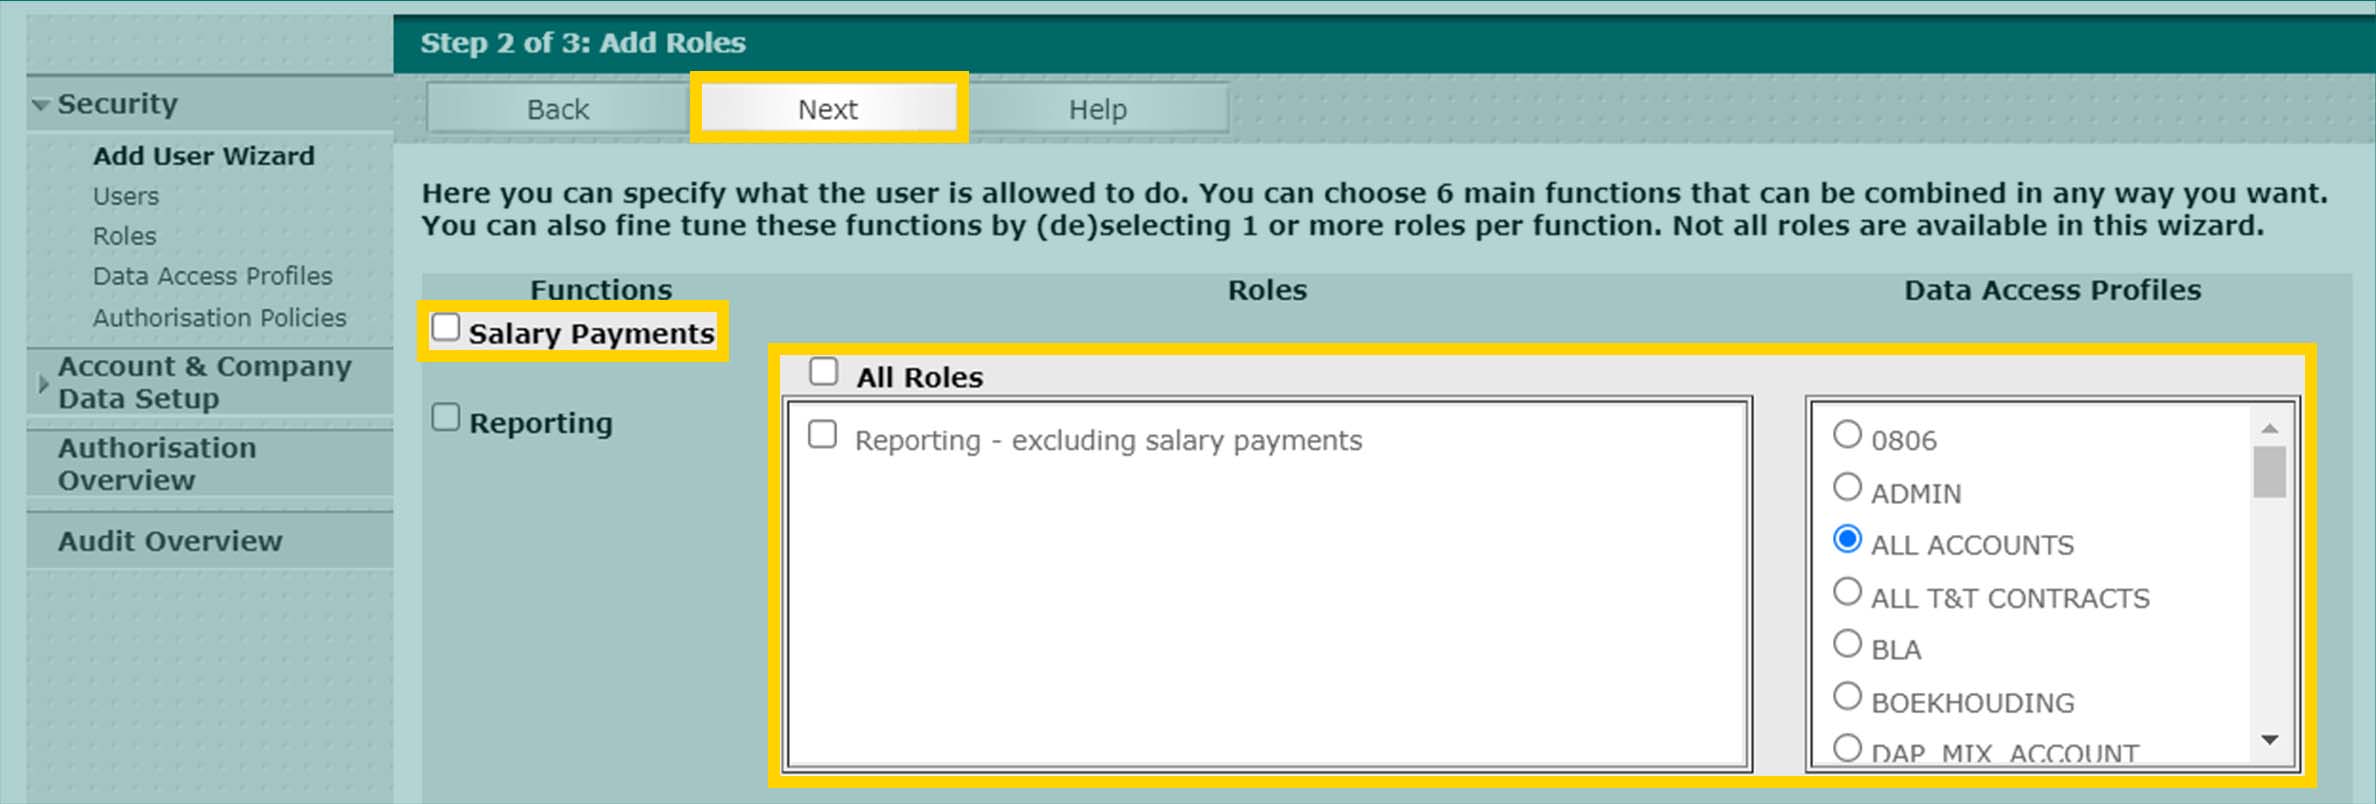
Part 2 – Assign roles
Our advice: divide the roles between various users, so that one user can create payments, for example, and a different user can approve those payments.
- Specify the roles to be allocated to the user in Access Online.
- View payroll payments: tick Salary Payments.
- View reports: select the correct Data Access Profile and tick All Roles in Reporting.
- Create payments: select the correct Data Access Profile and tick All Roles in Initiate Payments.
- Approve payments: select the correct Data Access Profile and tick All Roles in Authorise Payments.
- Perform management tasks: select the correct Data Access Profile and tick All Roles in User Administration.
For more information about the various roles, go to 'The most frequently used roles in Access Online'.
- Click Next.
Please note: if you see the message 'No Policy(s) found', you have not yet created an authorisation policy. You can do this at a later stage via Authorisation policy.
Part 3 - Completion
- Click Next again.
- Click Submit.
- To create another user, repeat the steps under 'Part 2 – Assign roles'.
- When you have finished creating all the new users, click Authorise Now.
If you cannot click 'Authorise Now', this is because a colleague needs to approve your changes.