
Creating an authorisation policy
Management
An authorisation policy sets out which colleagues may sign for an order, and, for example, if an extra person needs to sign for payments that exceed a certain amount. Or if signatures for certain payments must be placed in a particular sequence. You will find our step-by-step instructions for creating an authorisation policy below.
Go to: AOL Classic > Administration > Security > Authorisation Policies: Setup
Part 1 – Select the accounts for the policy
- Click New.
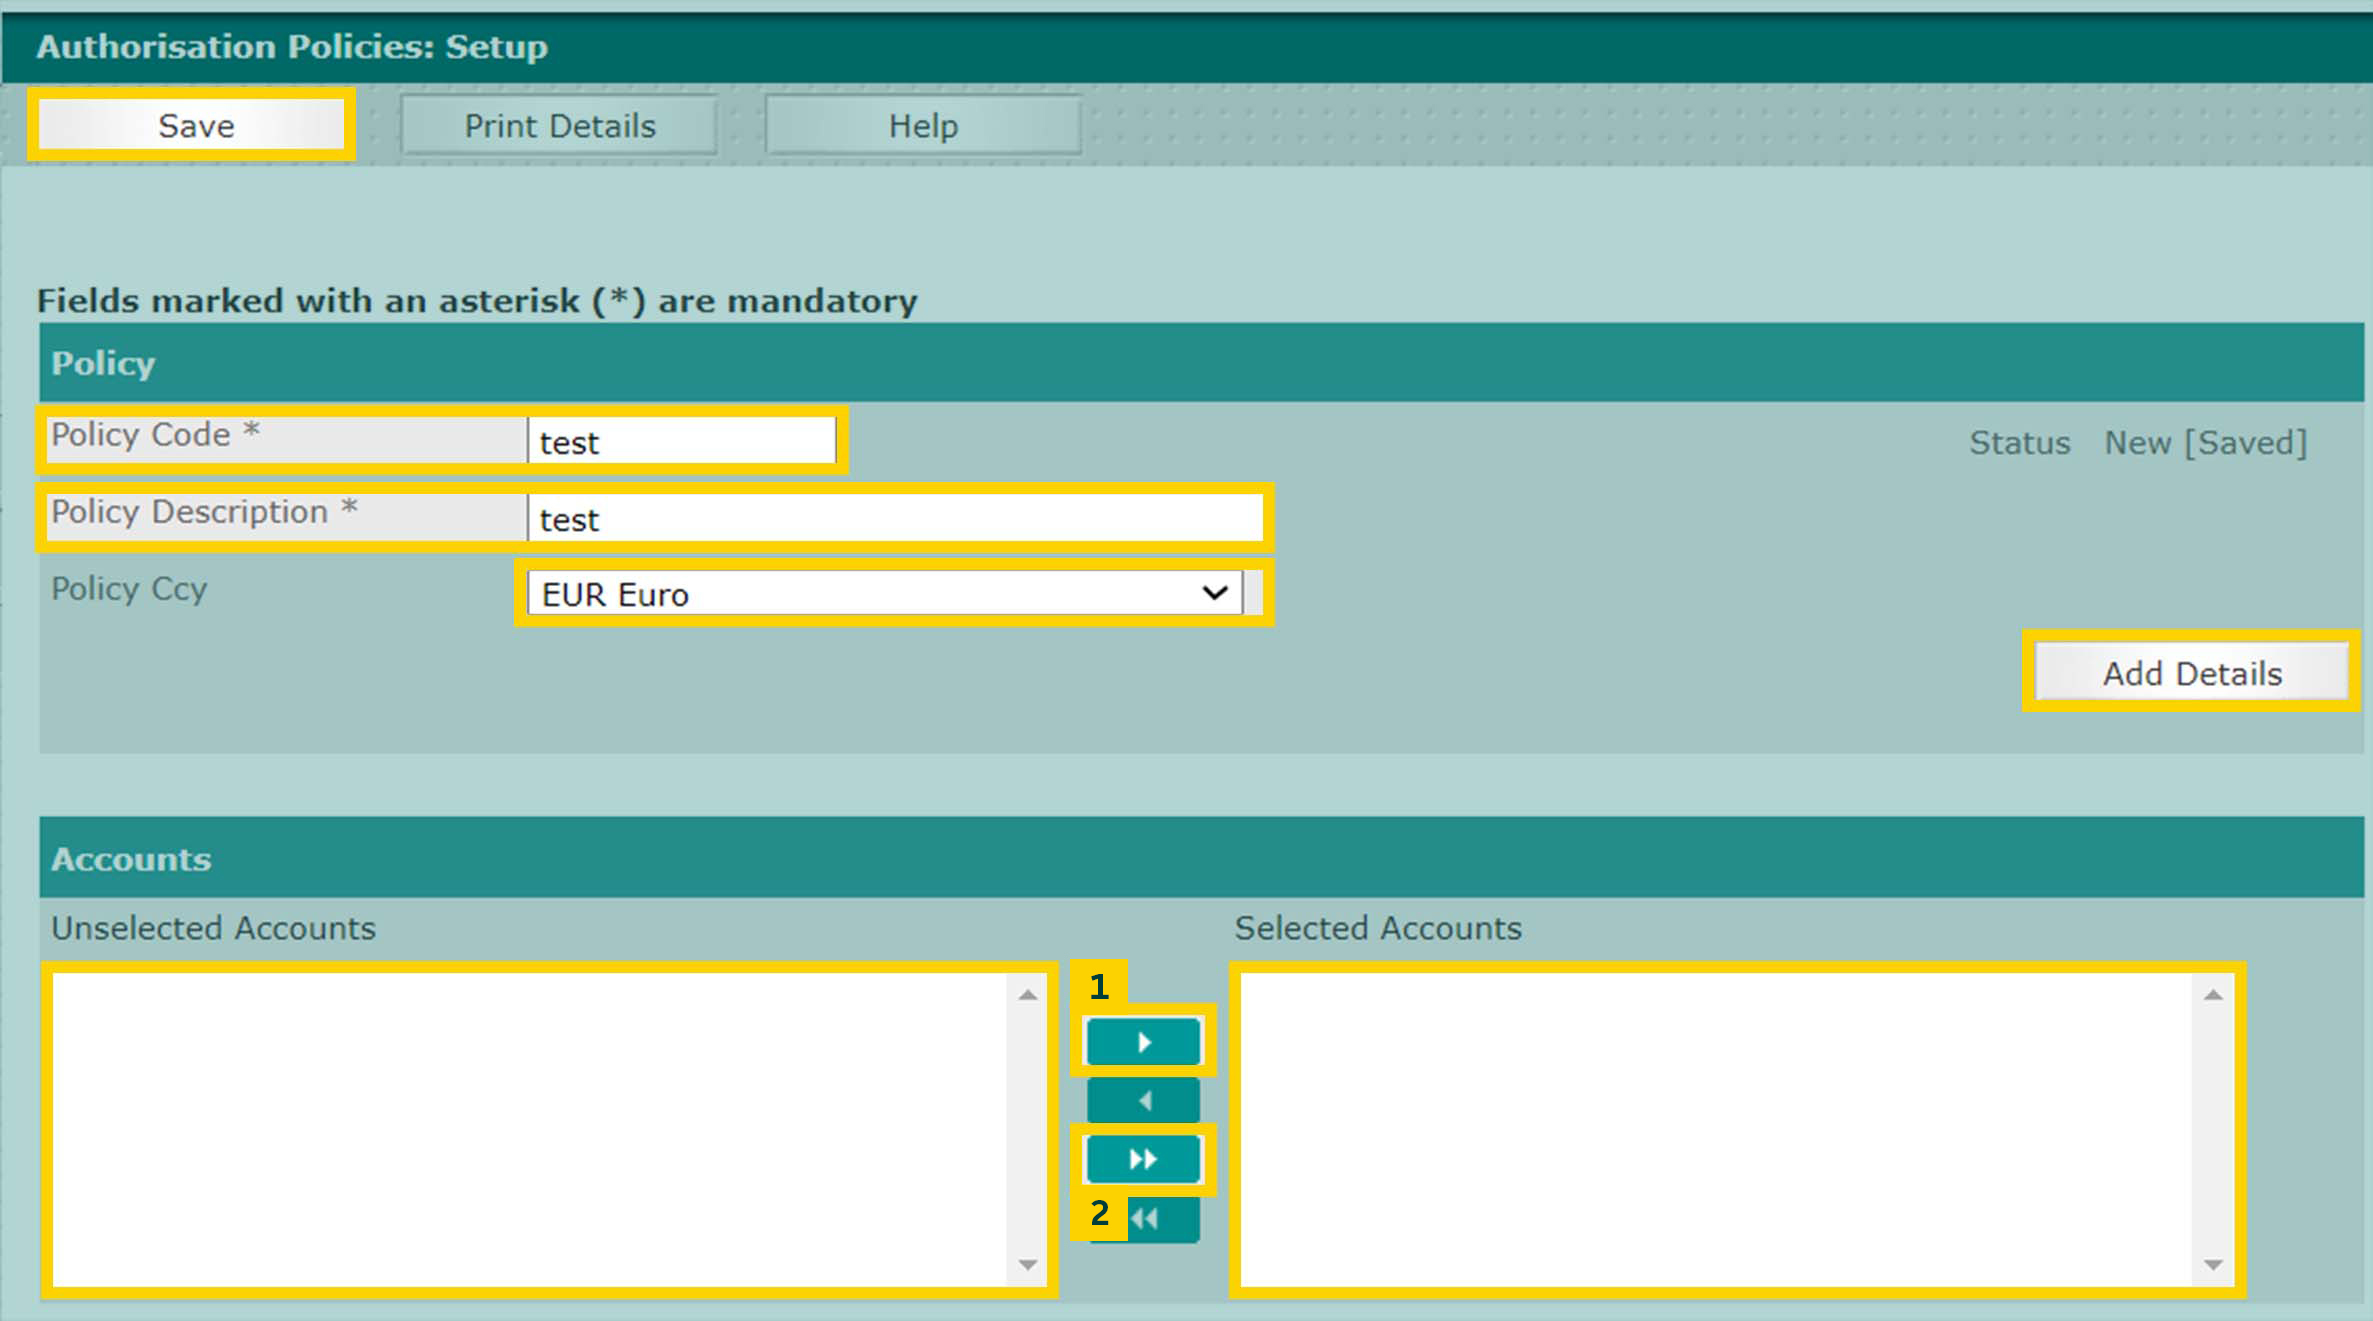
- Give the policy a name: enter the Policy code that you have thought up and a Policy Description.
If the same policy applies to all accounts, enter 'All' for the code, and 'Accounts' for the description. - Select the correct currency for this policy; this is set to EUR as standard.
- Select the account(s) to which the policy applies:
- Click on button (1) to move accounts one by one from Unselected Accounts to Selected Accounts.
- Click on button (2) to move all accounts in one go.
- Click Save.
Part 2 – Create rules for the policy
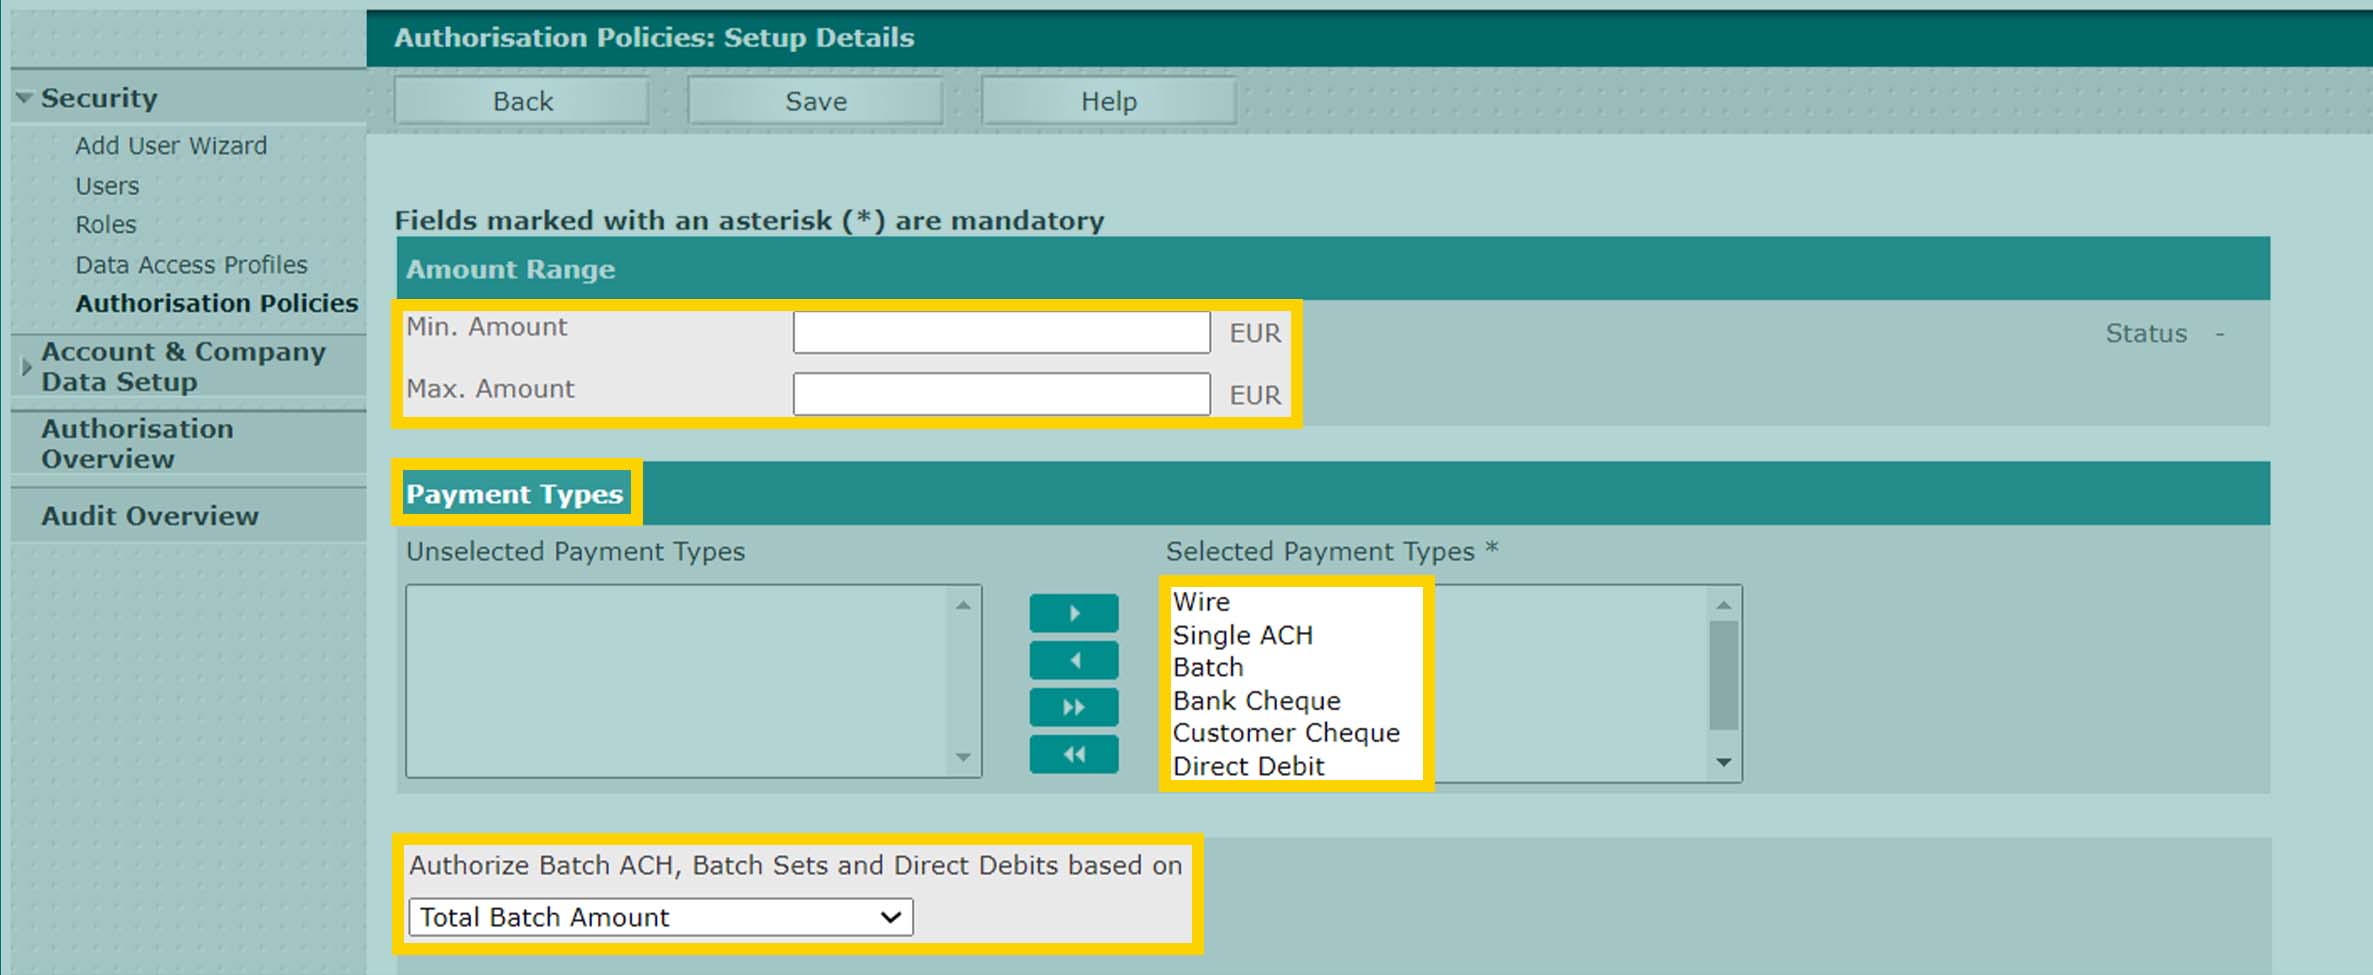
- Click Add Details (appears on the right of the screen).
- Optional: enter a minimum and/or maximum amount.
Please note: if you do not enter an amount here, there will be no maximum. - Select the payment types and beneficiary types.
The payment types and beneficiary types are all selected by default. - If you have entered a maximum amount, select one of the following options in Authorize Batch ACH, Batch Sets and Direct Debits on:
- Total Batch Amount if the maximum amount applies to the total amount of the batch. 'In order to sign, the sum of all of the payments in the batch may not exceed...'
- Highest Individual Transfer Amount if the maximum amount applies to single payments in the batch. 'In order to sign, a single payment in the batch may not exceed...'
- Specify which users are allowed to make these payment types: the authoriser(s). Also state whether they must sign in a particular sequence.
Our advice: where possible, arrange for at least two users to sign for a payment.
No authorisation sequence or a single authoriser
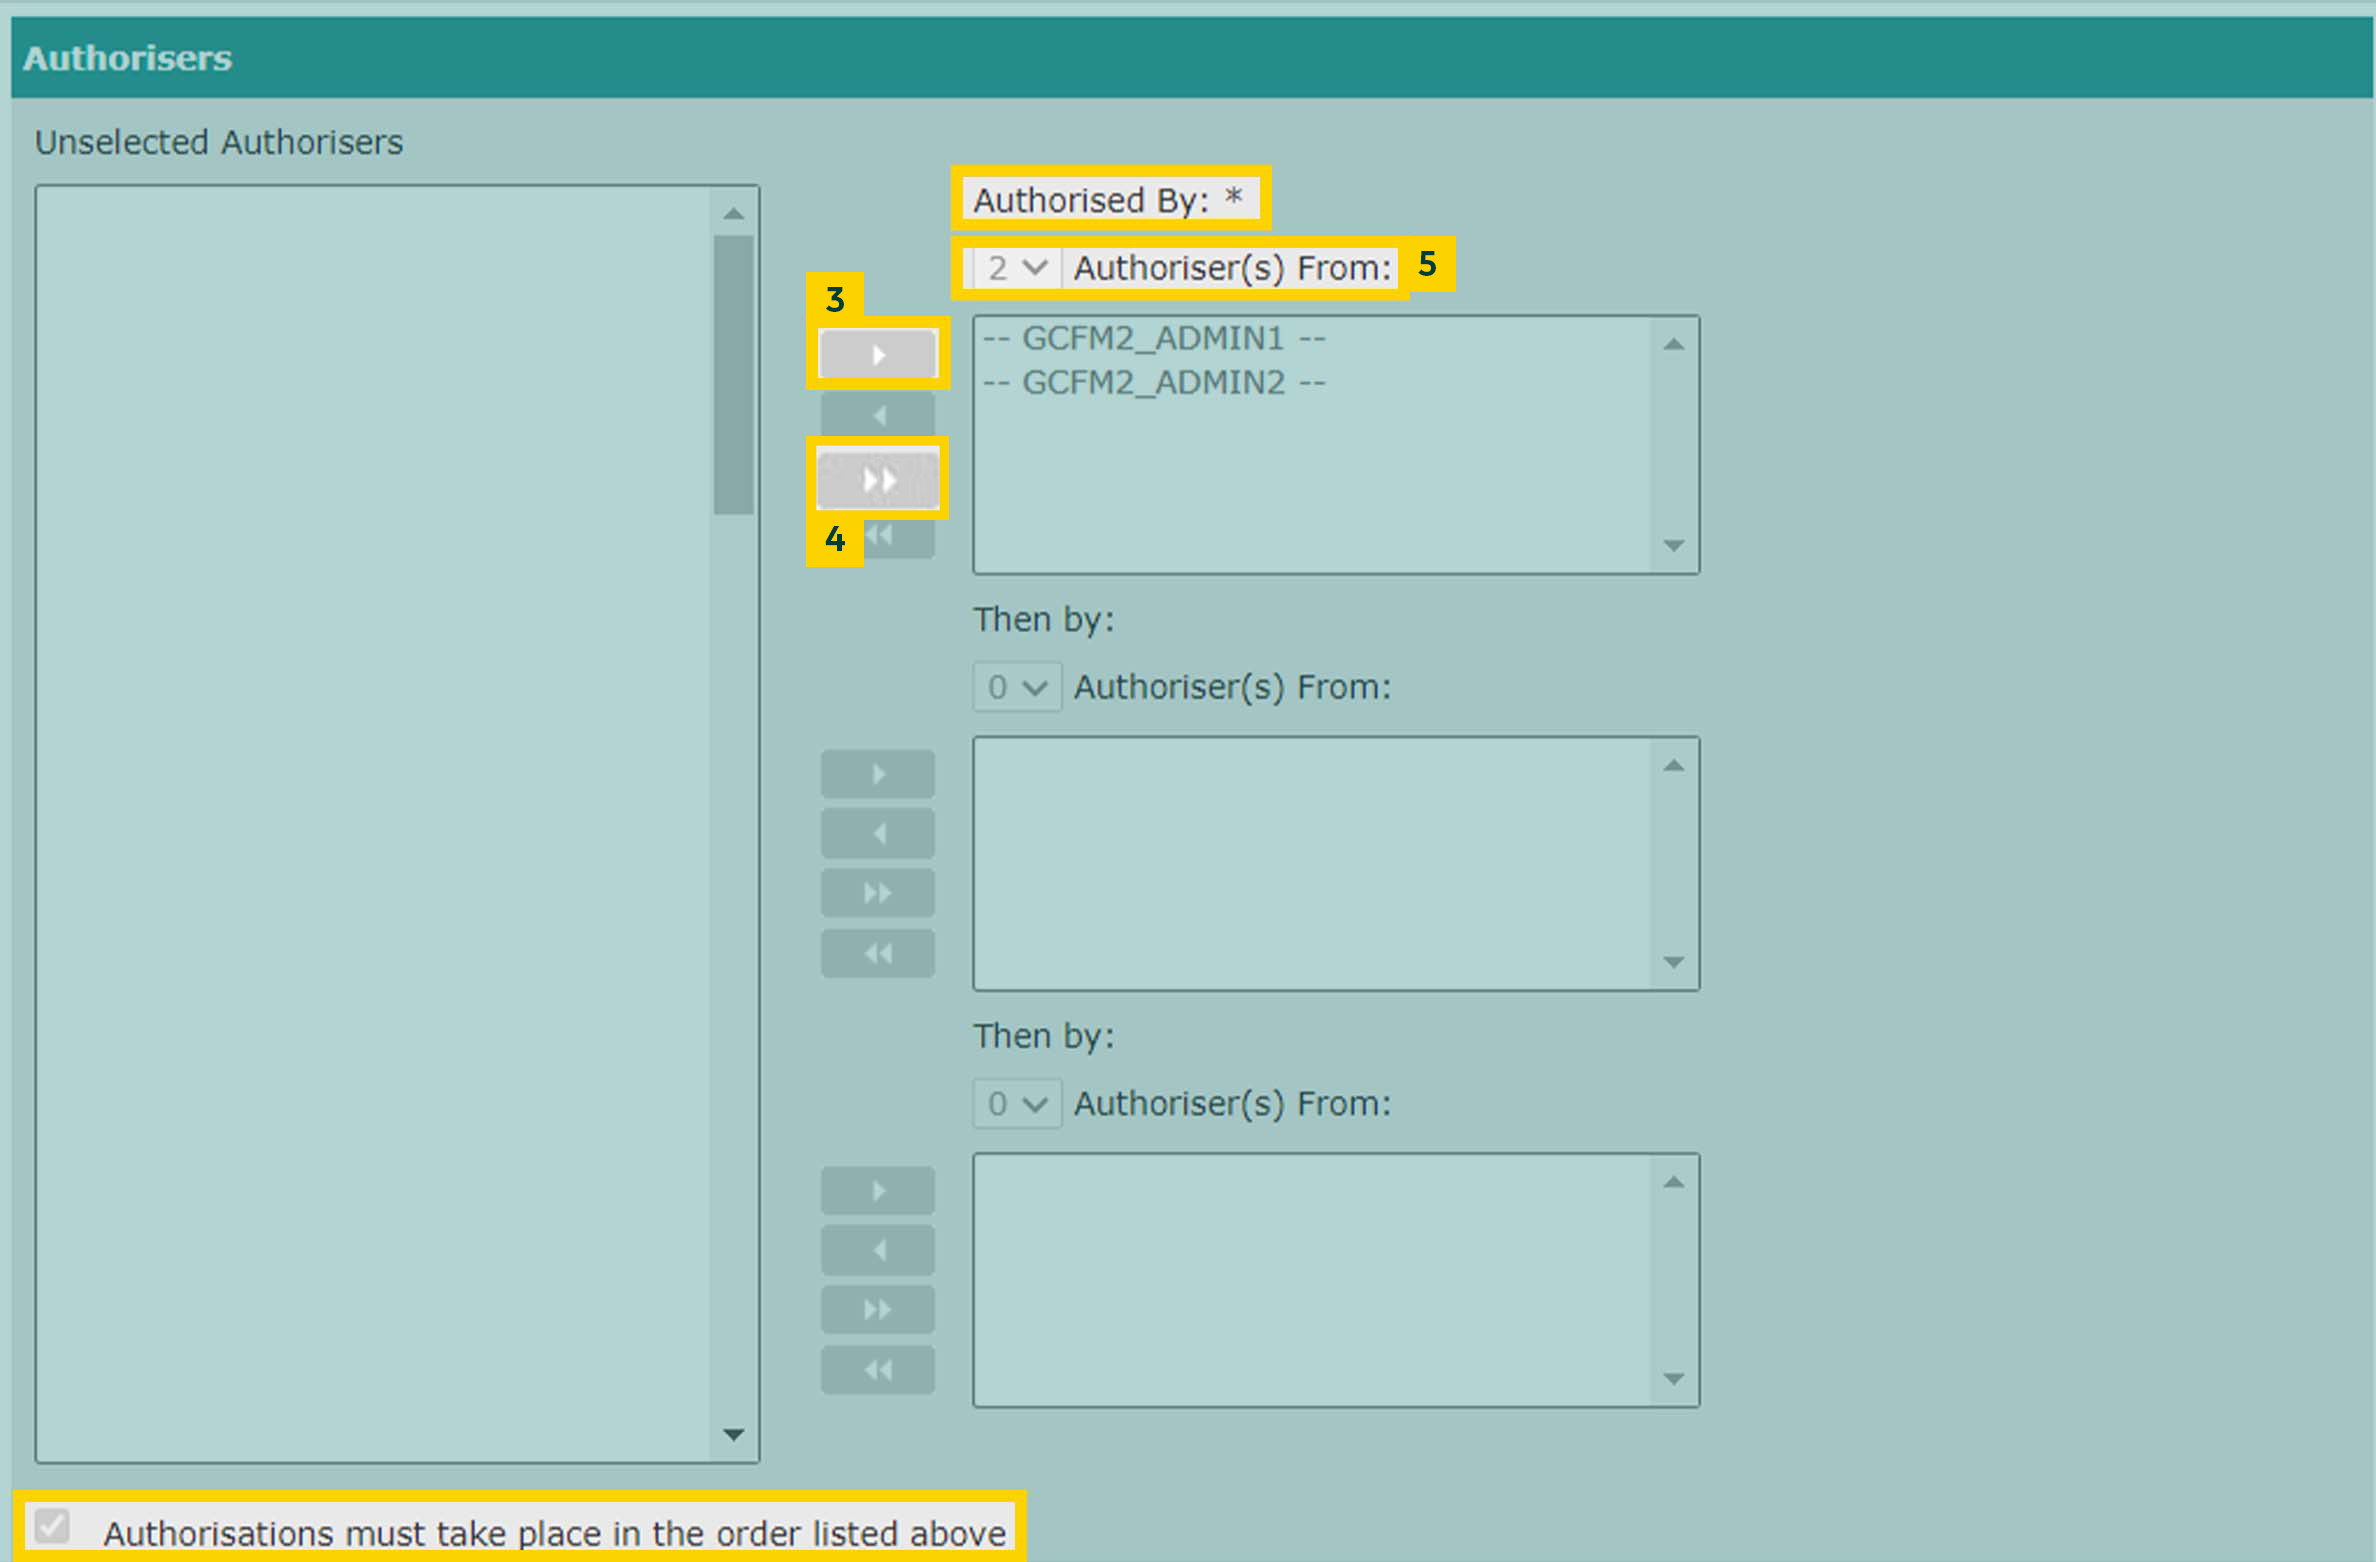
- Select the users who are authorised to sign for this payment. Click the top button (3) to move them to Authorised By*: Click on button (4) to move all users in one go.
- In dropdown (5) Authoriser(s) By, specify how many of these authorisers must collectively approve a payment.
- Remove the tick for the option Authorisations must take place in the order listed above.
There is an authorisation sequence
- Add the first authoriser(s) to Authorised By*. Add the second authoriser(s) to Then by. And add the third authoriser(s) to the Then by field at the bottom. You can do this by selecting the user(s) and clicking on button (4).
- In dropdown (5) Authoriser(s) By, state for each field how many authorisers must collectively approve a payment.
- Leave the Authorisations must take place in the order listed above option ticked.
- Please note: authorisation is performed in order of the three fields. The order of users within a field does not matter.
- Click Save.
You will see the message 'Policy saved successfully'.
Part 3 – Finalise the policy
- You have now created a rule within the authorisation policy. If you want to create another rule for the same accounts, repeat steps 6 to 11 under 'Part 2 – Creating rules for the policy'.
- If the policy is ready, click Submit.
- Activate the new policy by confirming it in the Authorisation Overview.