
Creating a SEPA direct debit batch manually
In Access Online Renewed, you can quickly and easily manually create a SEPA direct debit batch. This is useful if you want to have direct debit instructions processed that you previously forgot to submit.
1. Log in
Log in and go to Access Online Renewed
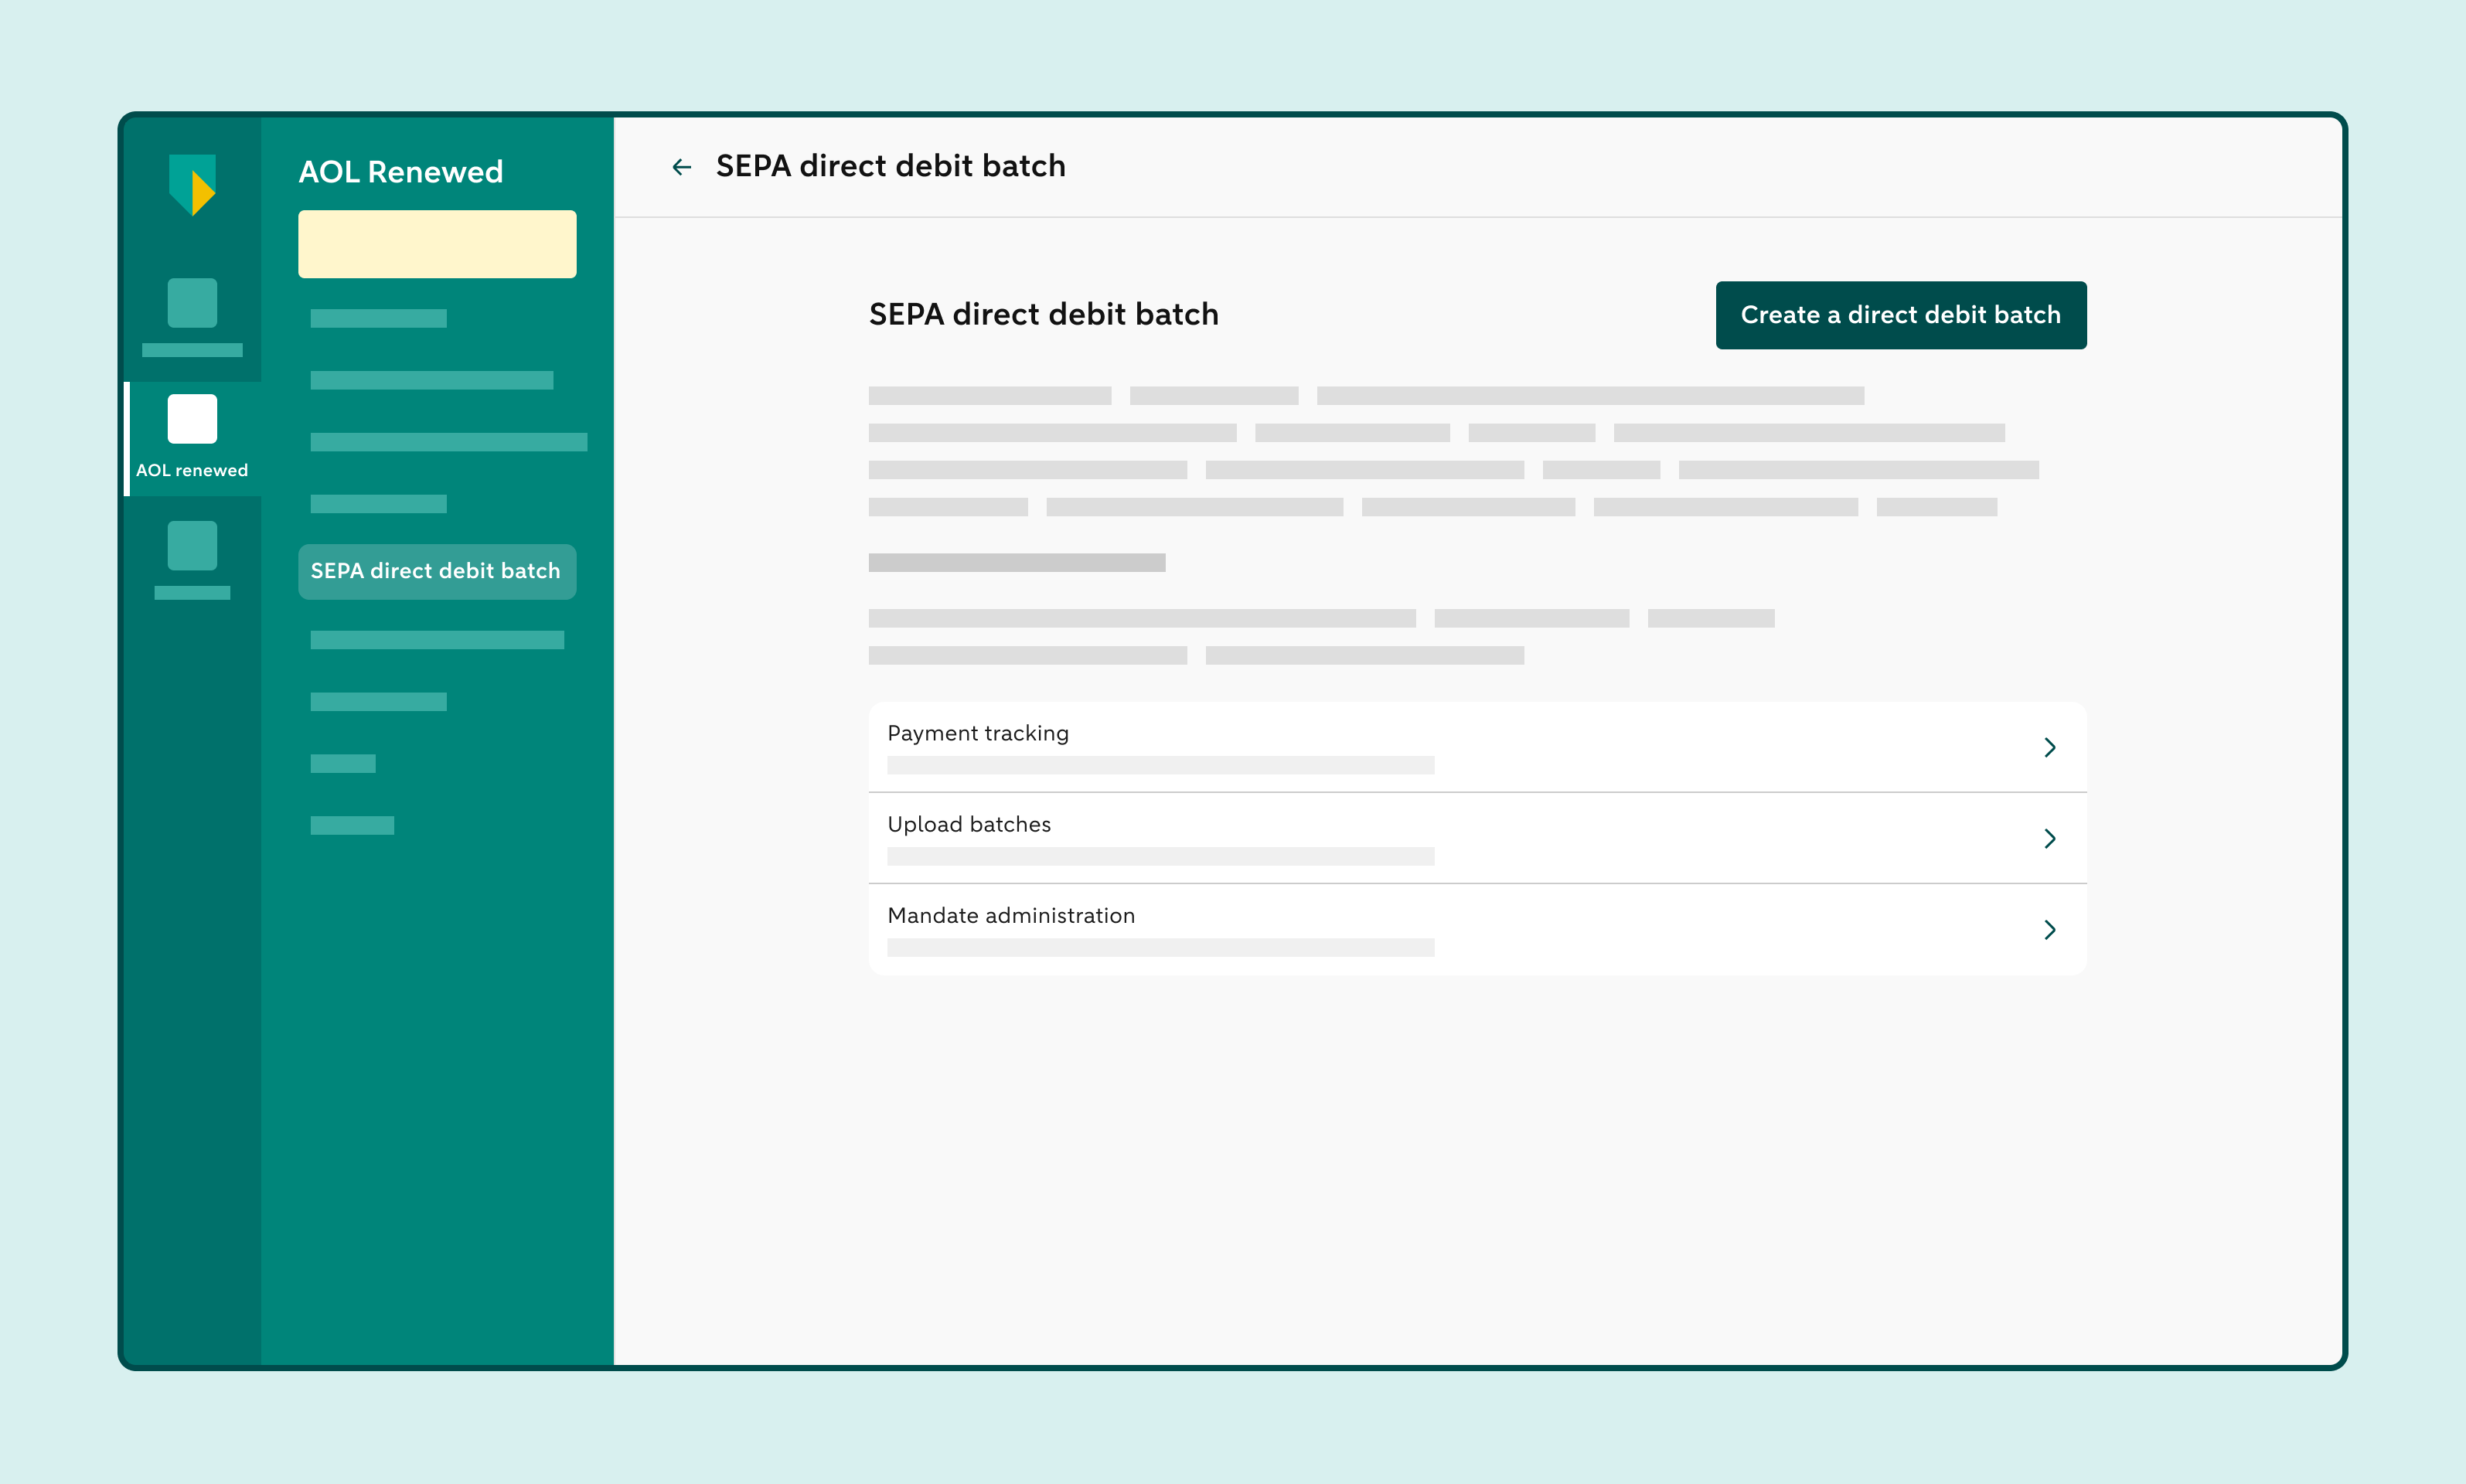
In the menu on the left, click Direct debit batch
You are now on the SEPA direct debit batch screen.
Click Create direct debit batch
You are now on the Create direct debit batch screen.
2. Enter batch details
Choose the account to which the SEPA direct debit batch should be credited
The creditor ID is automatically retrieved.
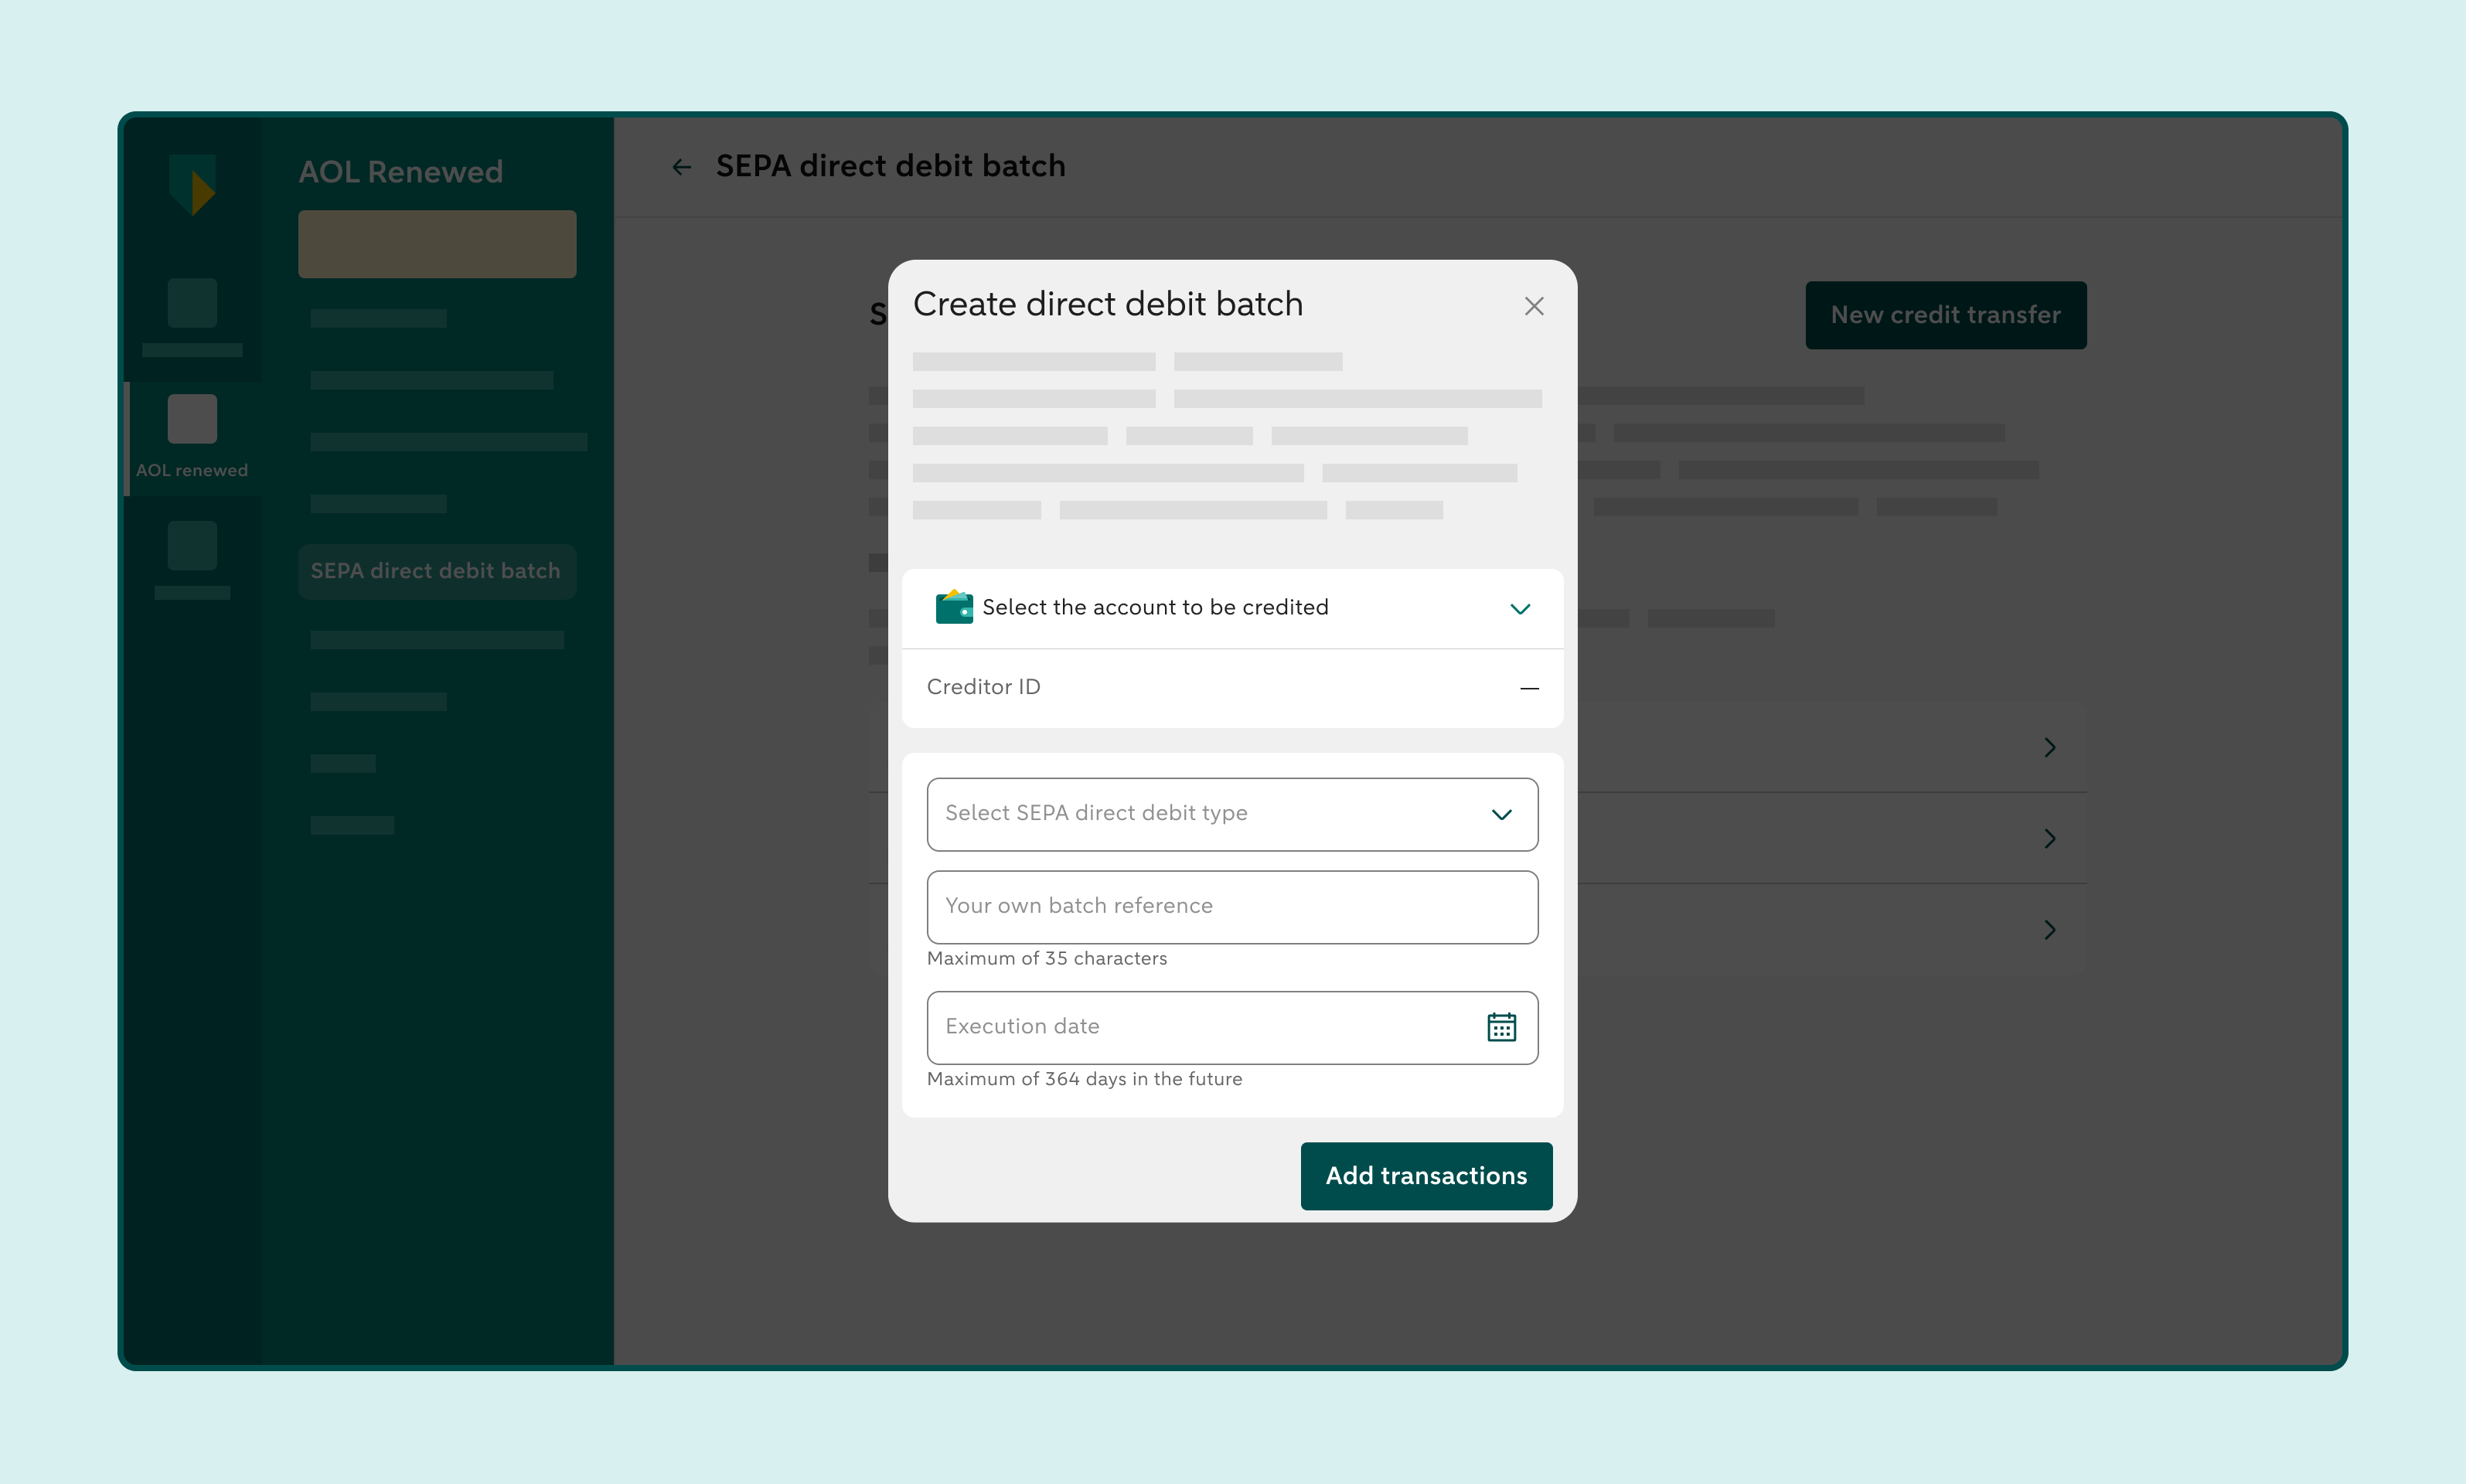
Select the SEPA direct debit variant
If you only have 1 direct debit variant in your SEPA direct debit agreement, it is filled in automatically.
Enter a reference that helps you to identify the batch
Choose the date you want the batch to be executed
This date can be a maximum of 364 days in the future.
Click Add transactions
3. Check the batch details
Check the batch details you just entered
You can see the limits of the SEPA direct debit agreement here.
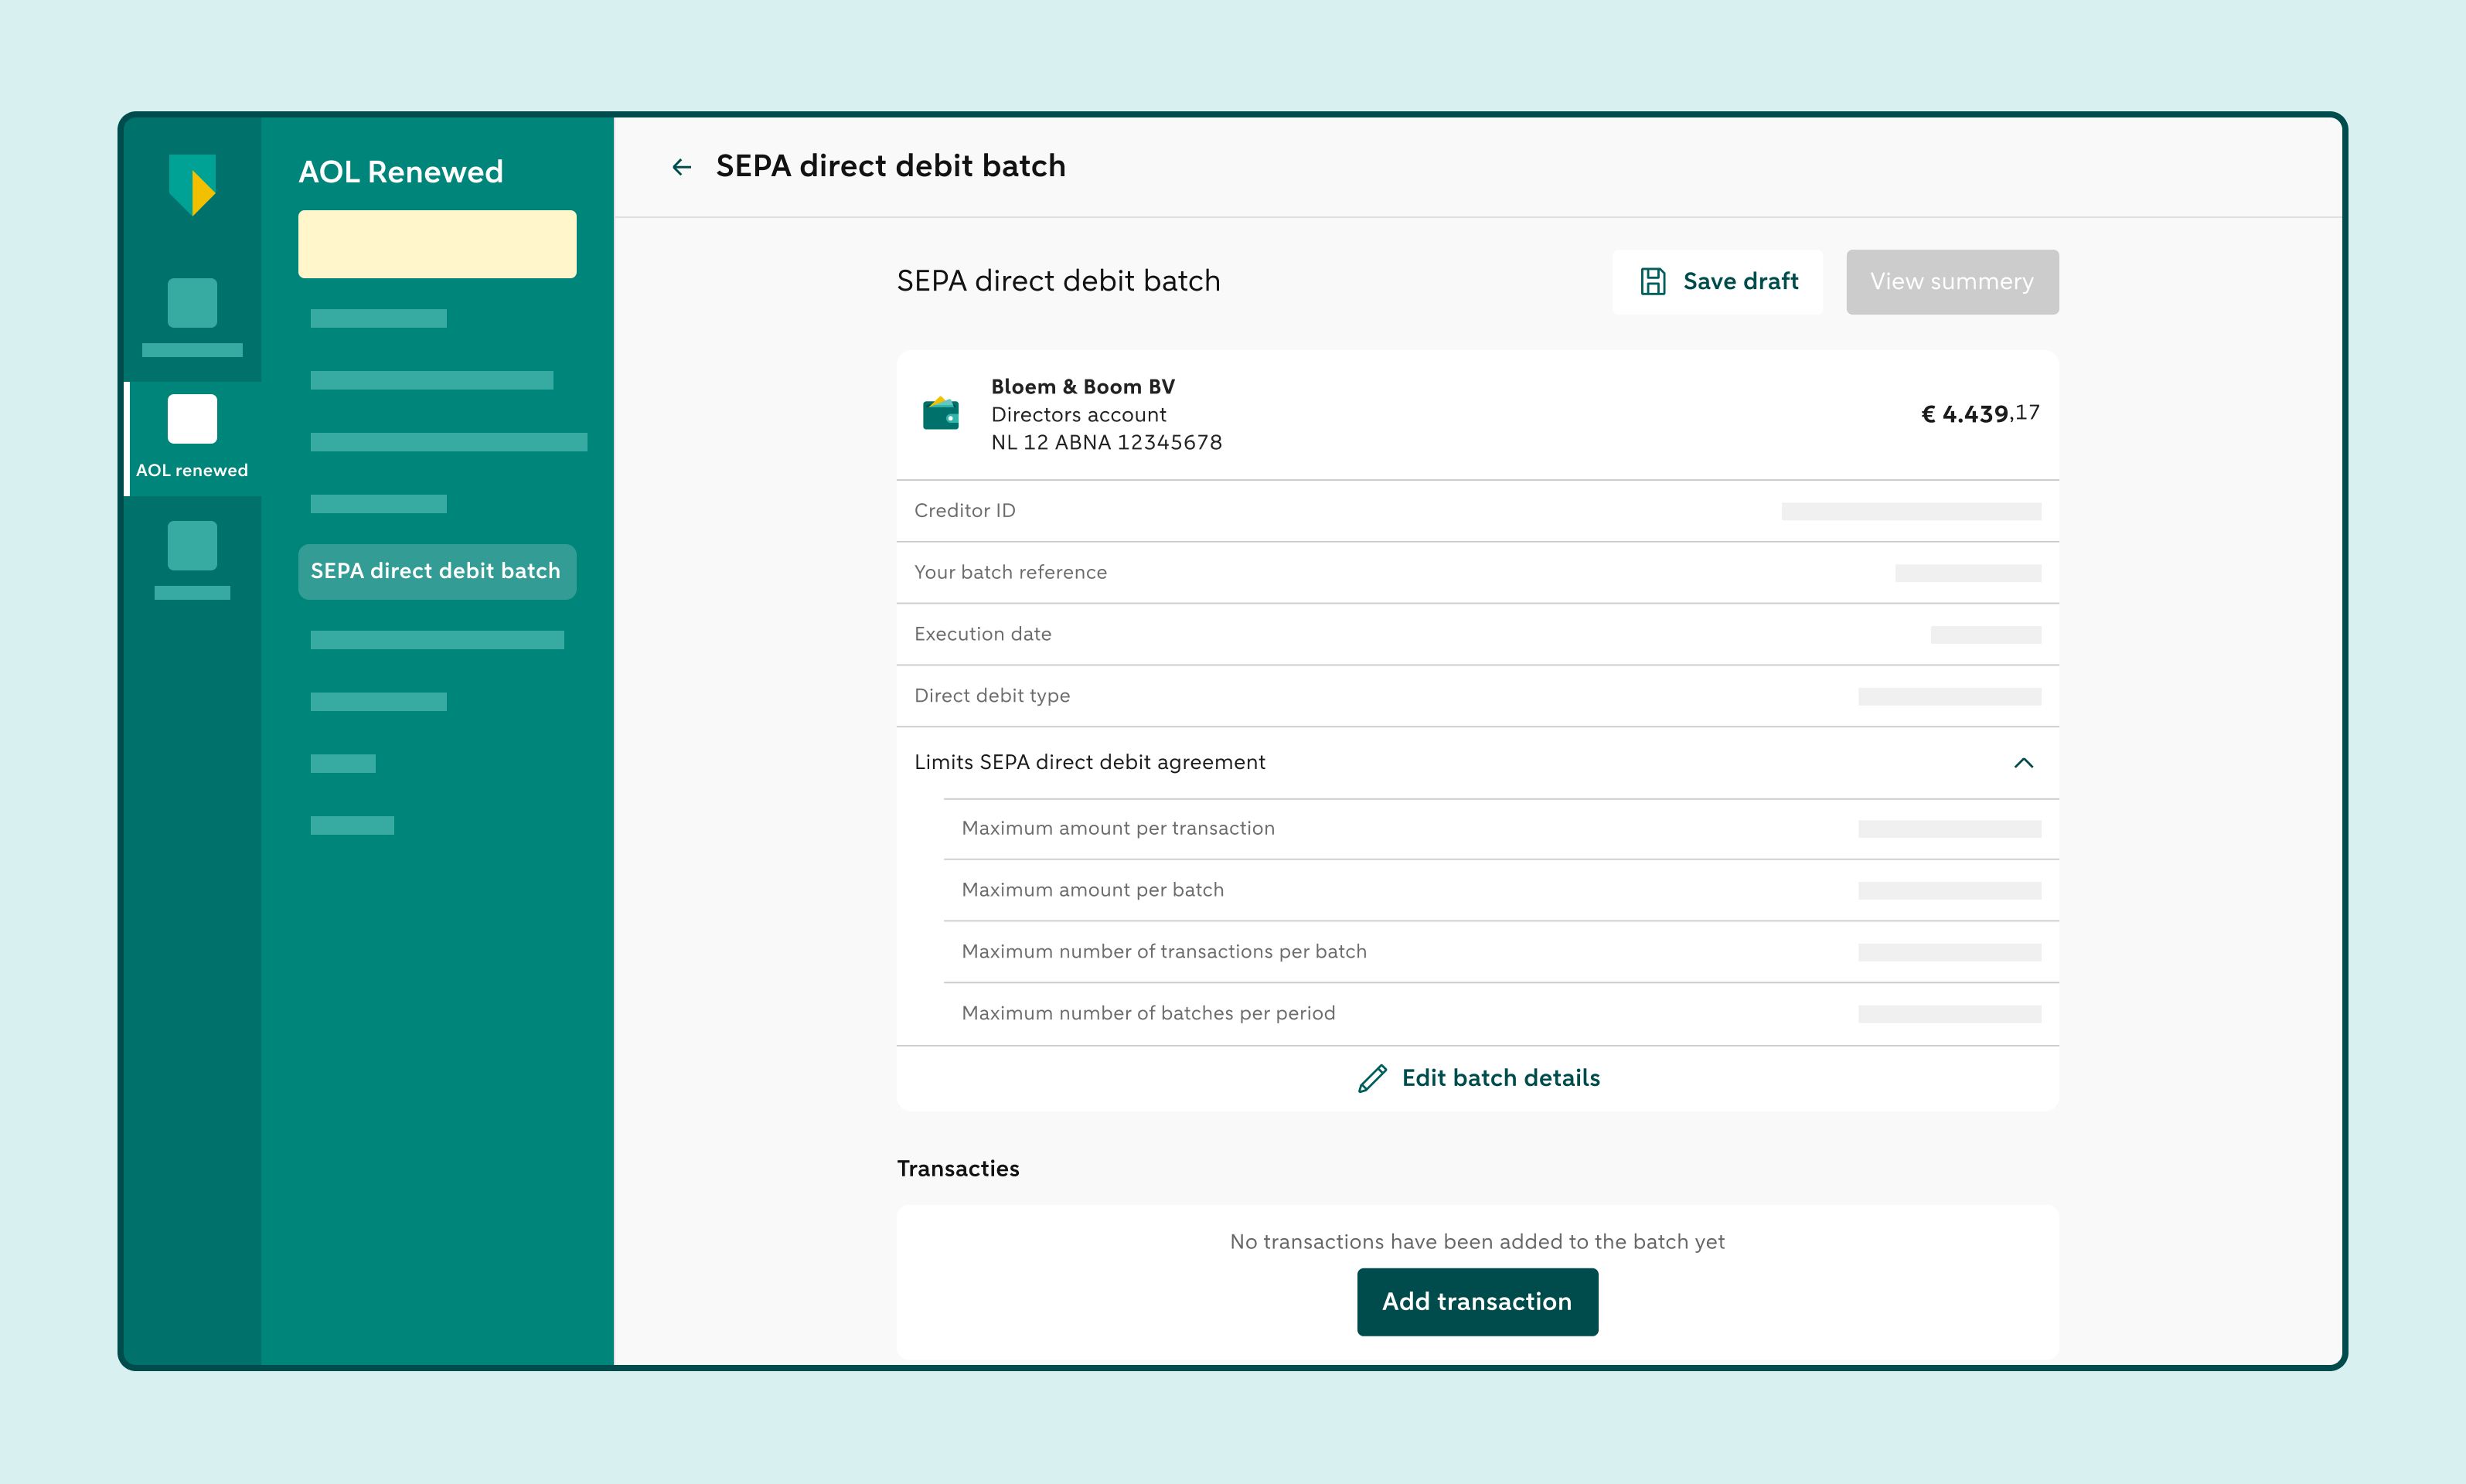
If you want to make any changes, click Edit batch details
Click Add transaction to enter a direct debit instruction
Or click Save draft at the top if you want to continue later.
4. Add a transaction
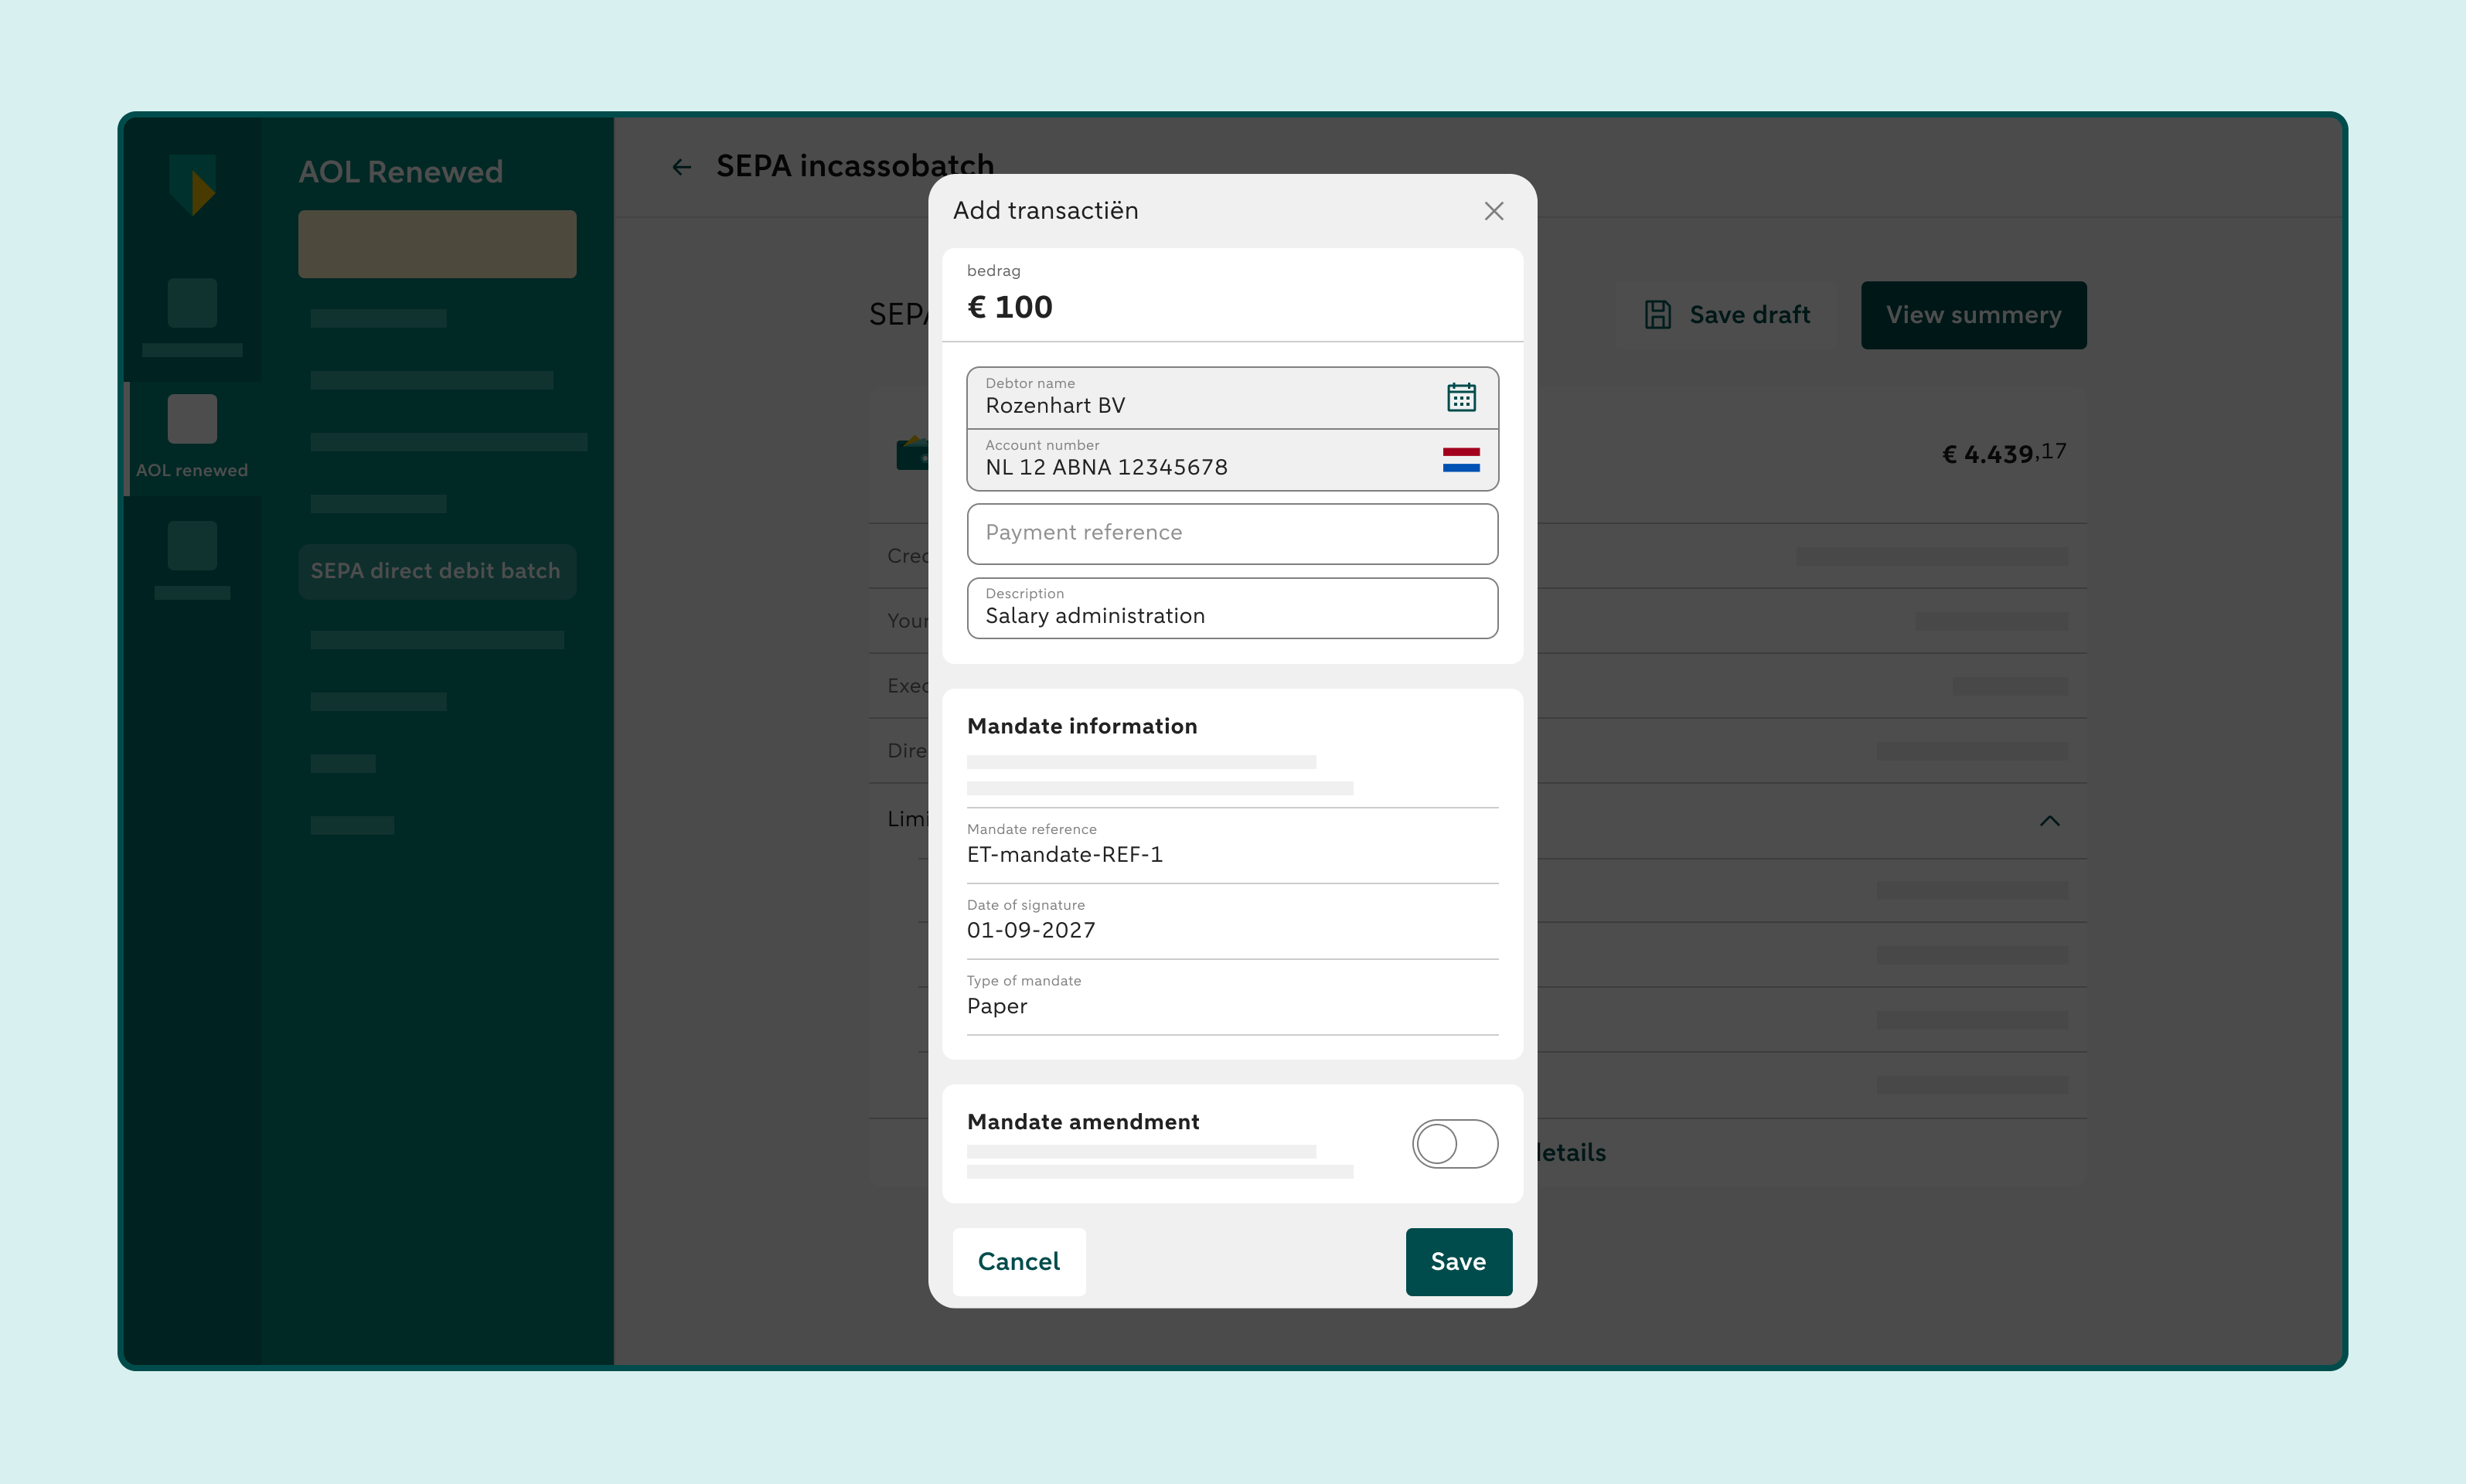
Enter the amount
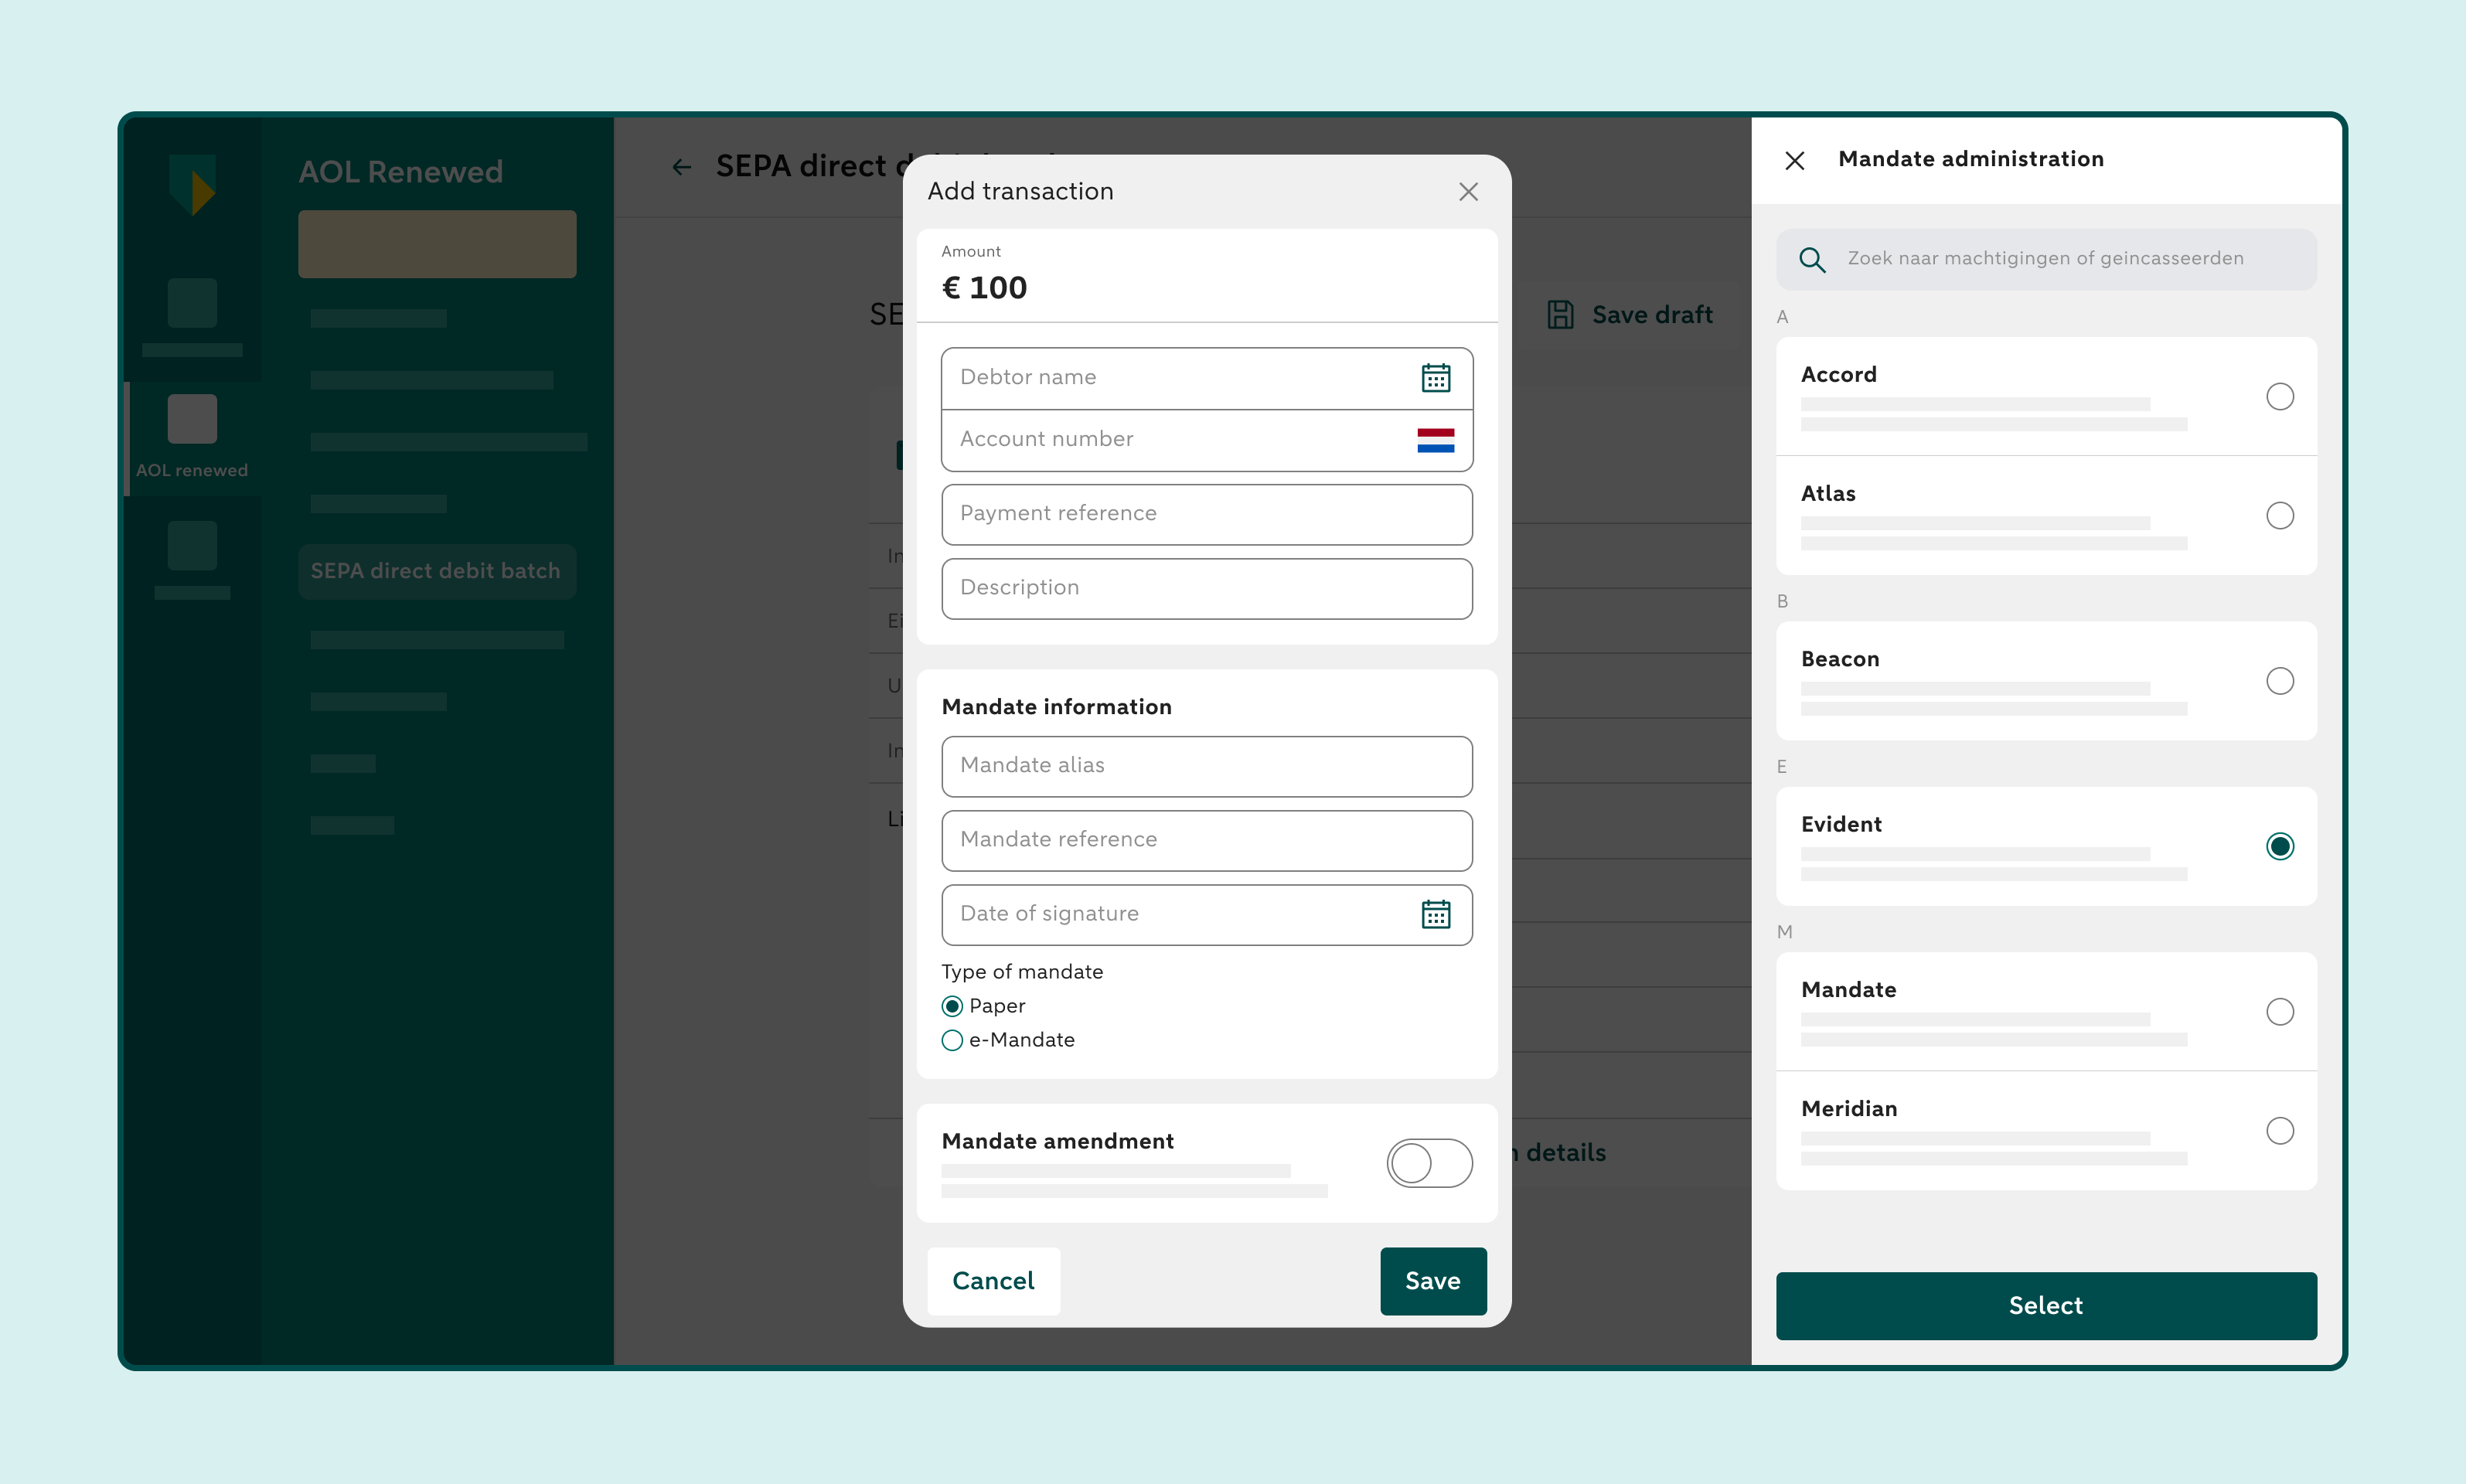
Enter the name of the debtor
Or click the icon in this field to search for the debtor details in your Mandate administration. If you select the debtor, the data from the mandate administration will automatically be filled on the screen.
Enter the debtor's account number
You can enter a payment reference and a description
Fill in the mandate information
Fill in: the alias of the mandate, the mandate reference, the date of signature, and the type of mandate. If the mandate type is an e-mandate, you must also enter the validation reference (digital signature).
You can slide the button to the right in the Mandate amendment section
Do this if the mandate details have changed since the last time you collected for this mandate. Sometimes the button in the Mandate amendment section is already on the right. In that case, fill in the required details. Some details may already be filled in automatically.
Tick the option Save and add another transaction
Click Save
5. Add another transaction
Repeat the previous steps
You need to add at least 1 transaction to the batch
You can add up to 500 transactions to the batch.
If you don't want to add an extra transaction, untick the box next to Save and add another transaction and click Save
You can see the batch details, the transactions added, the total number of transactions in the batch, and the total amount of the batch.
6. Check the batch
Click the pencil icon if you want to change anything
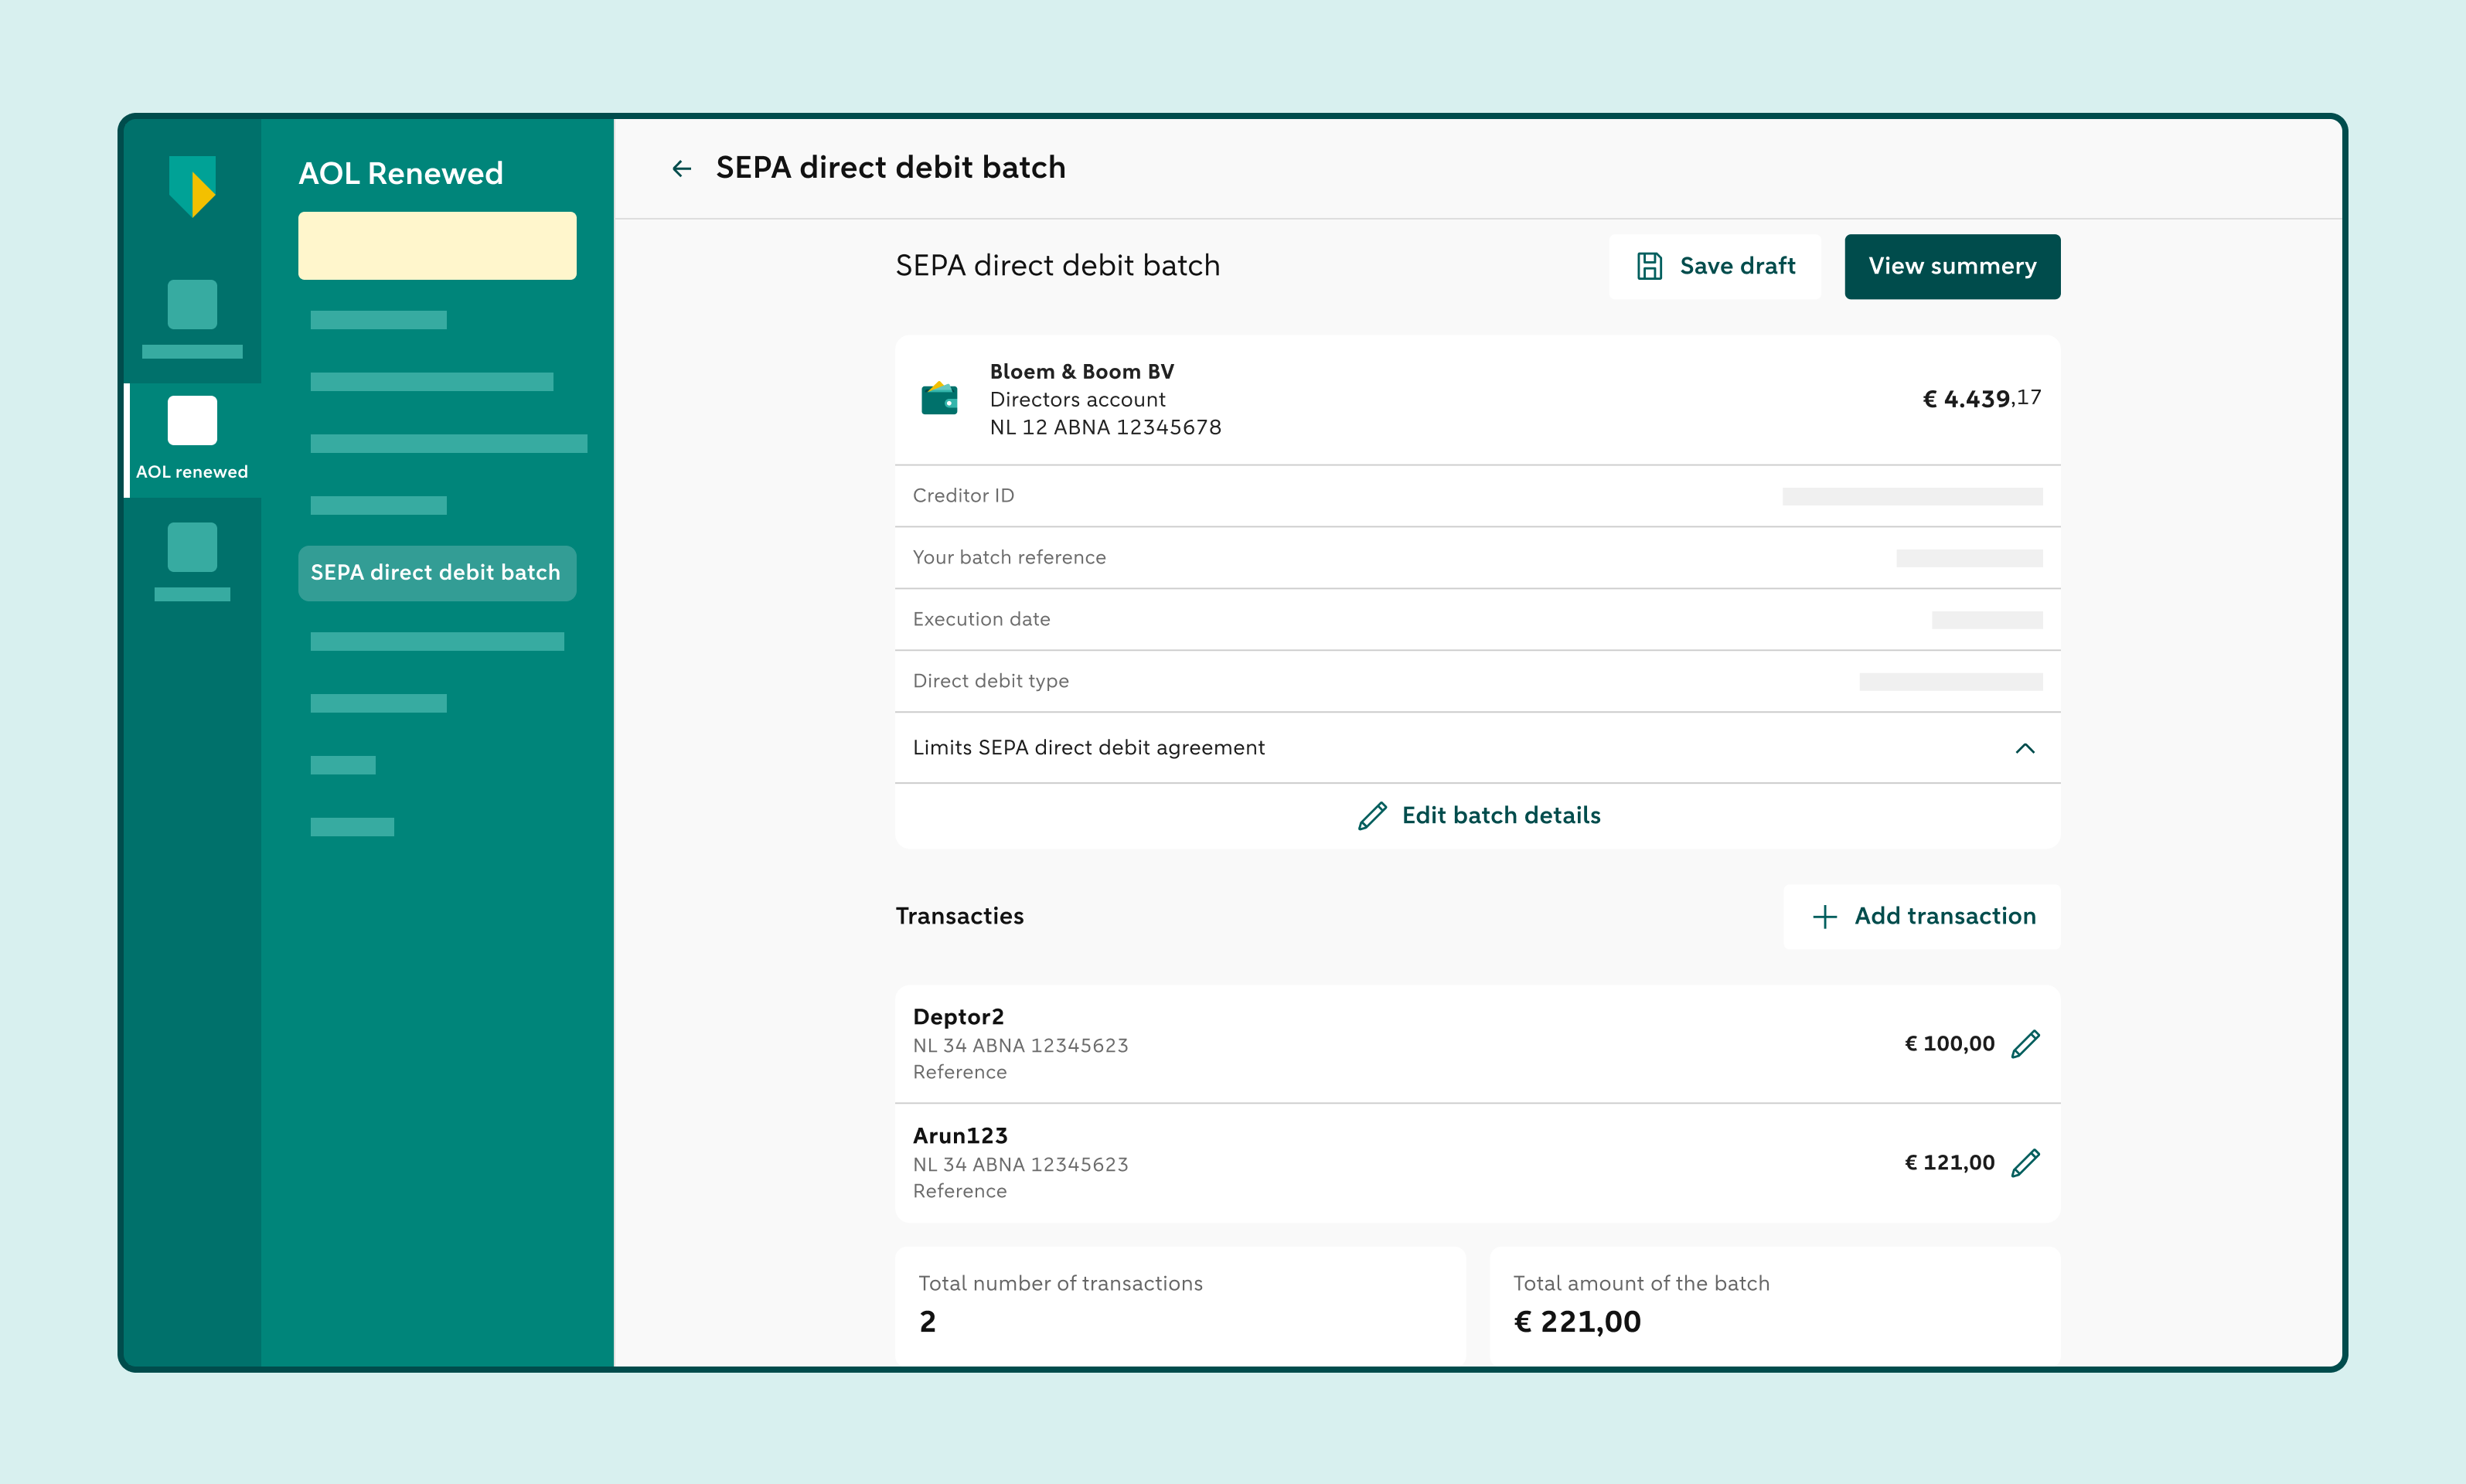
Click View summary when you're ready to approve and submit the batch
Or click Save draft at the top if you want to continue later.
7. Review the summary
Check again whether everything is correct
Click Edit batch details at the top if you want to change something
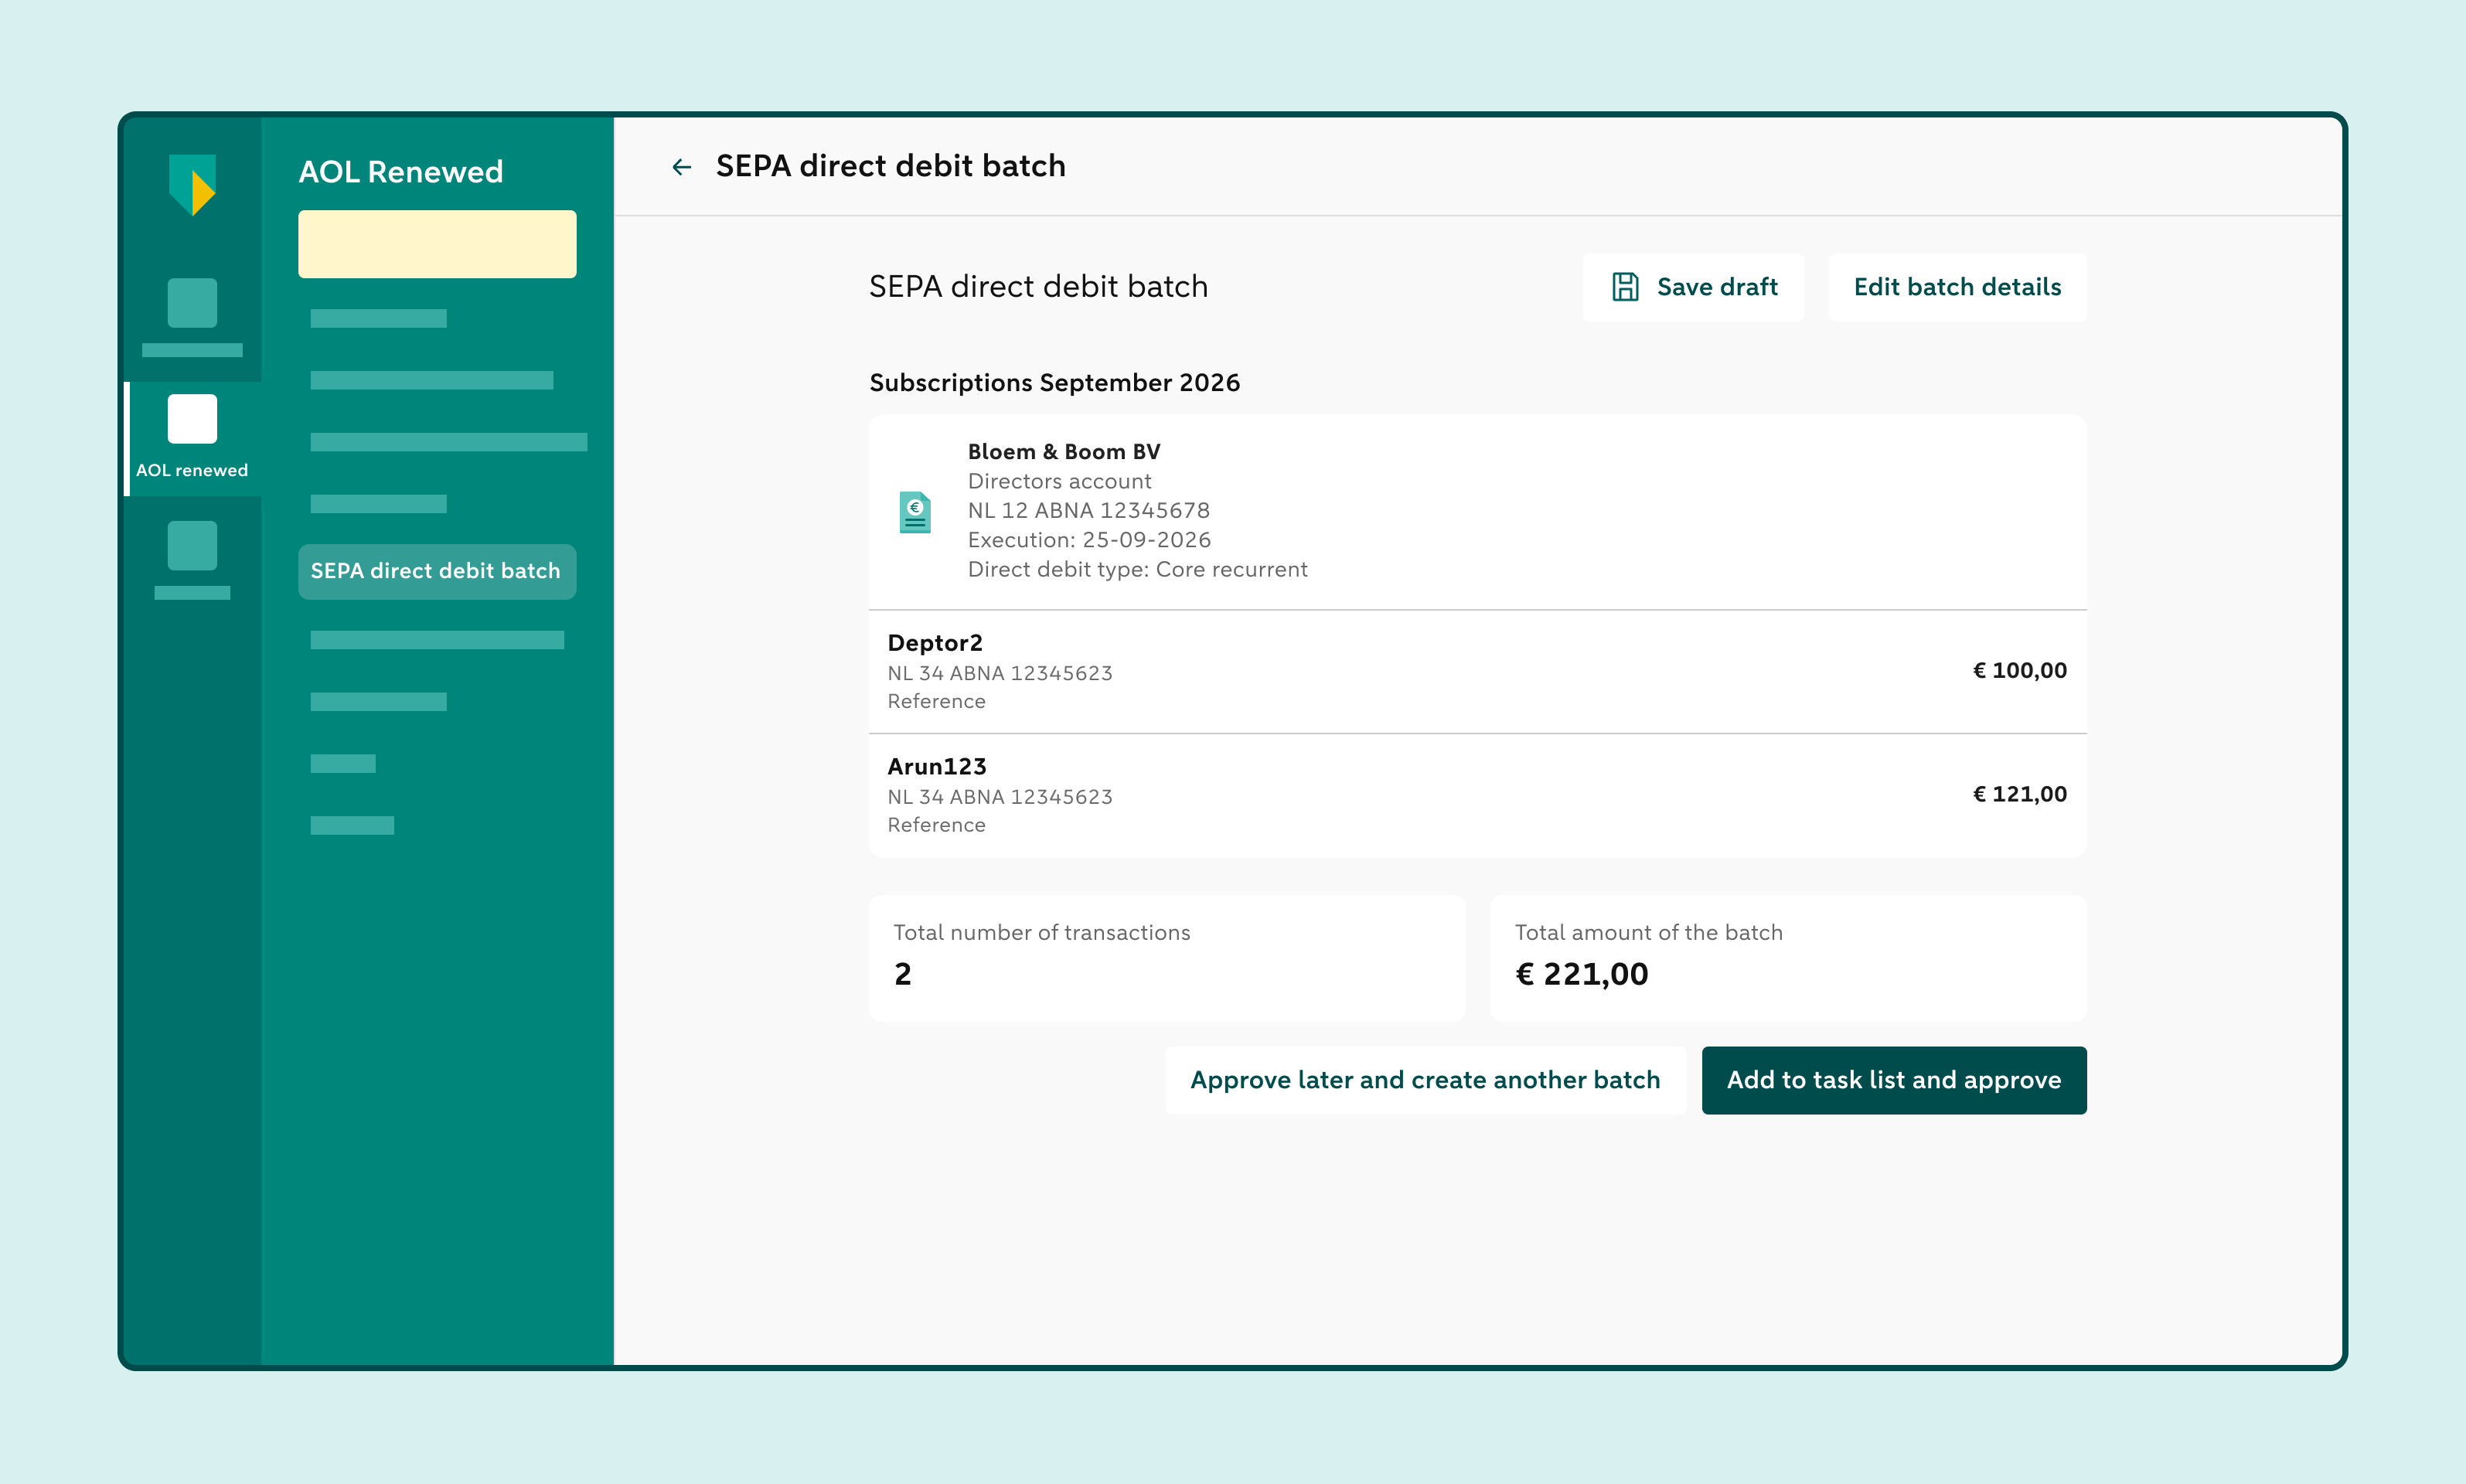
Otherwise, click Add to task list and approve
Or click Approve later and create another batch if you want to create an extra SEPA direct debit batch.
If you want to continue later, click Save draft at the top
8. Open the Task list
In the Task list, you'll find the manually created SEPA direct debit batch under the Direct debit batches to approve section
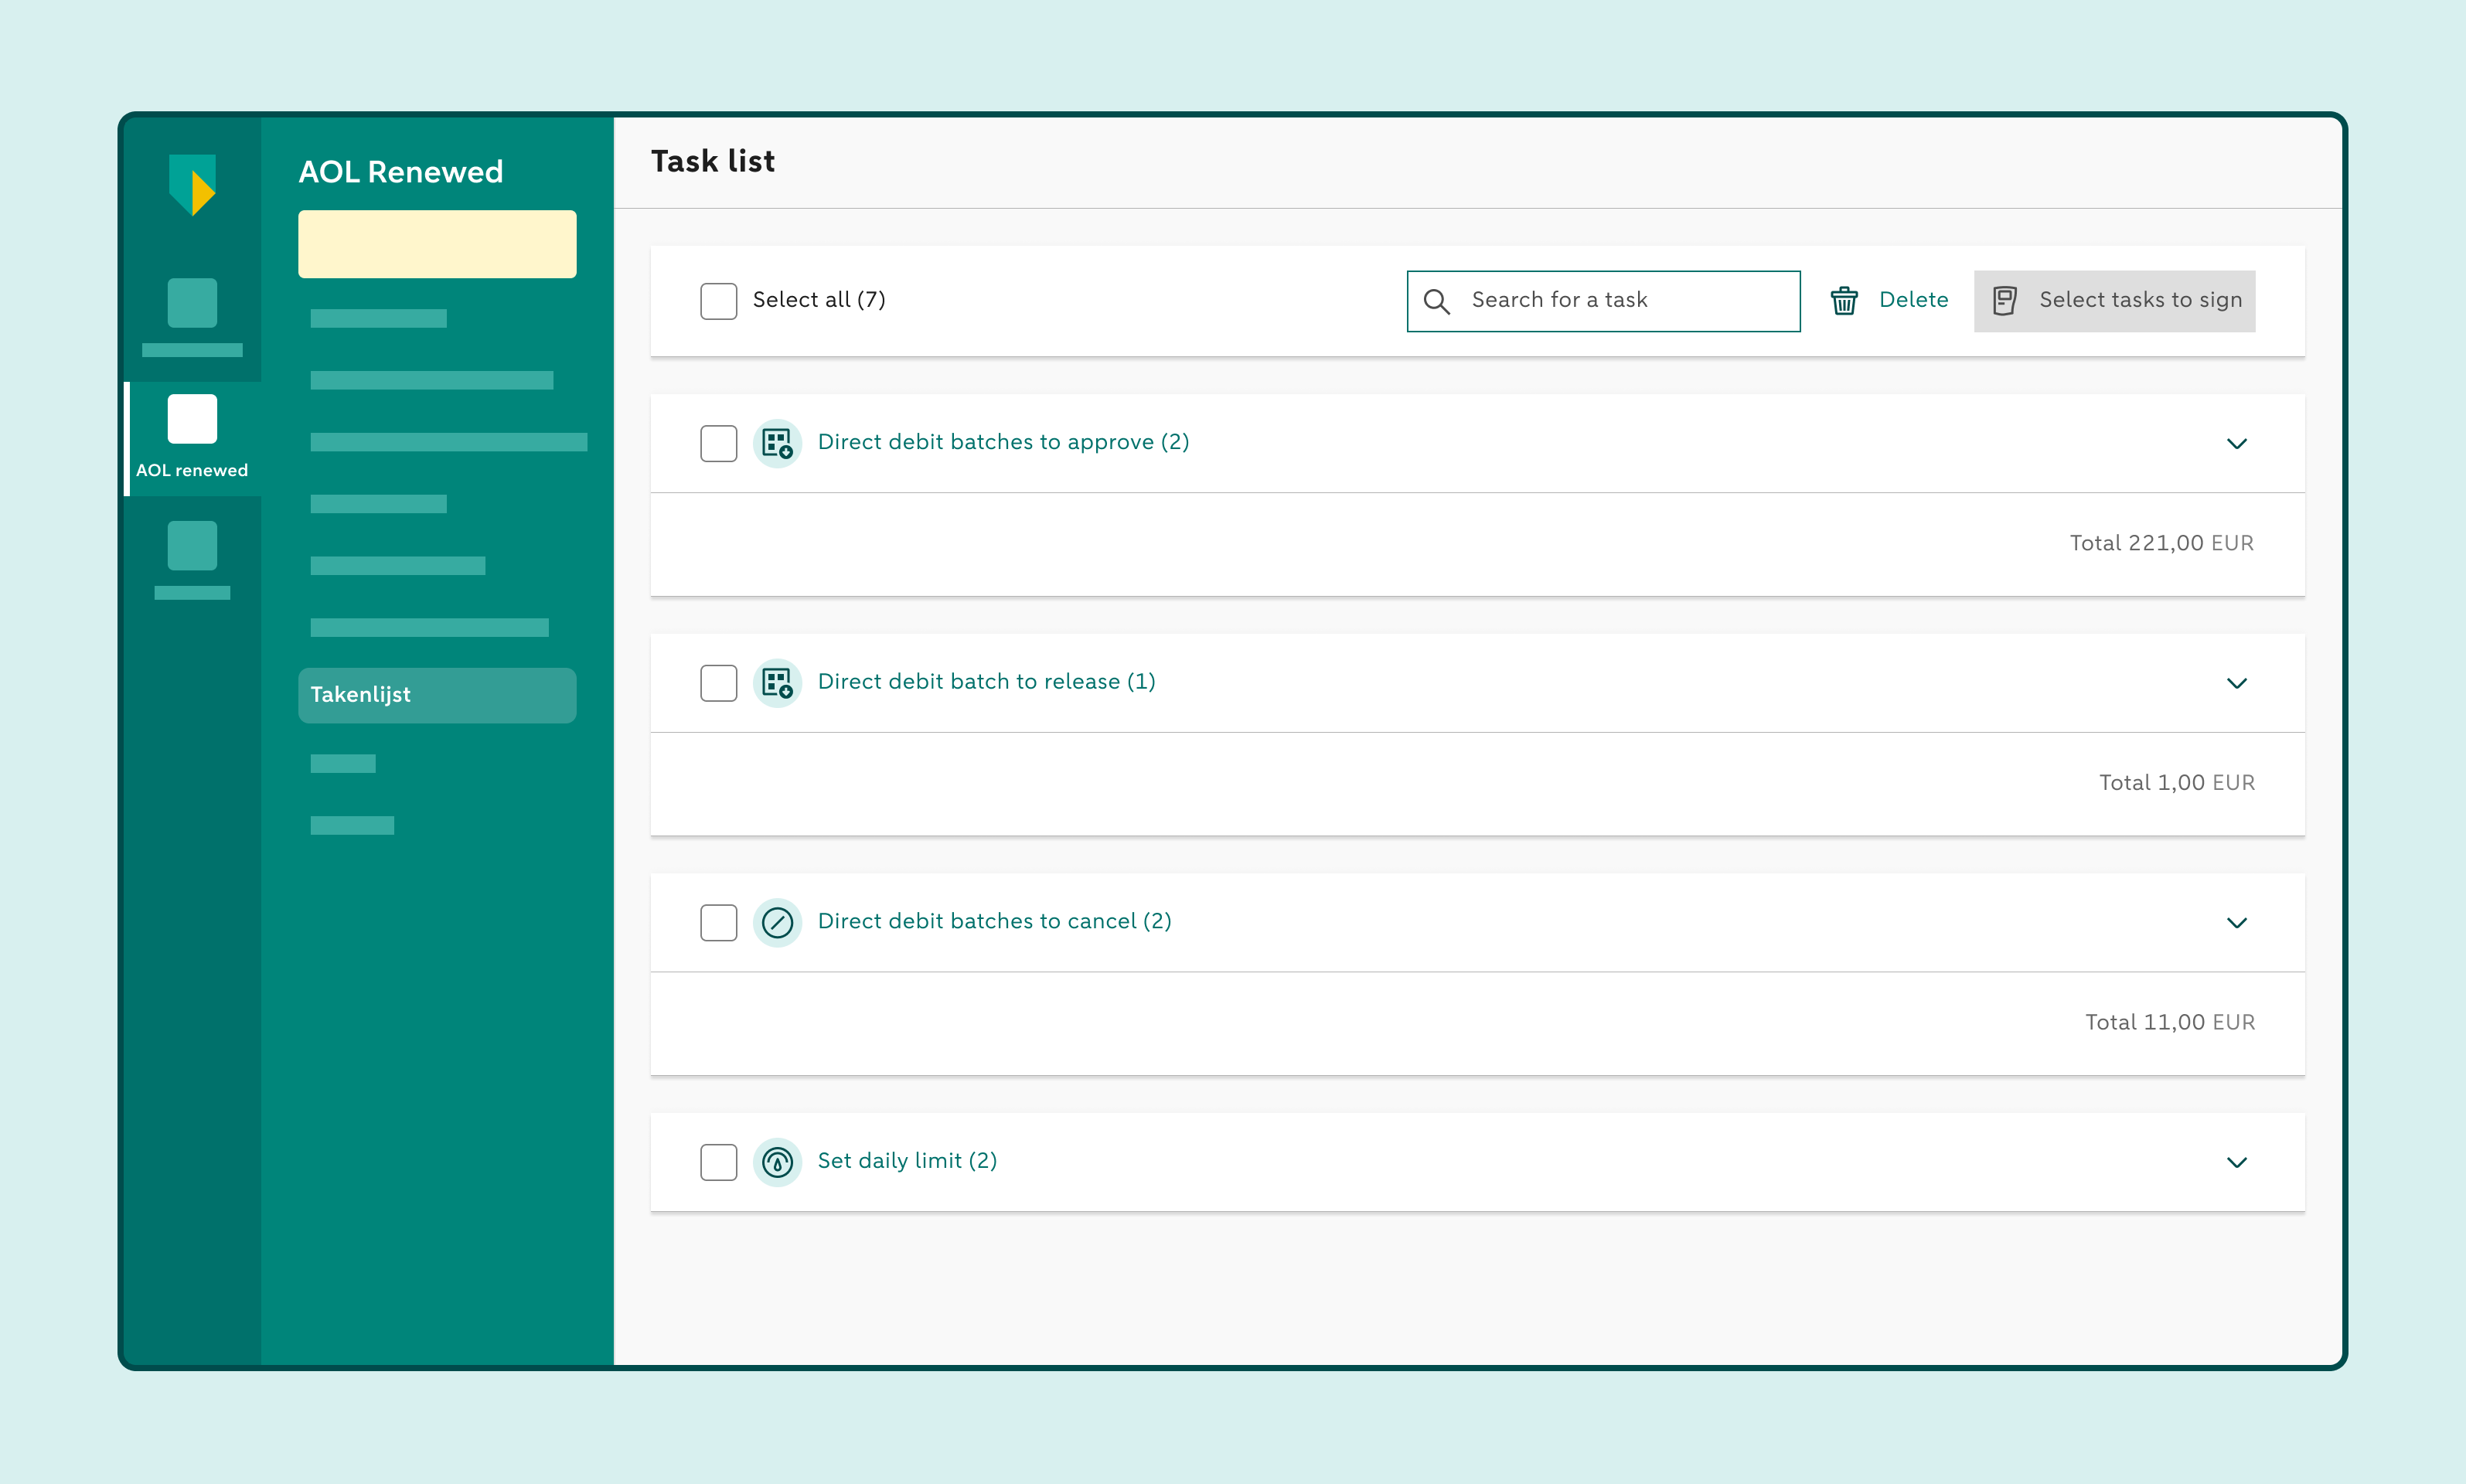
Tick the batch you want to approve and submit
9. Approve the direct debit batch
Use the e.dentifier to approve the direct debit batch and enter the response
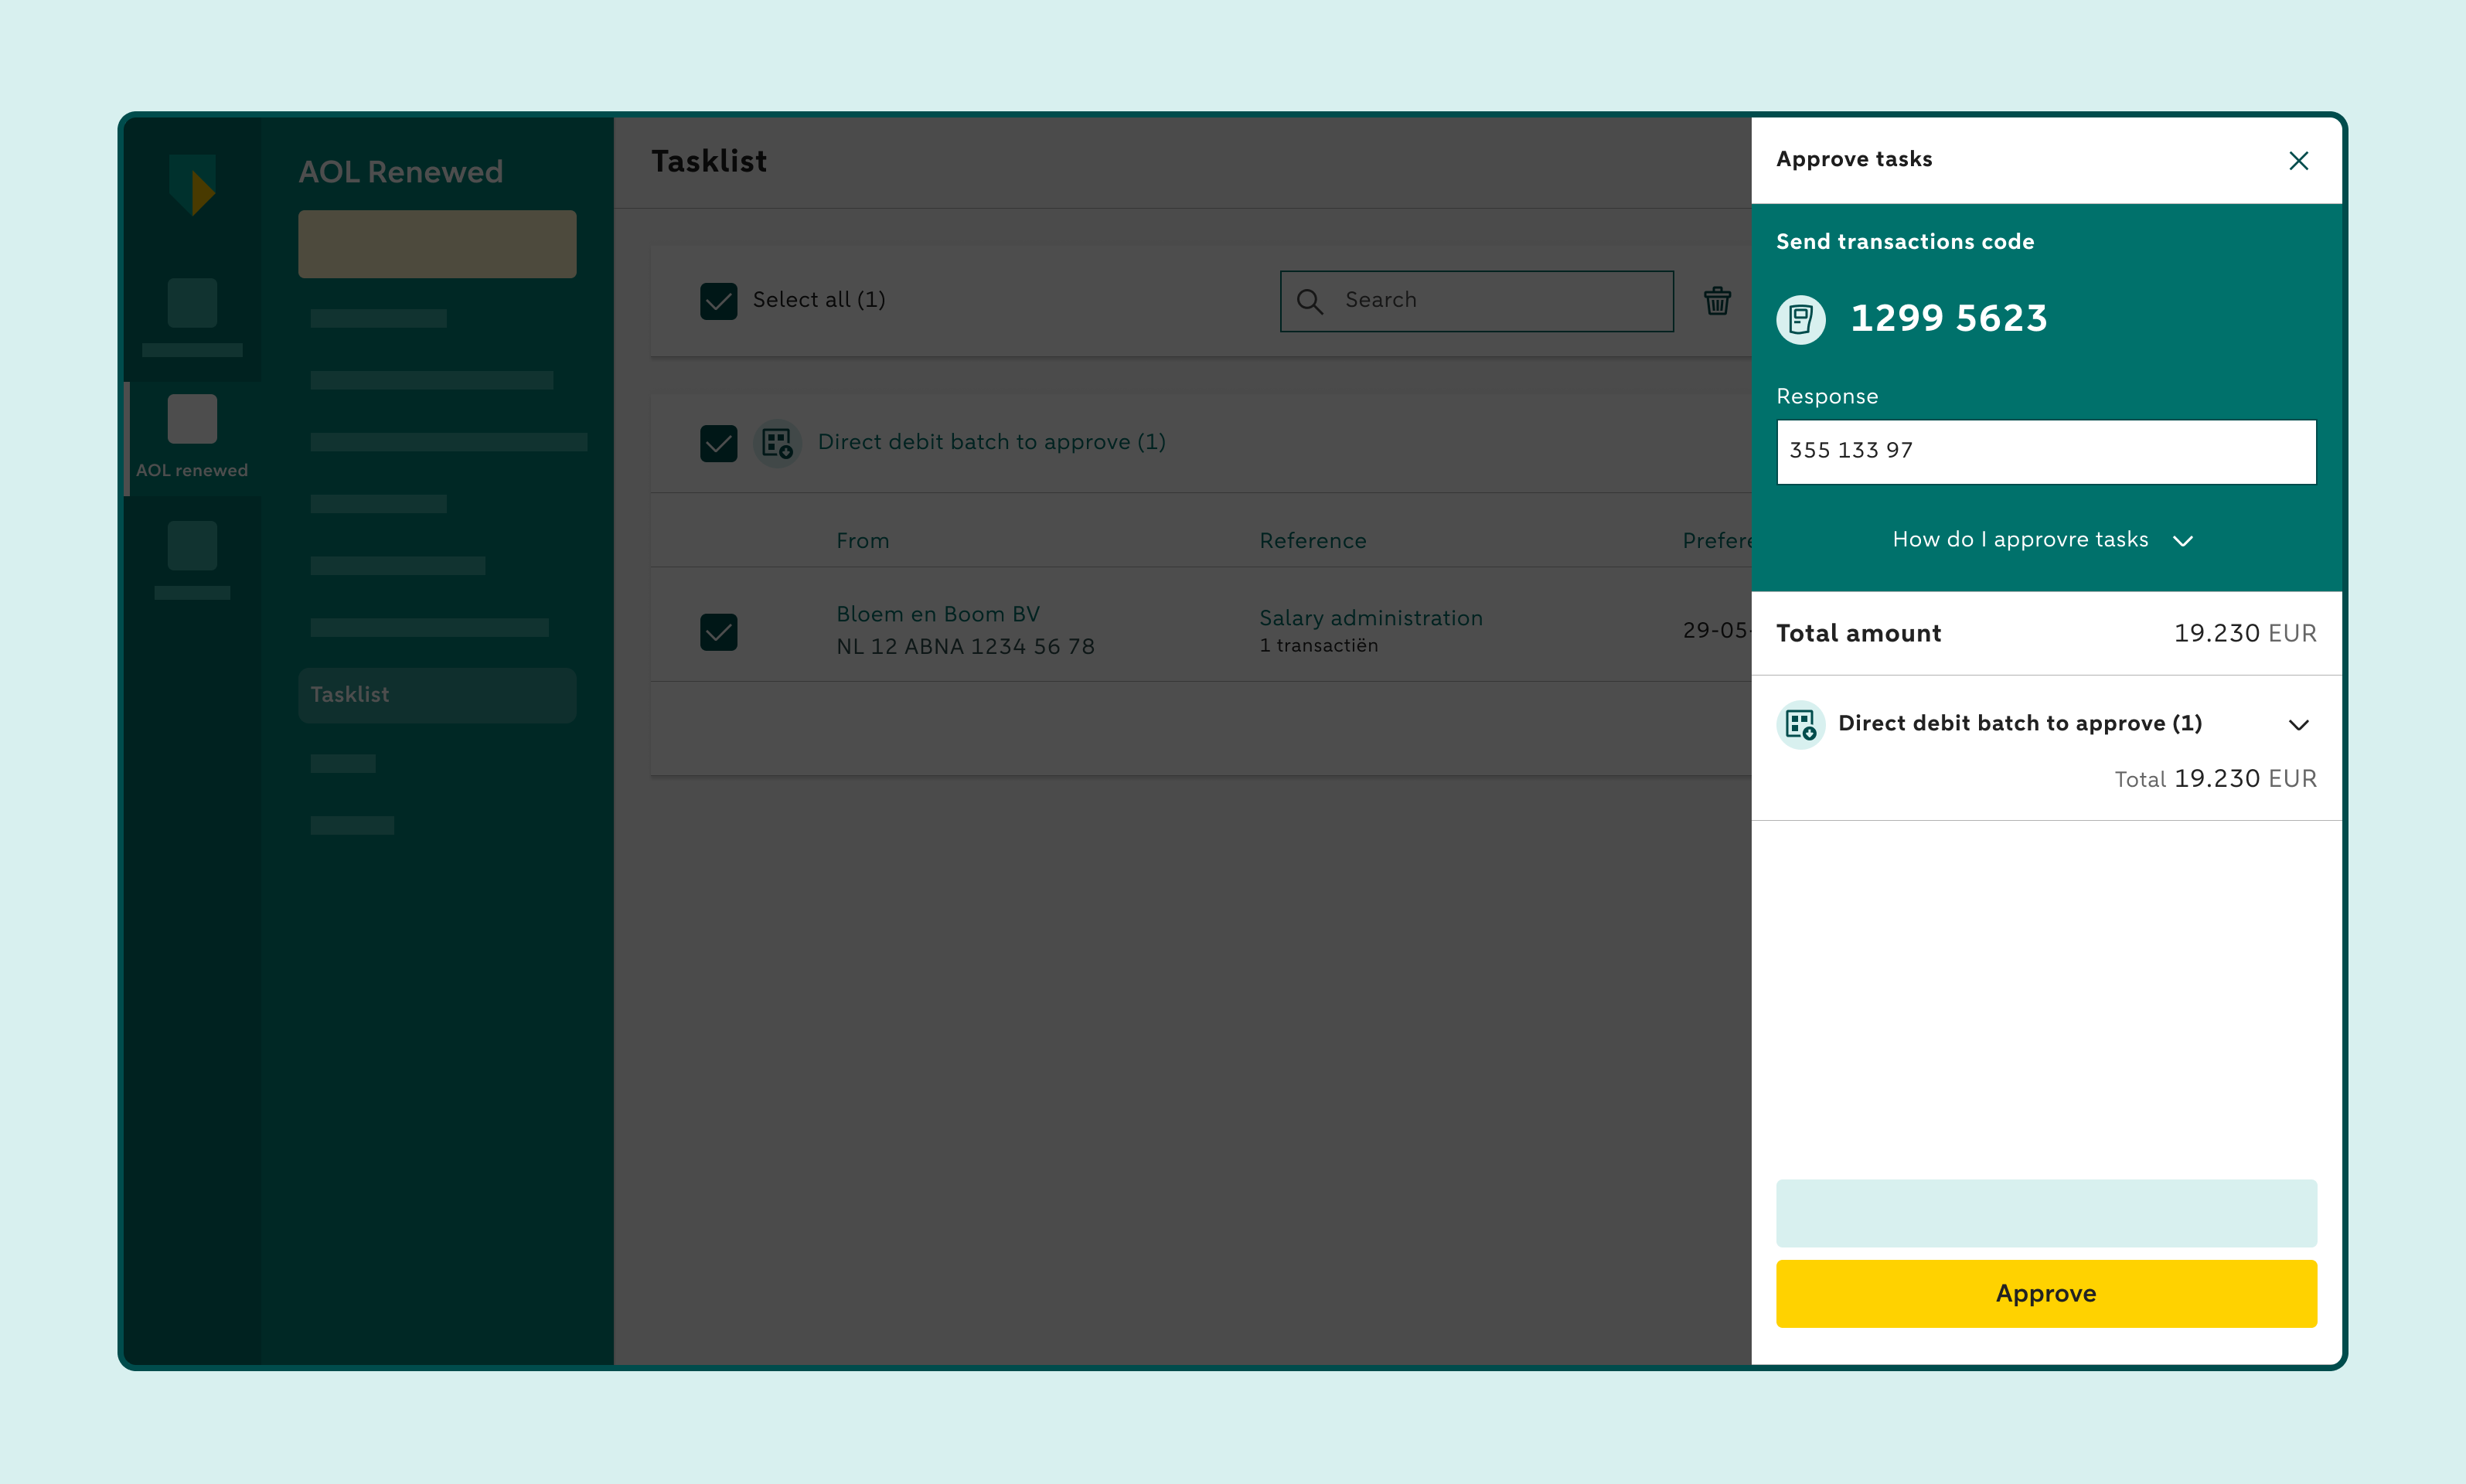
Click Approve to submit the batch
10. Track the batch
In the menu on the left, click Payment tracking
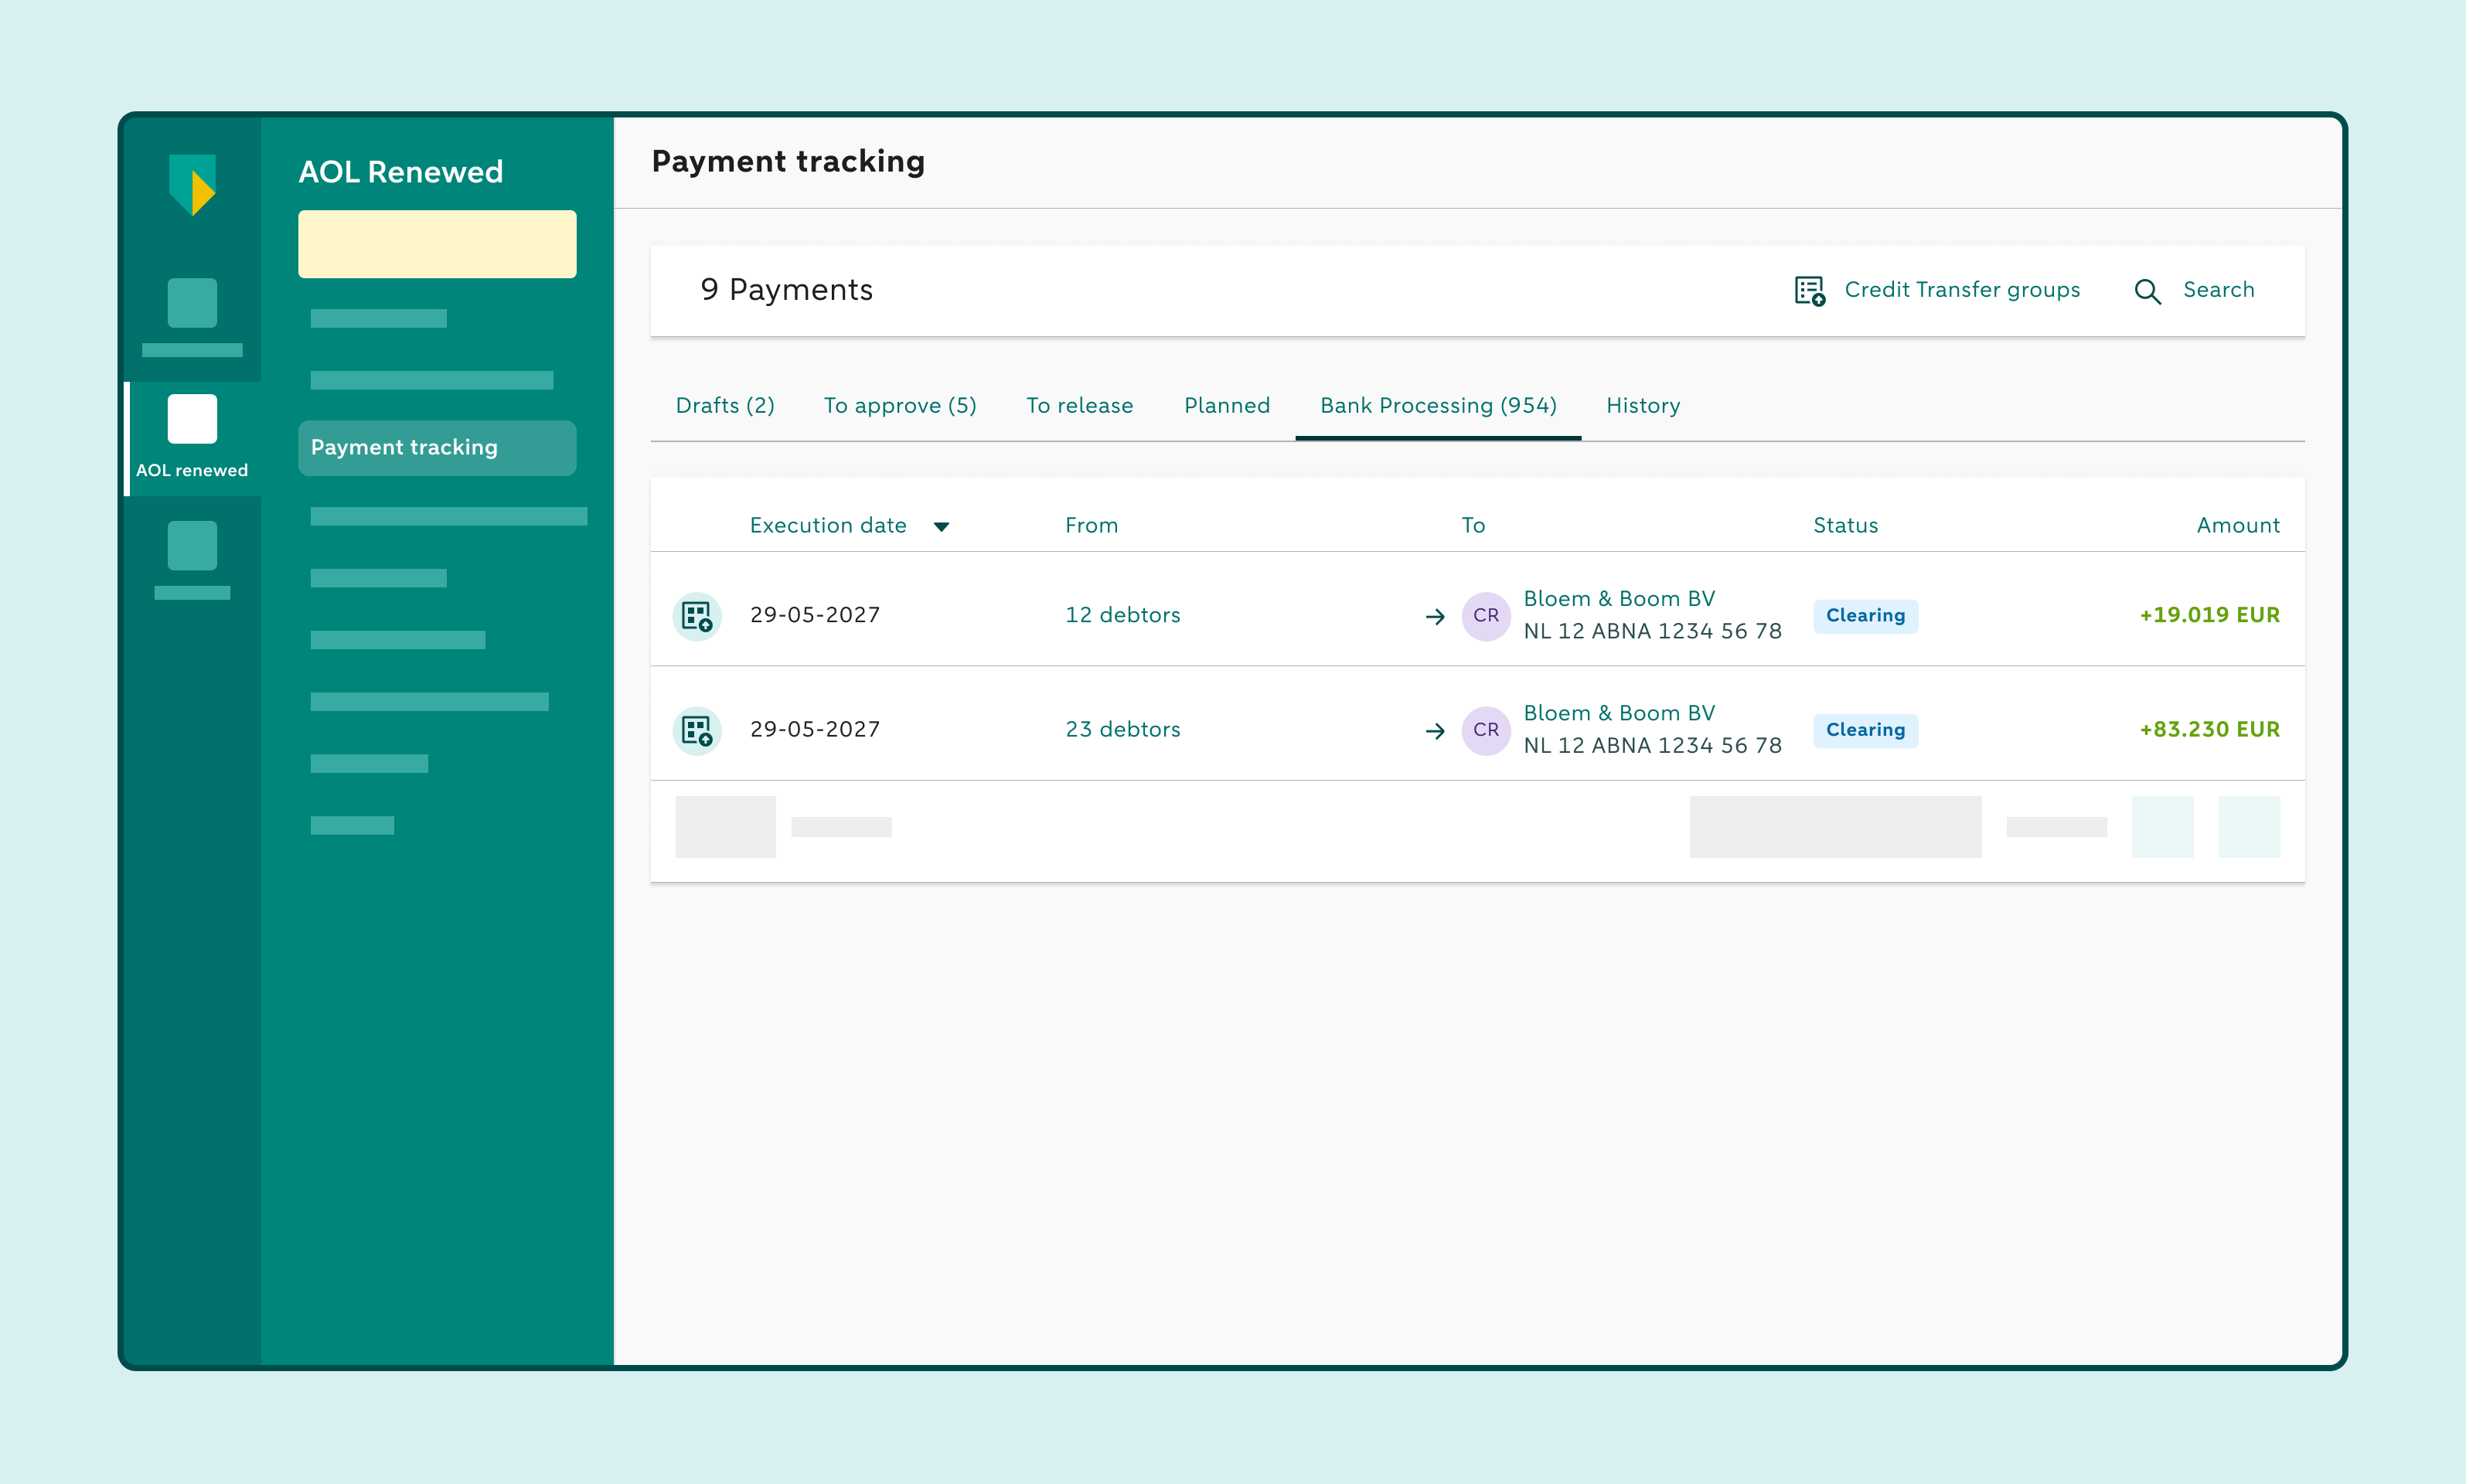
On the Payment tracking screen, go to the Bank Processing tab or the Planned tab
Here you will find the manually created SEPA direct debit batch that you have approved and sent
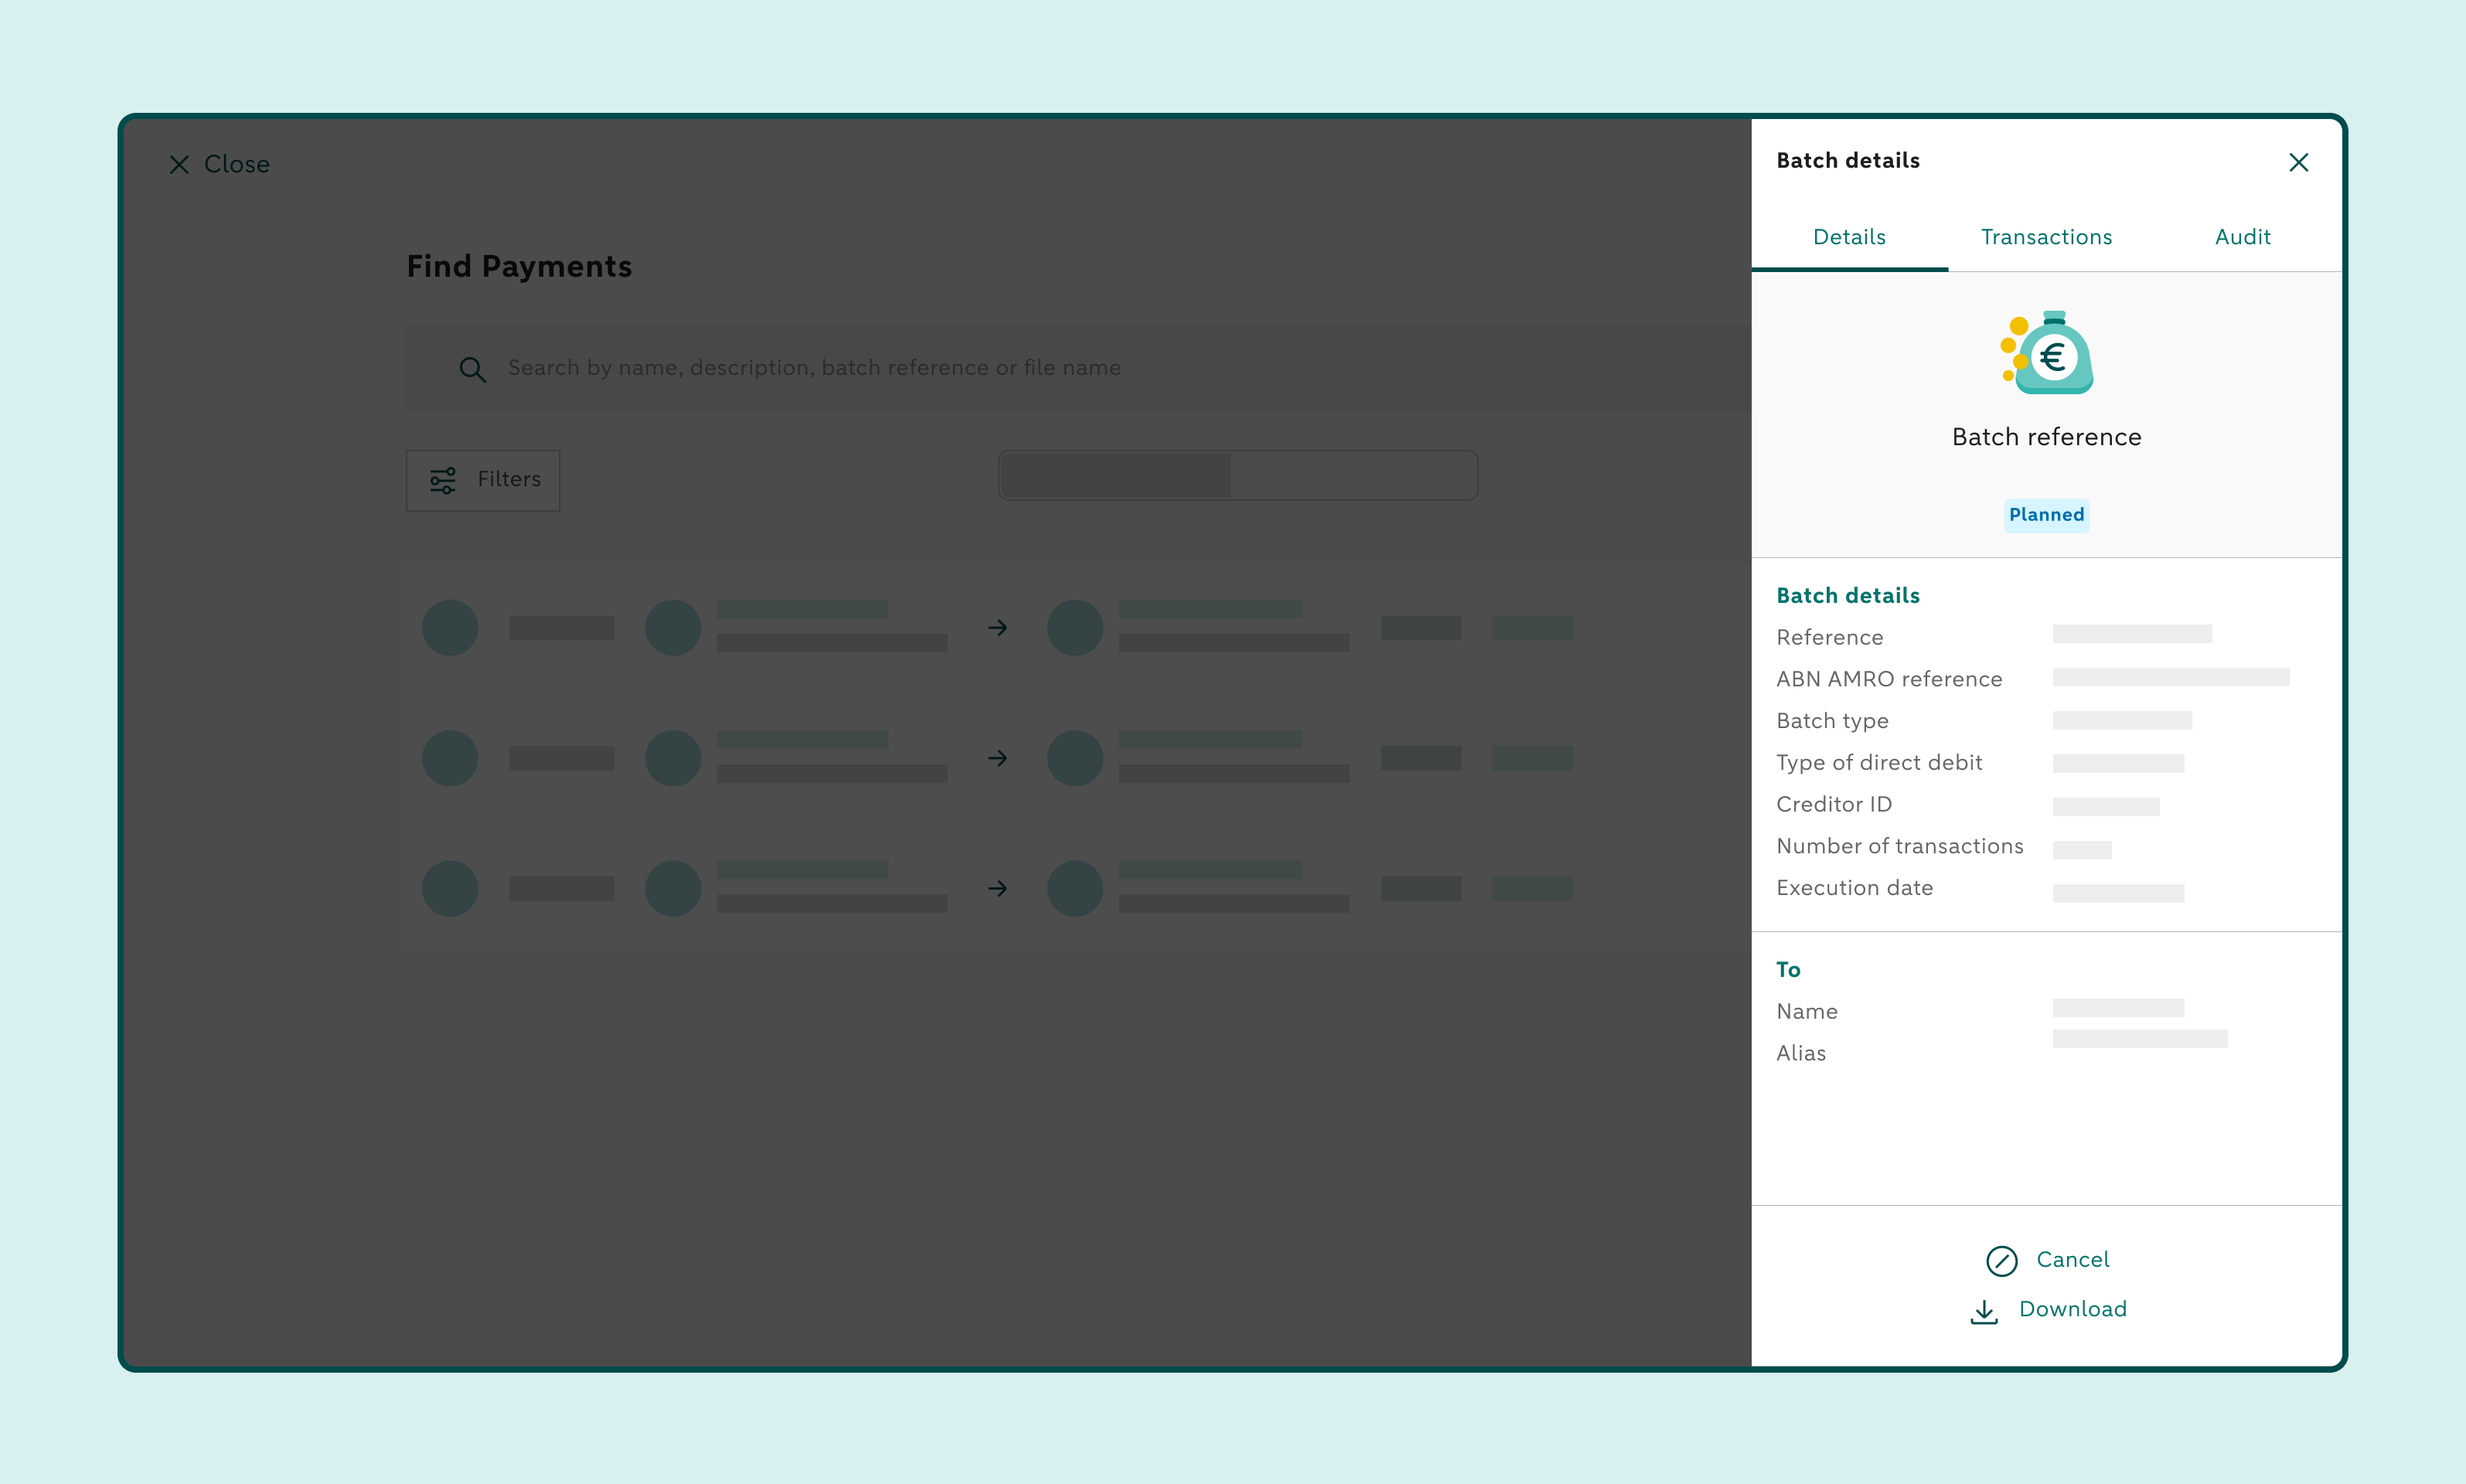
Click the batch to see the details. The Batch details screen is on the right
11. View the transactions
On the Batch details screen, click the Transactions tab to see the list of transactions in the batch
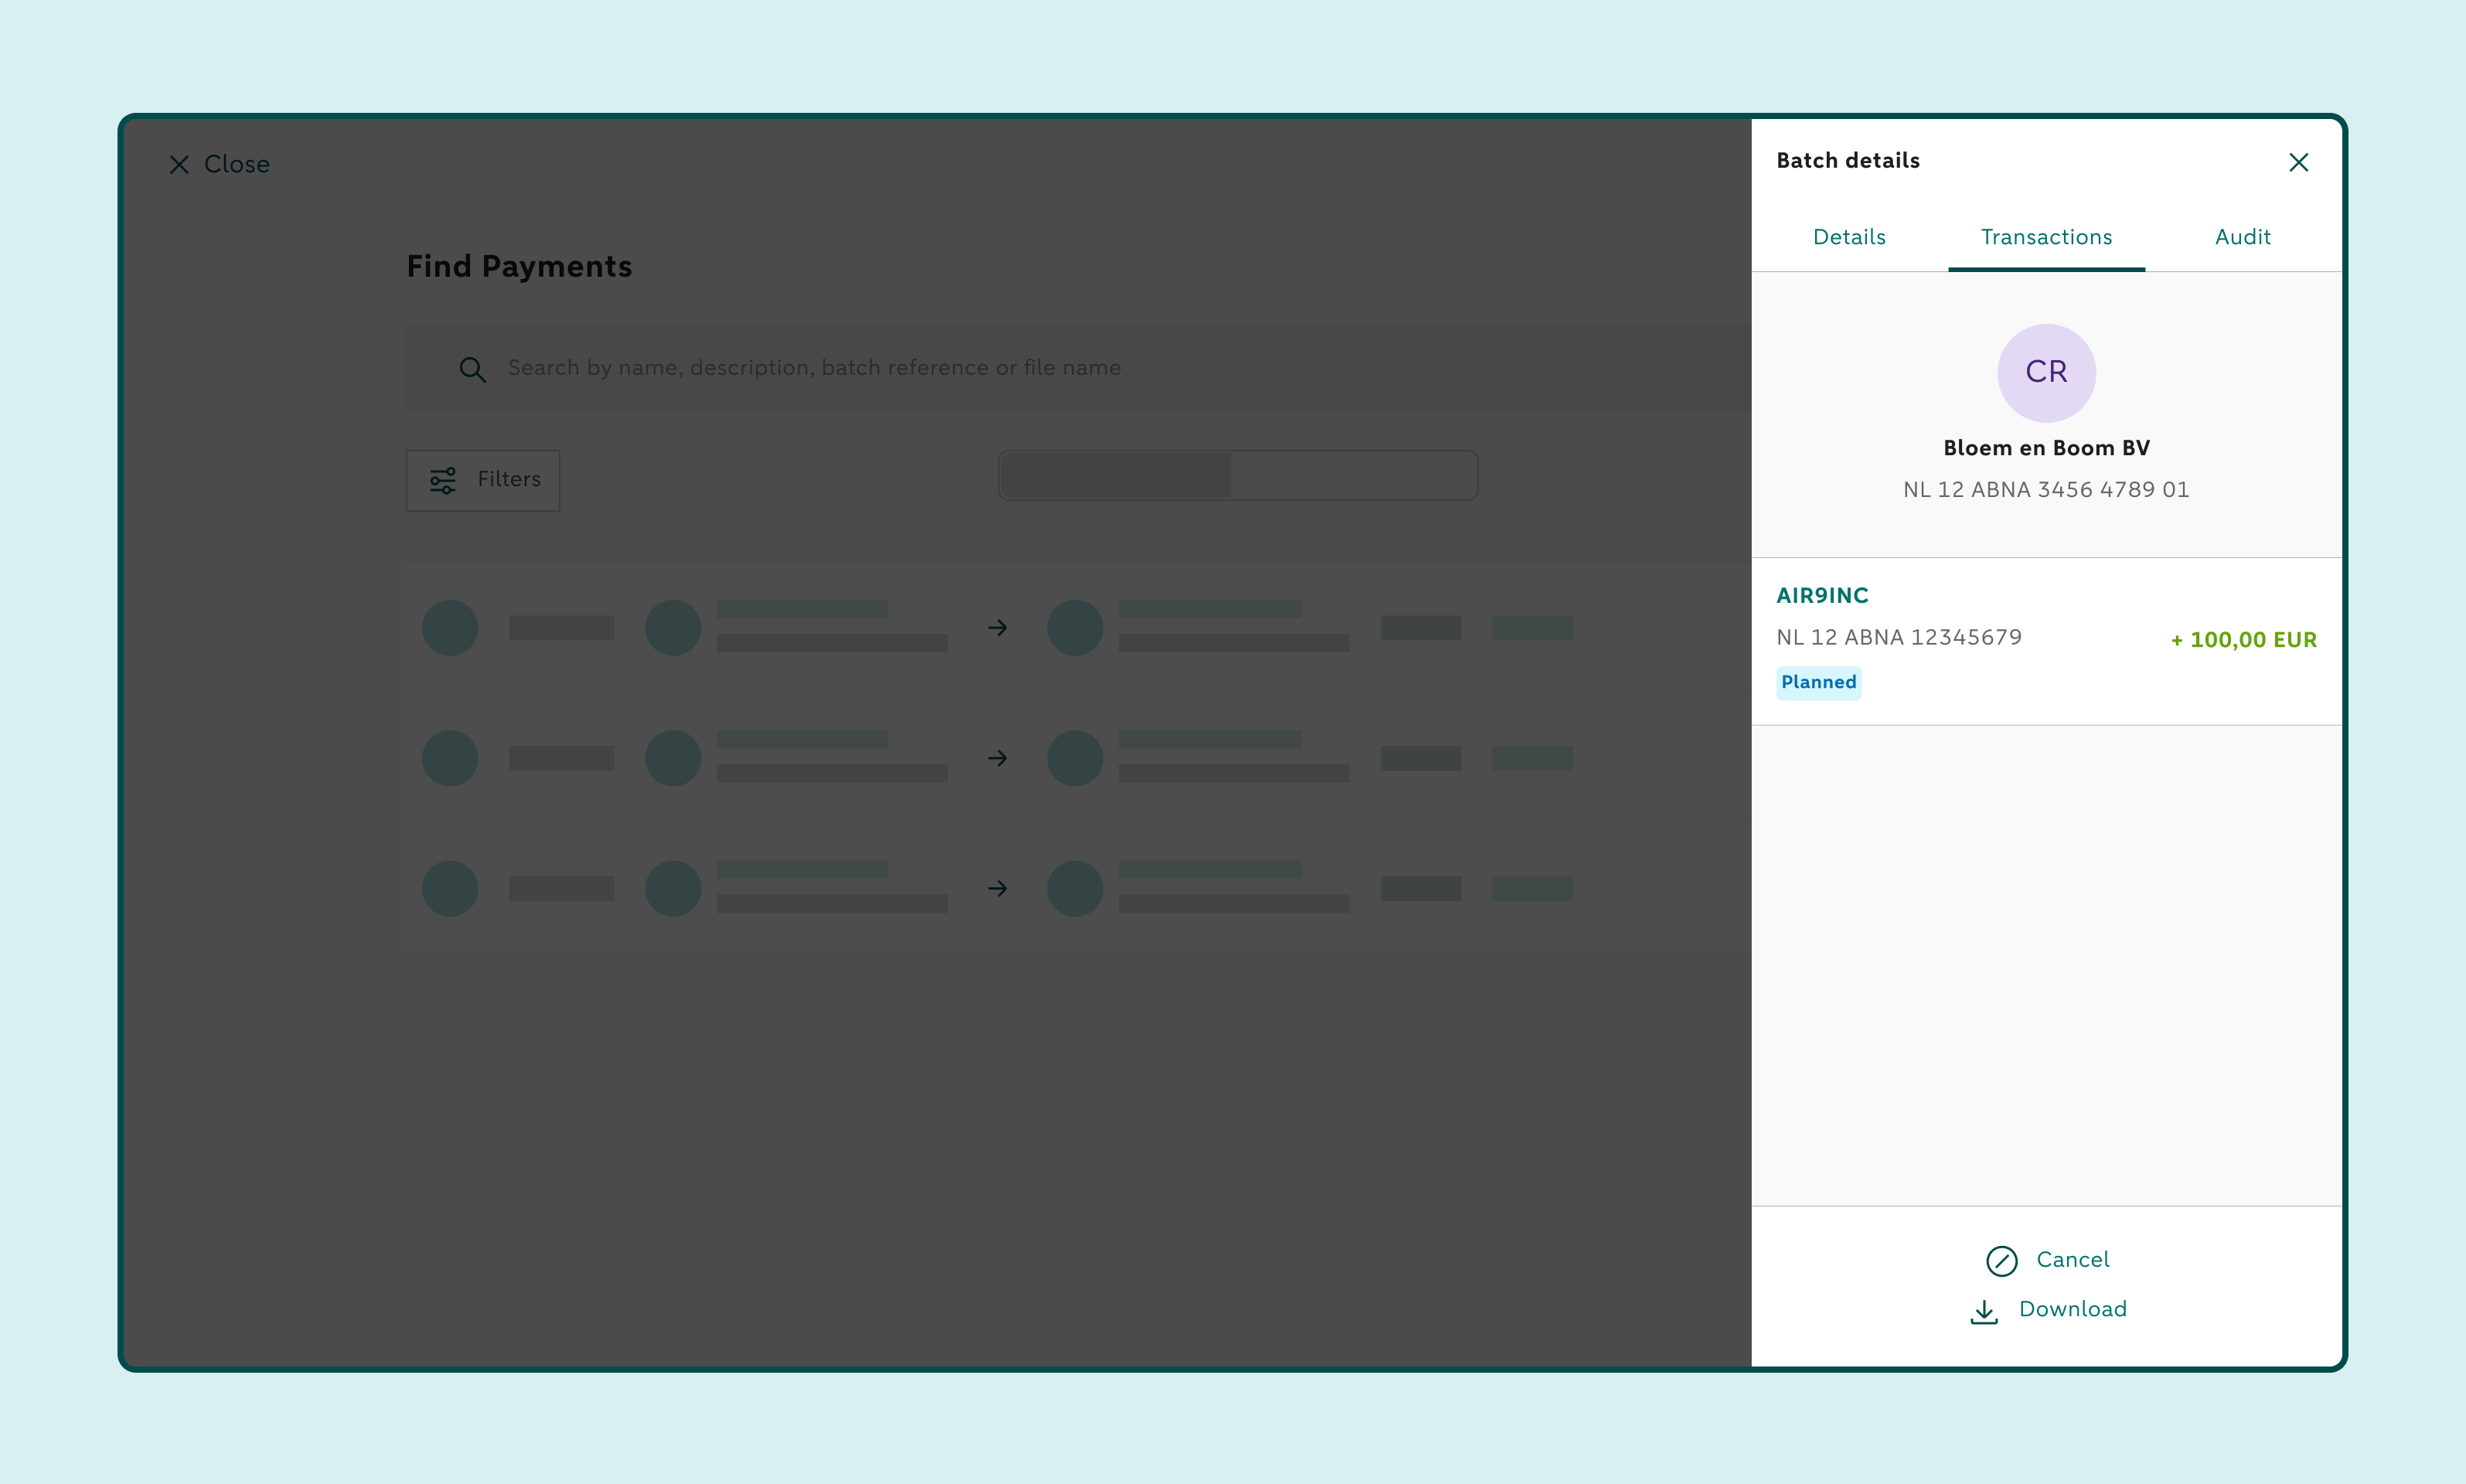
Click the transaction to view the details of the transaction
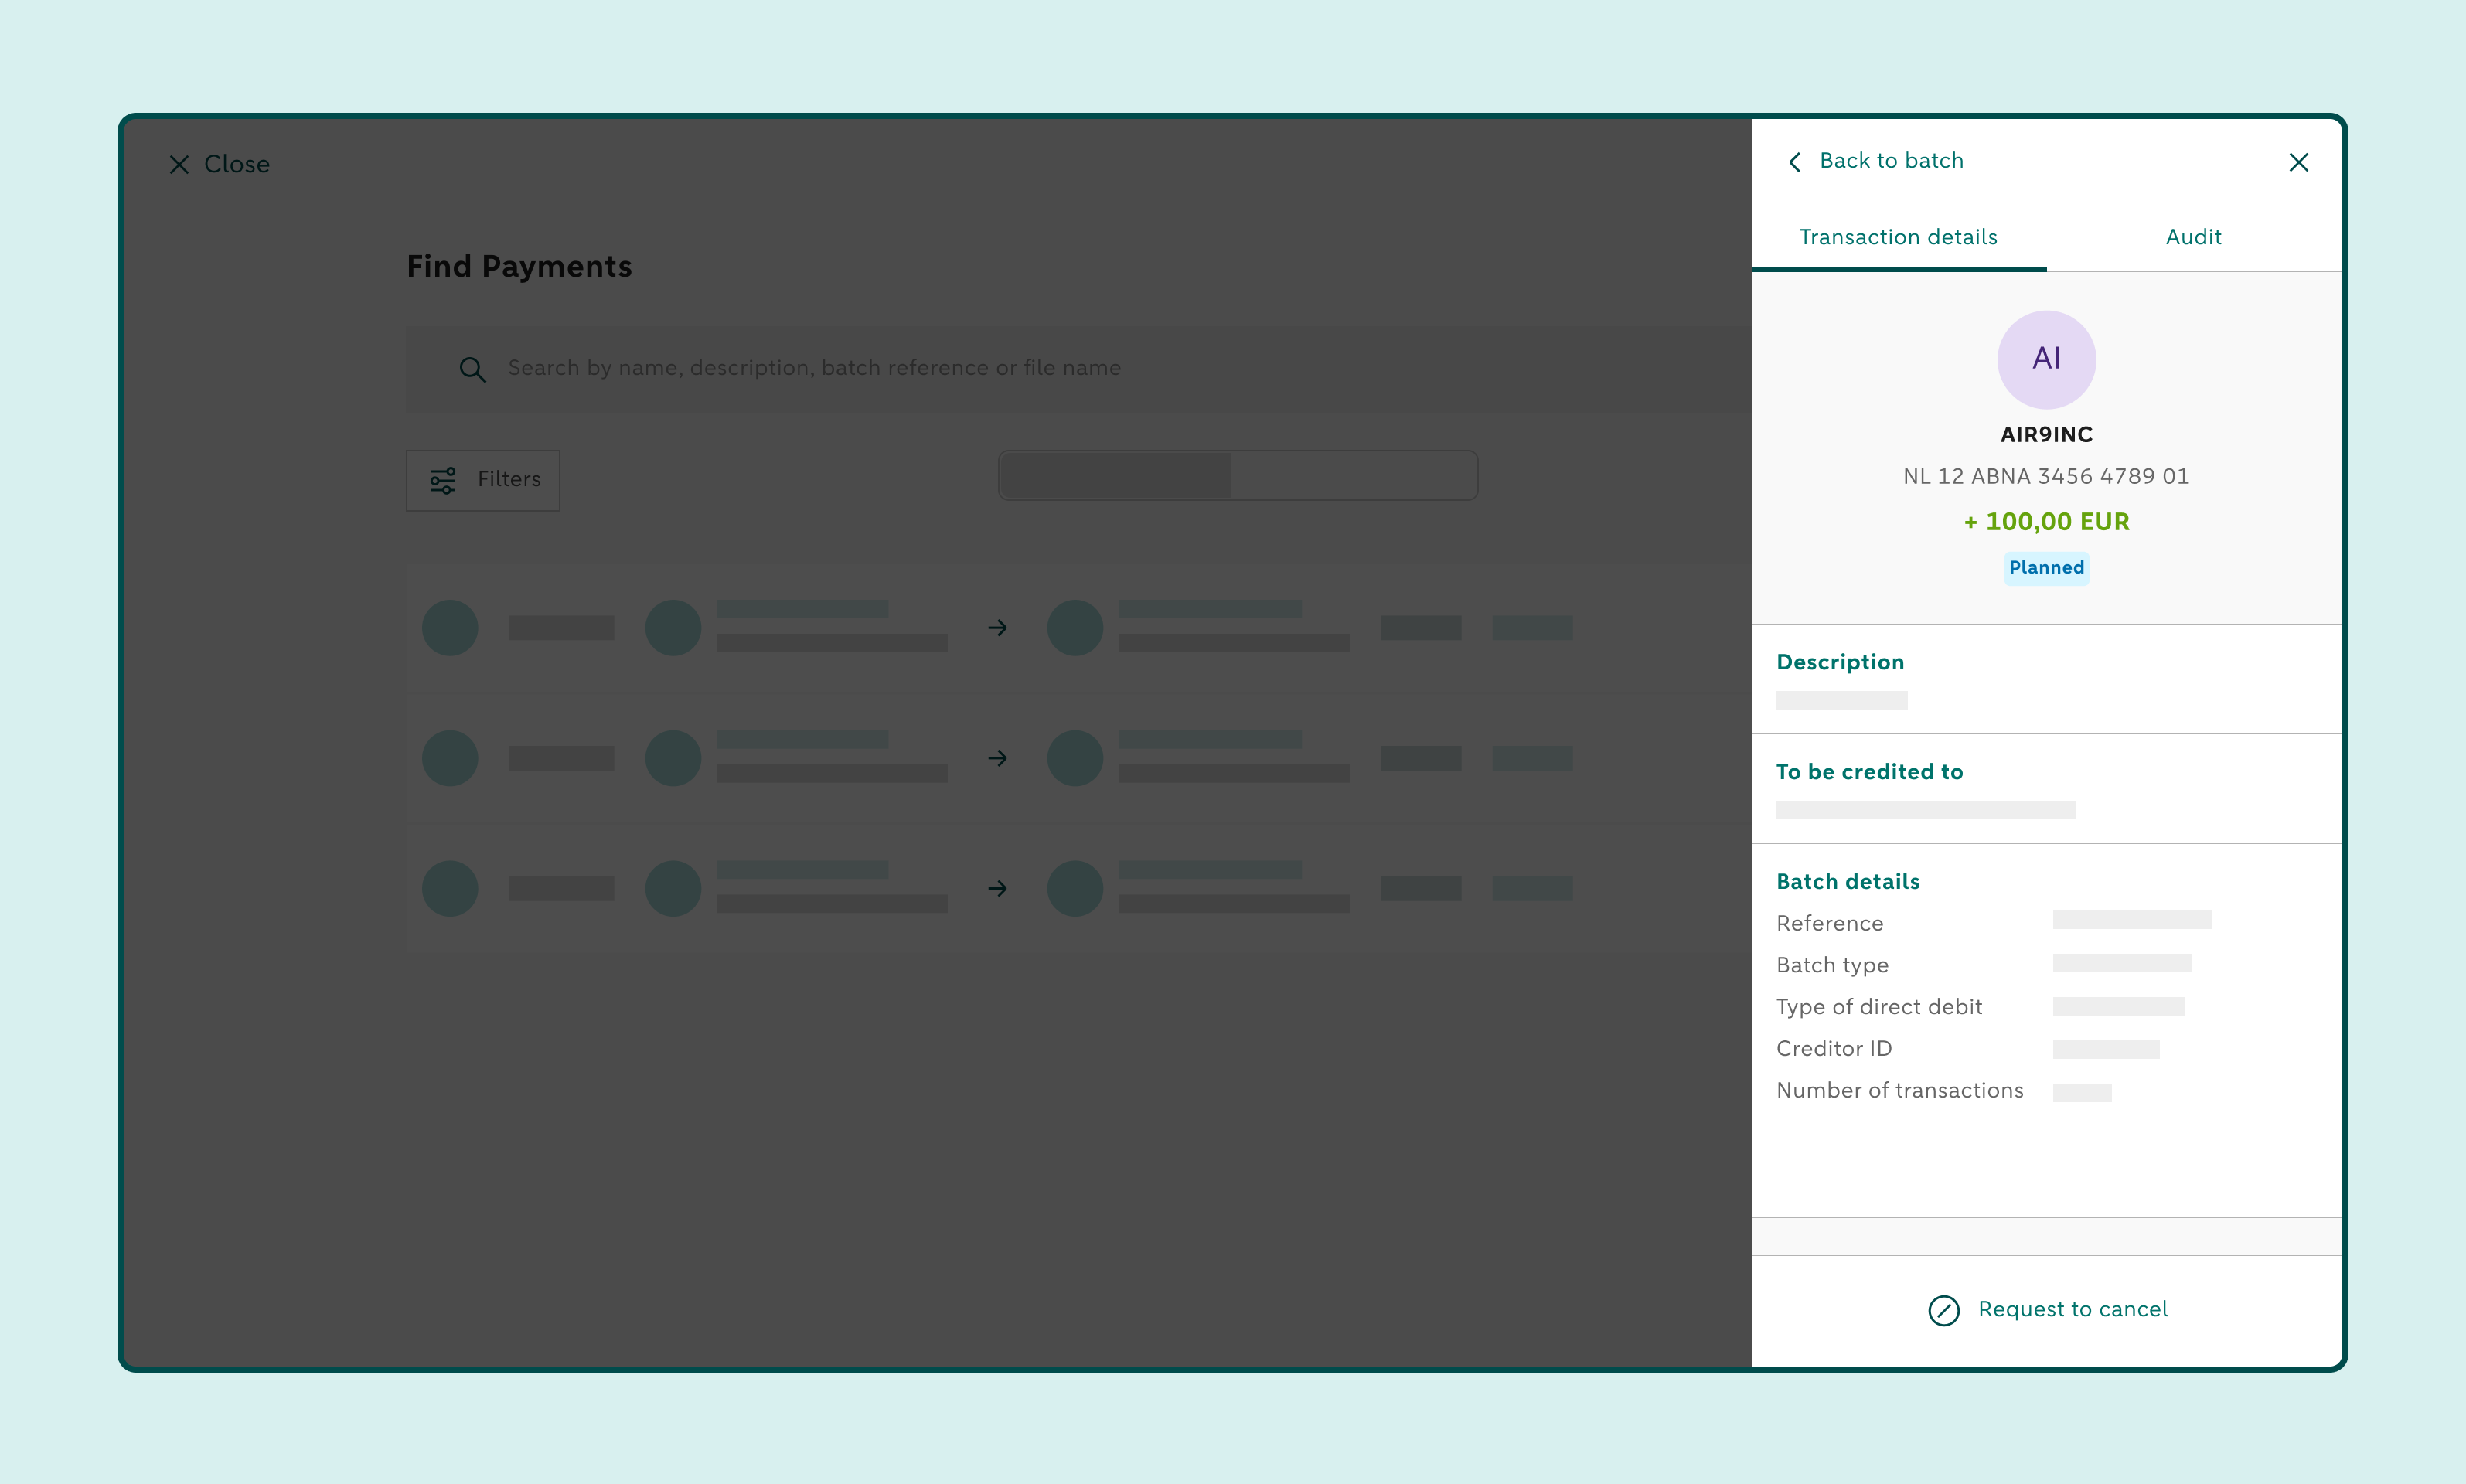
12. Download the direct debit batch
On the Batch details screen at the bottom, click Download to download a PDF file with the batch details and transactions
Save the PDF file