Create SEPA credit transfer batch manually
In Access Online Renewed, you can quickly and easily manually create a SEPA credit transfer batch. Handy if you forgot to make a few credit transfers and you want to have them processed as one batch.
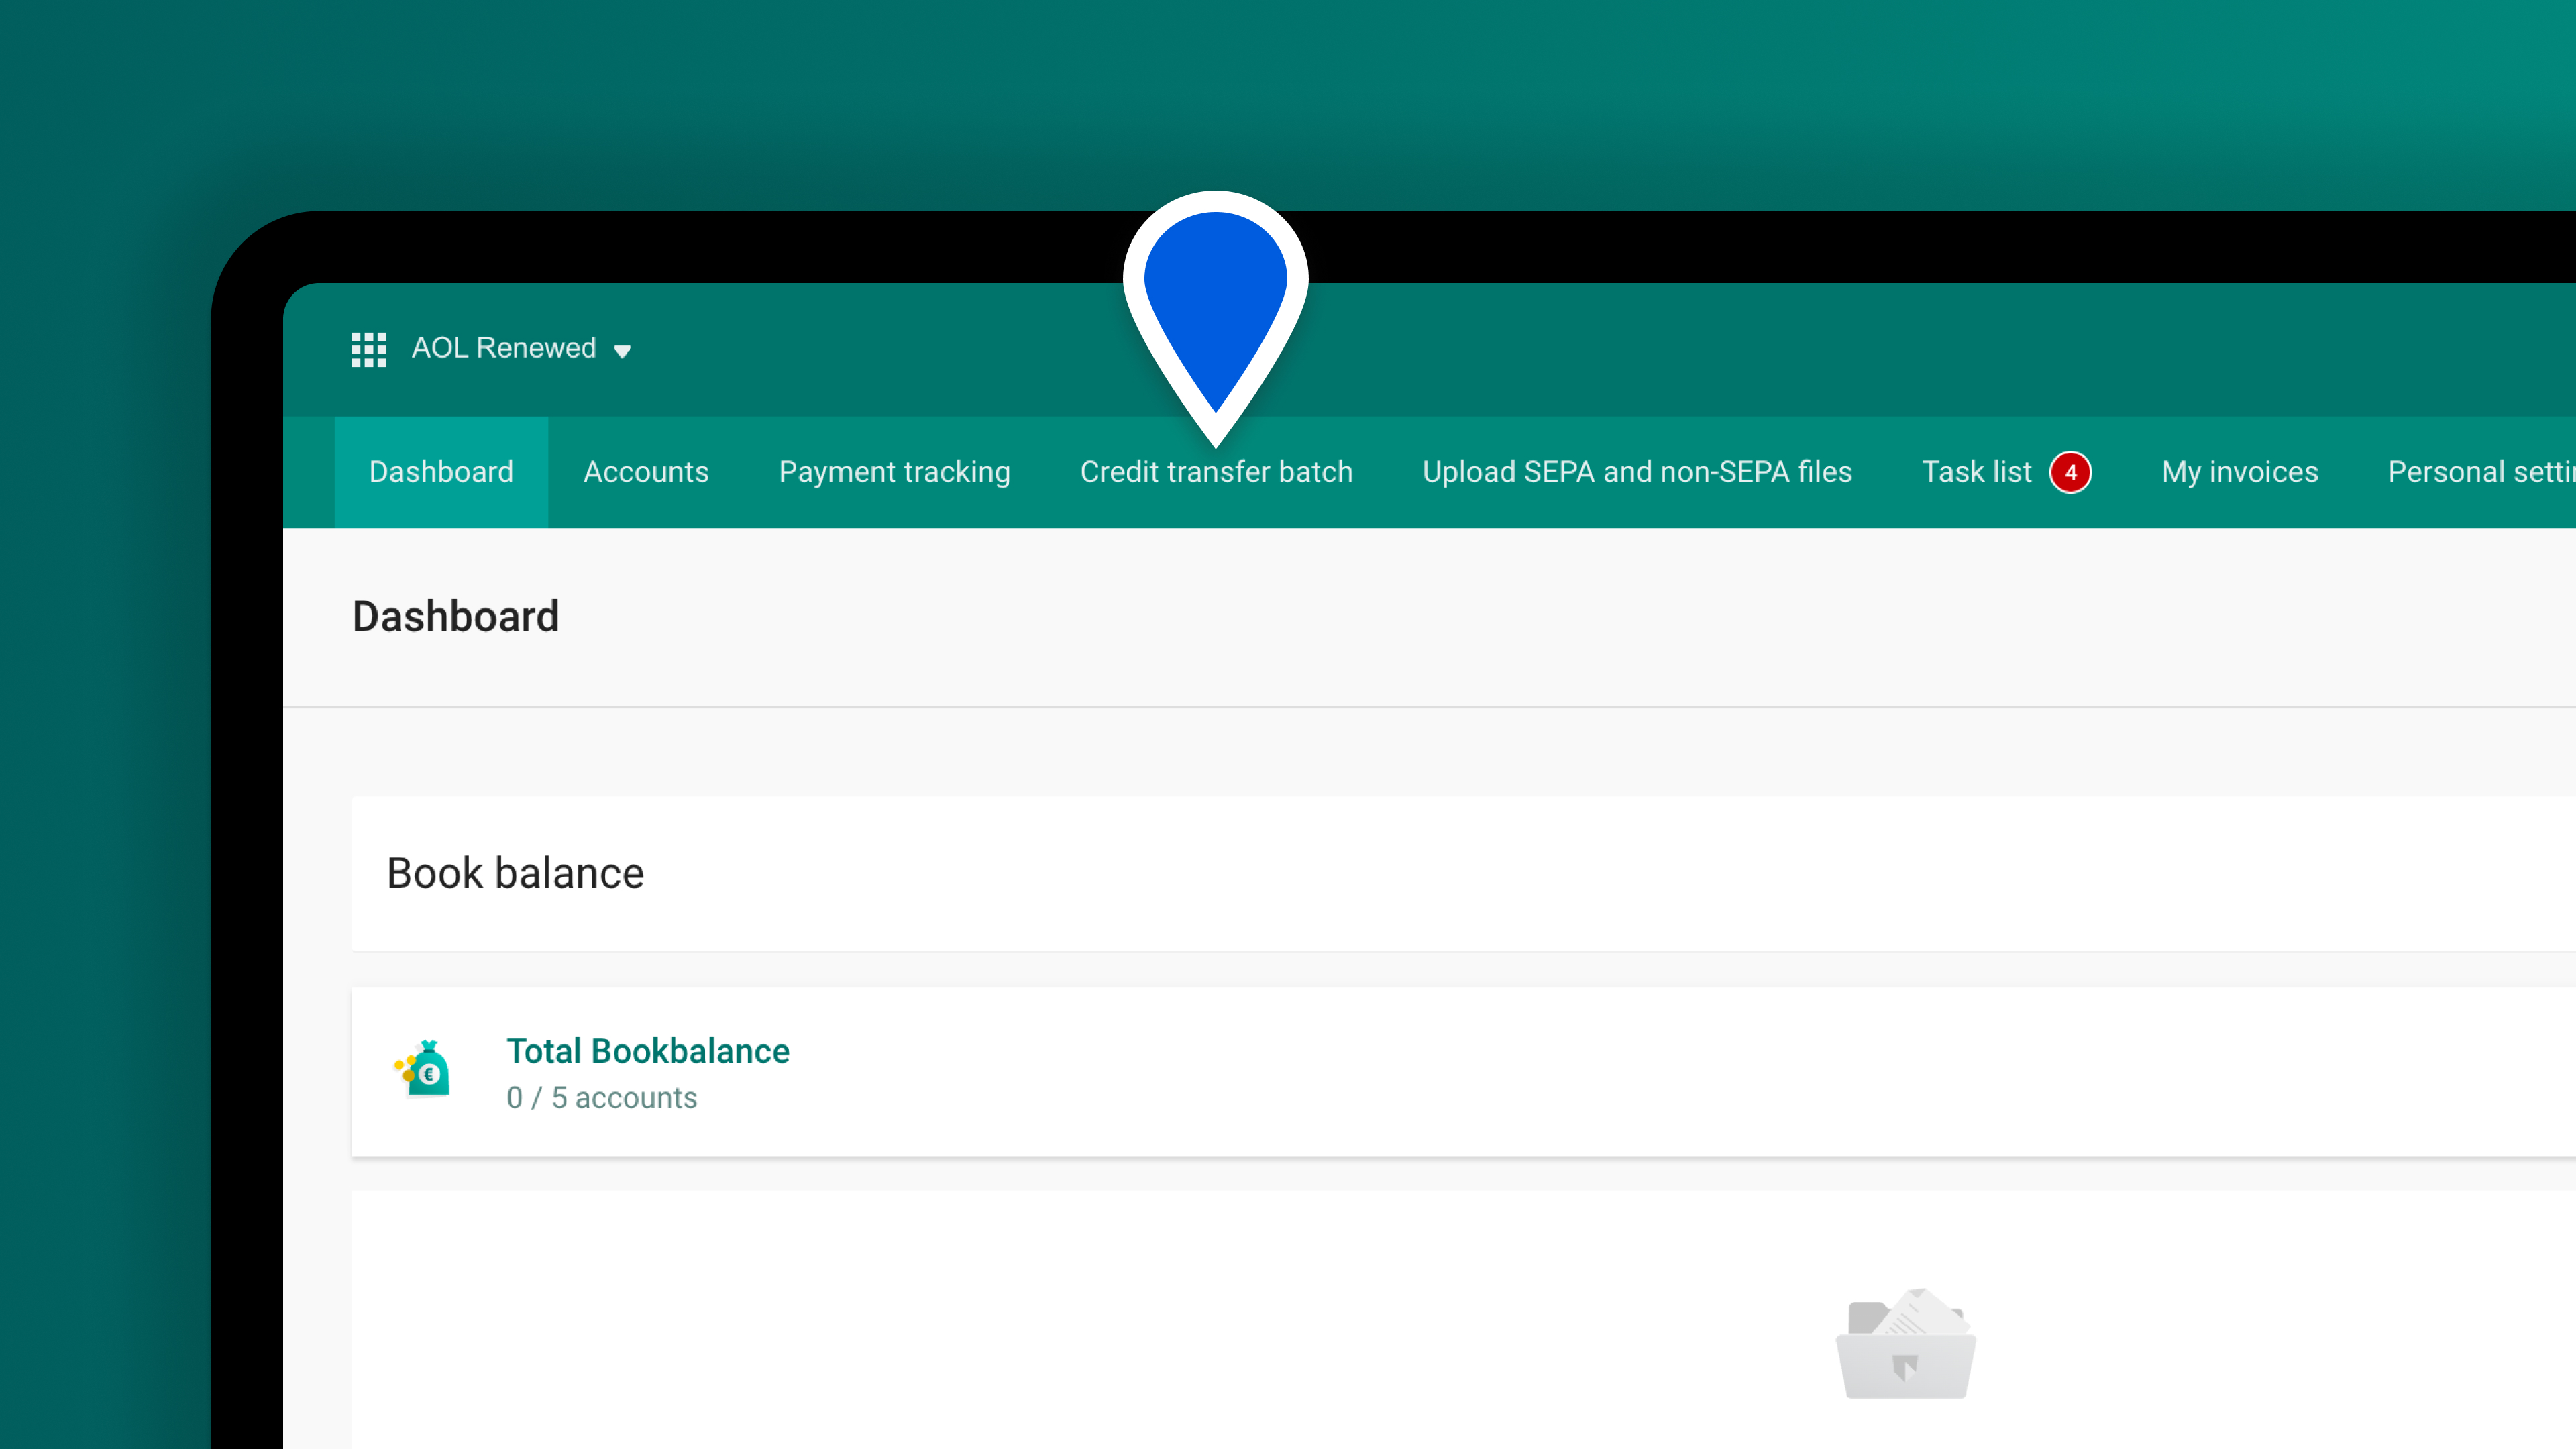
1. Log in
- Log in and go to AOL Renewed
- In the menu on top, click on ‘Credit transfer batch’
- You are now in the ‘Create credit transfer batch’ screen
2. Enter batch details
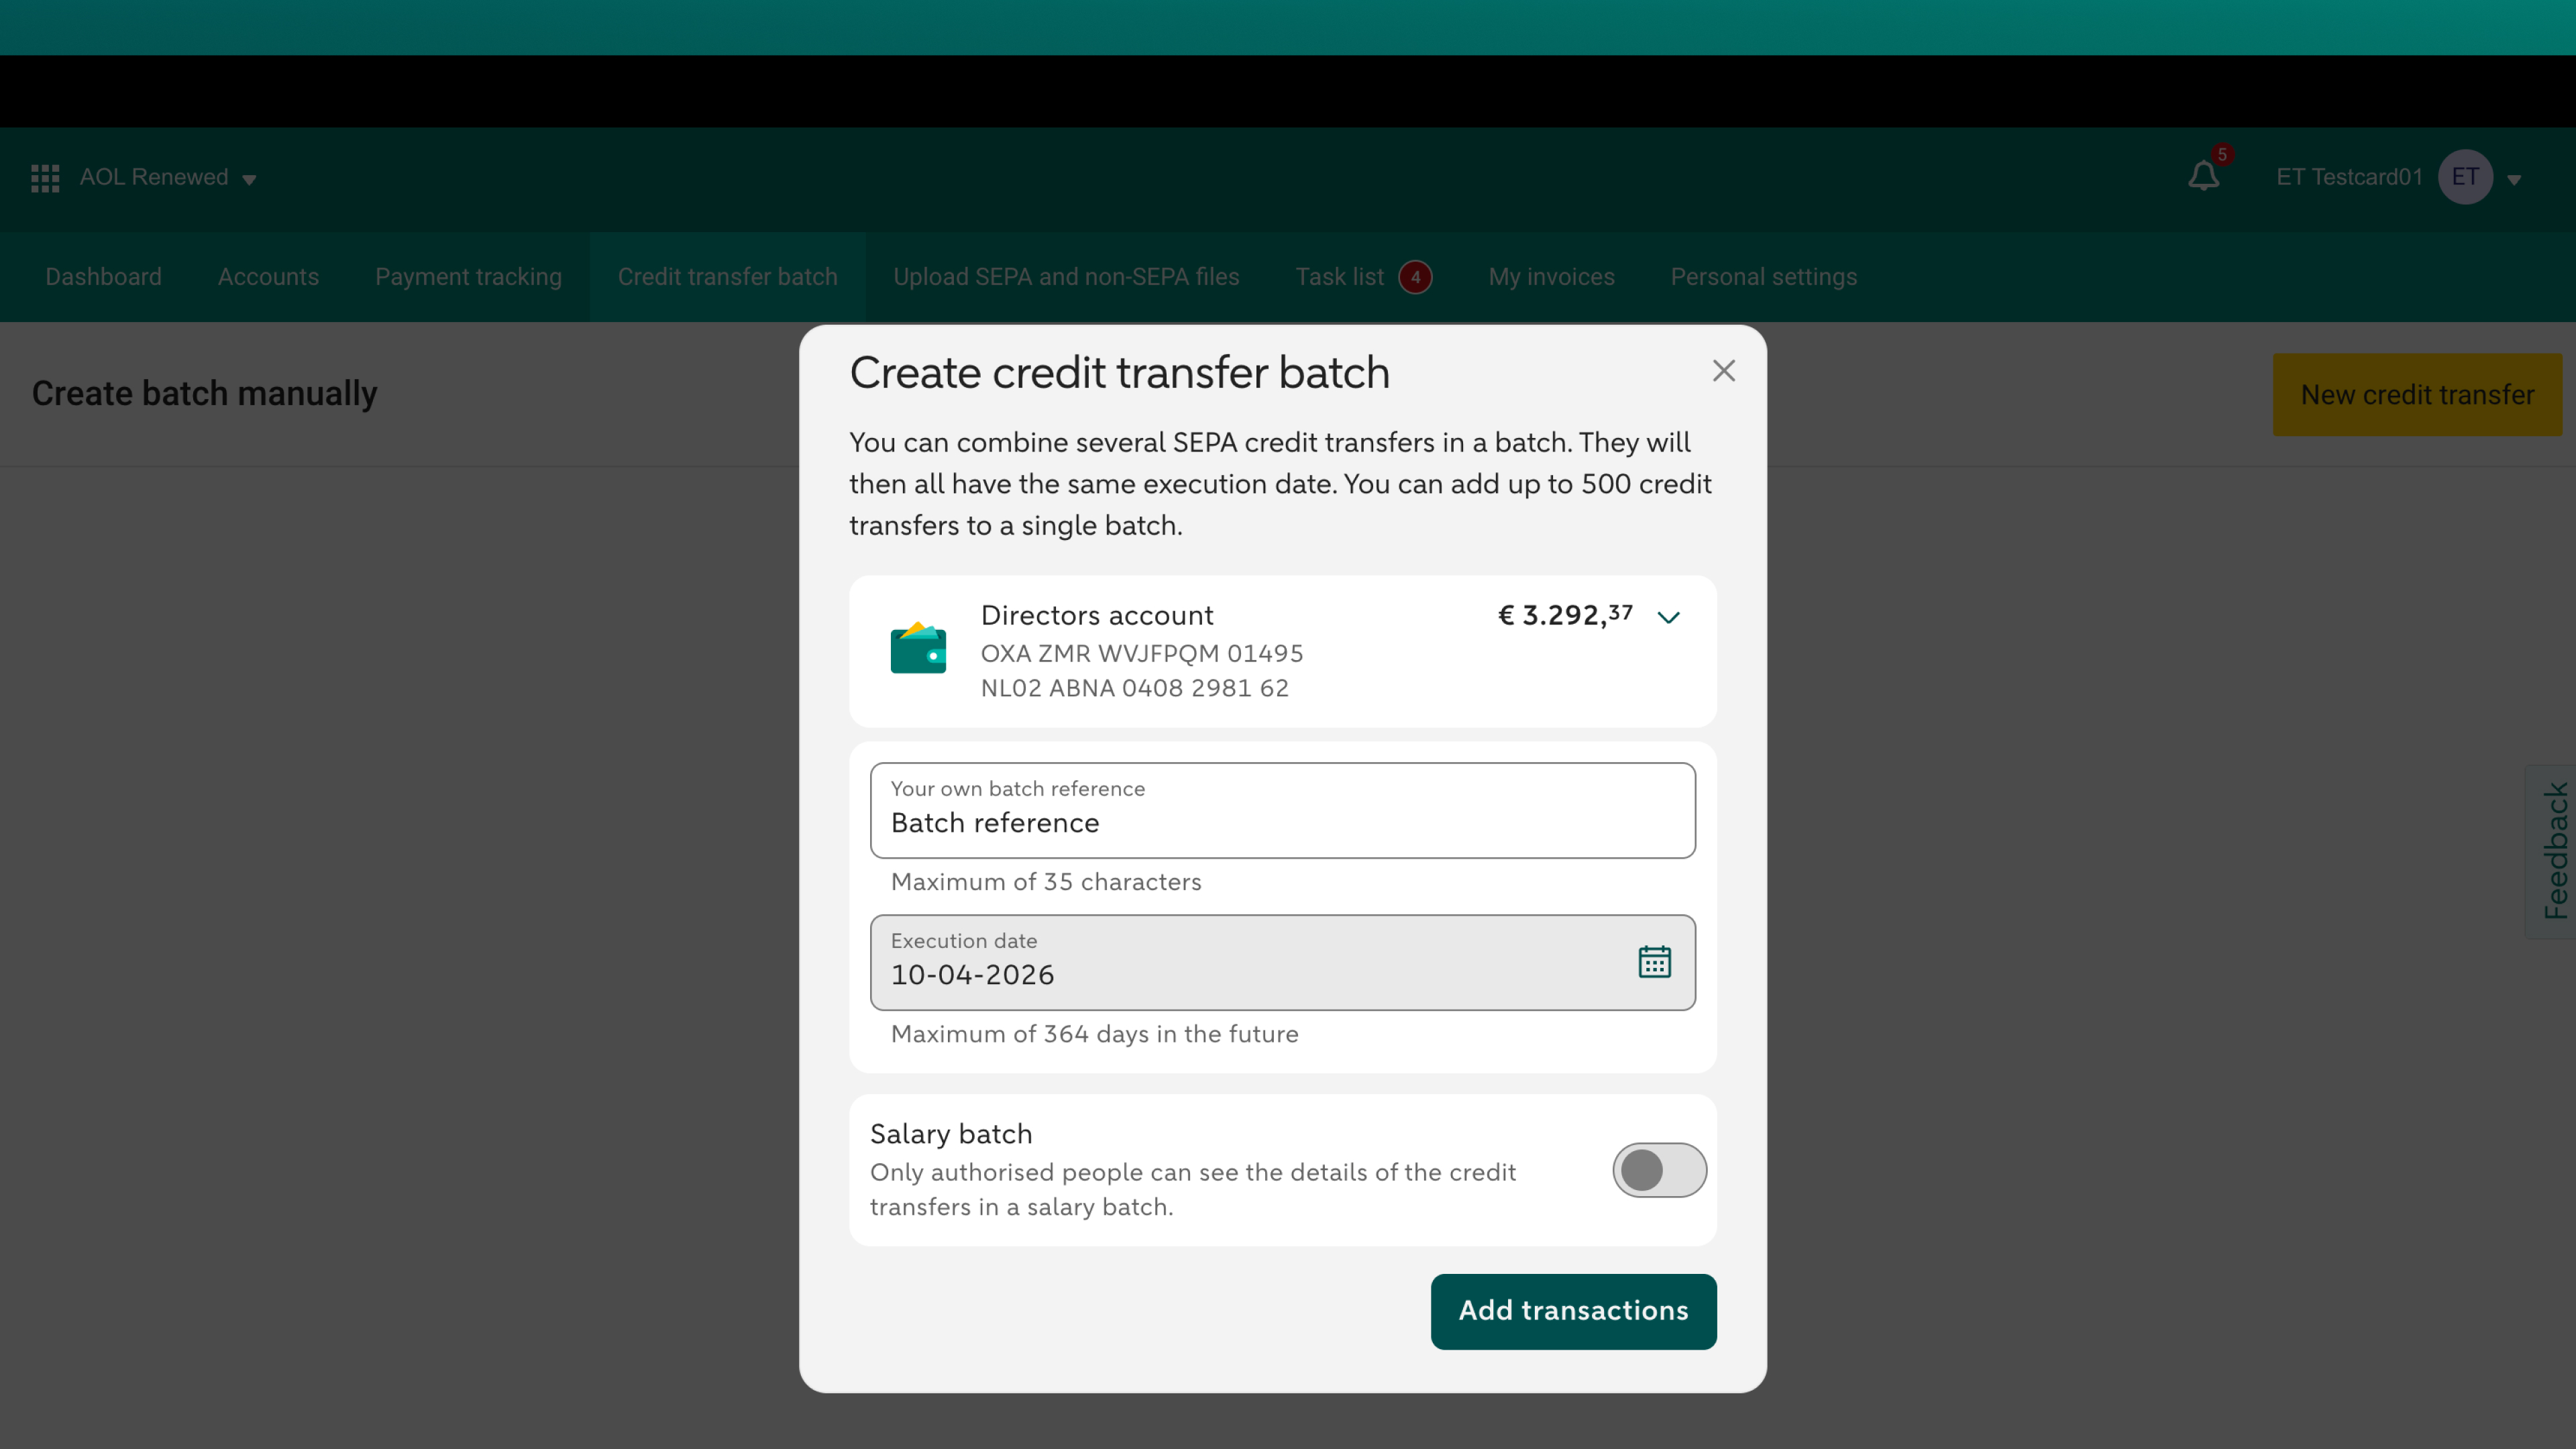
- Choose the account from which the SEPA credit transfer batch should be debited
- Enter a reference that helps you to identify the batch
- Choose the date you want the batch to be executed, this date can be a maximum of 364 days in the future
- Do you want to transfer salaries? Then slide the button to the right under Salary batch
- Click on 'Add transactions'
3. Review overview
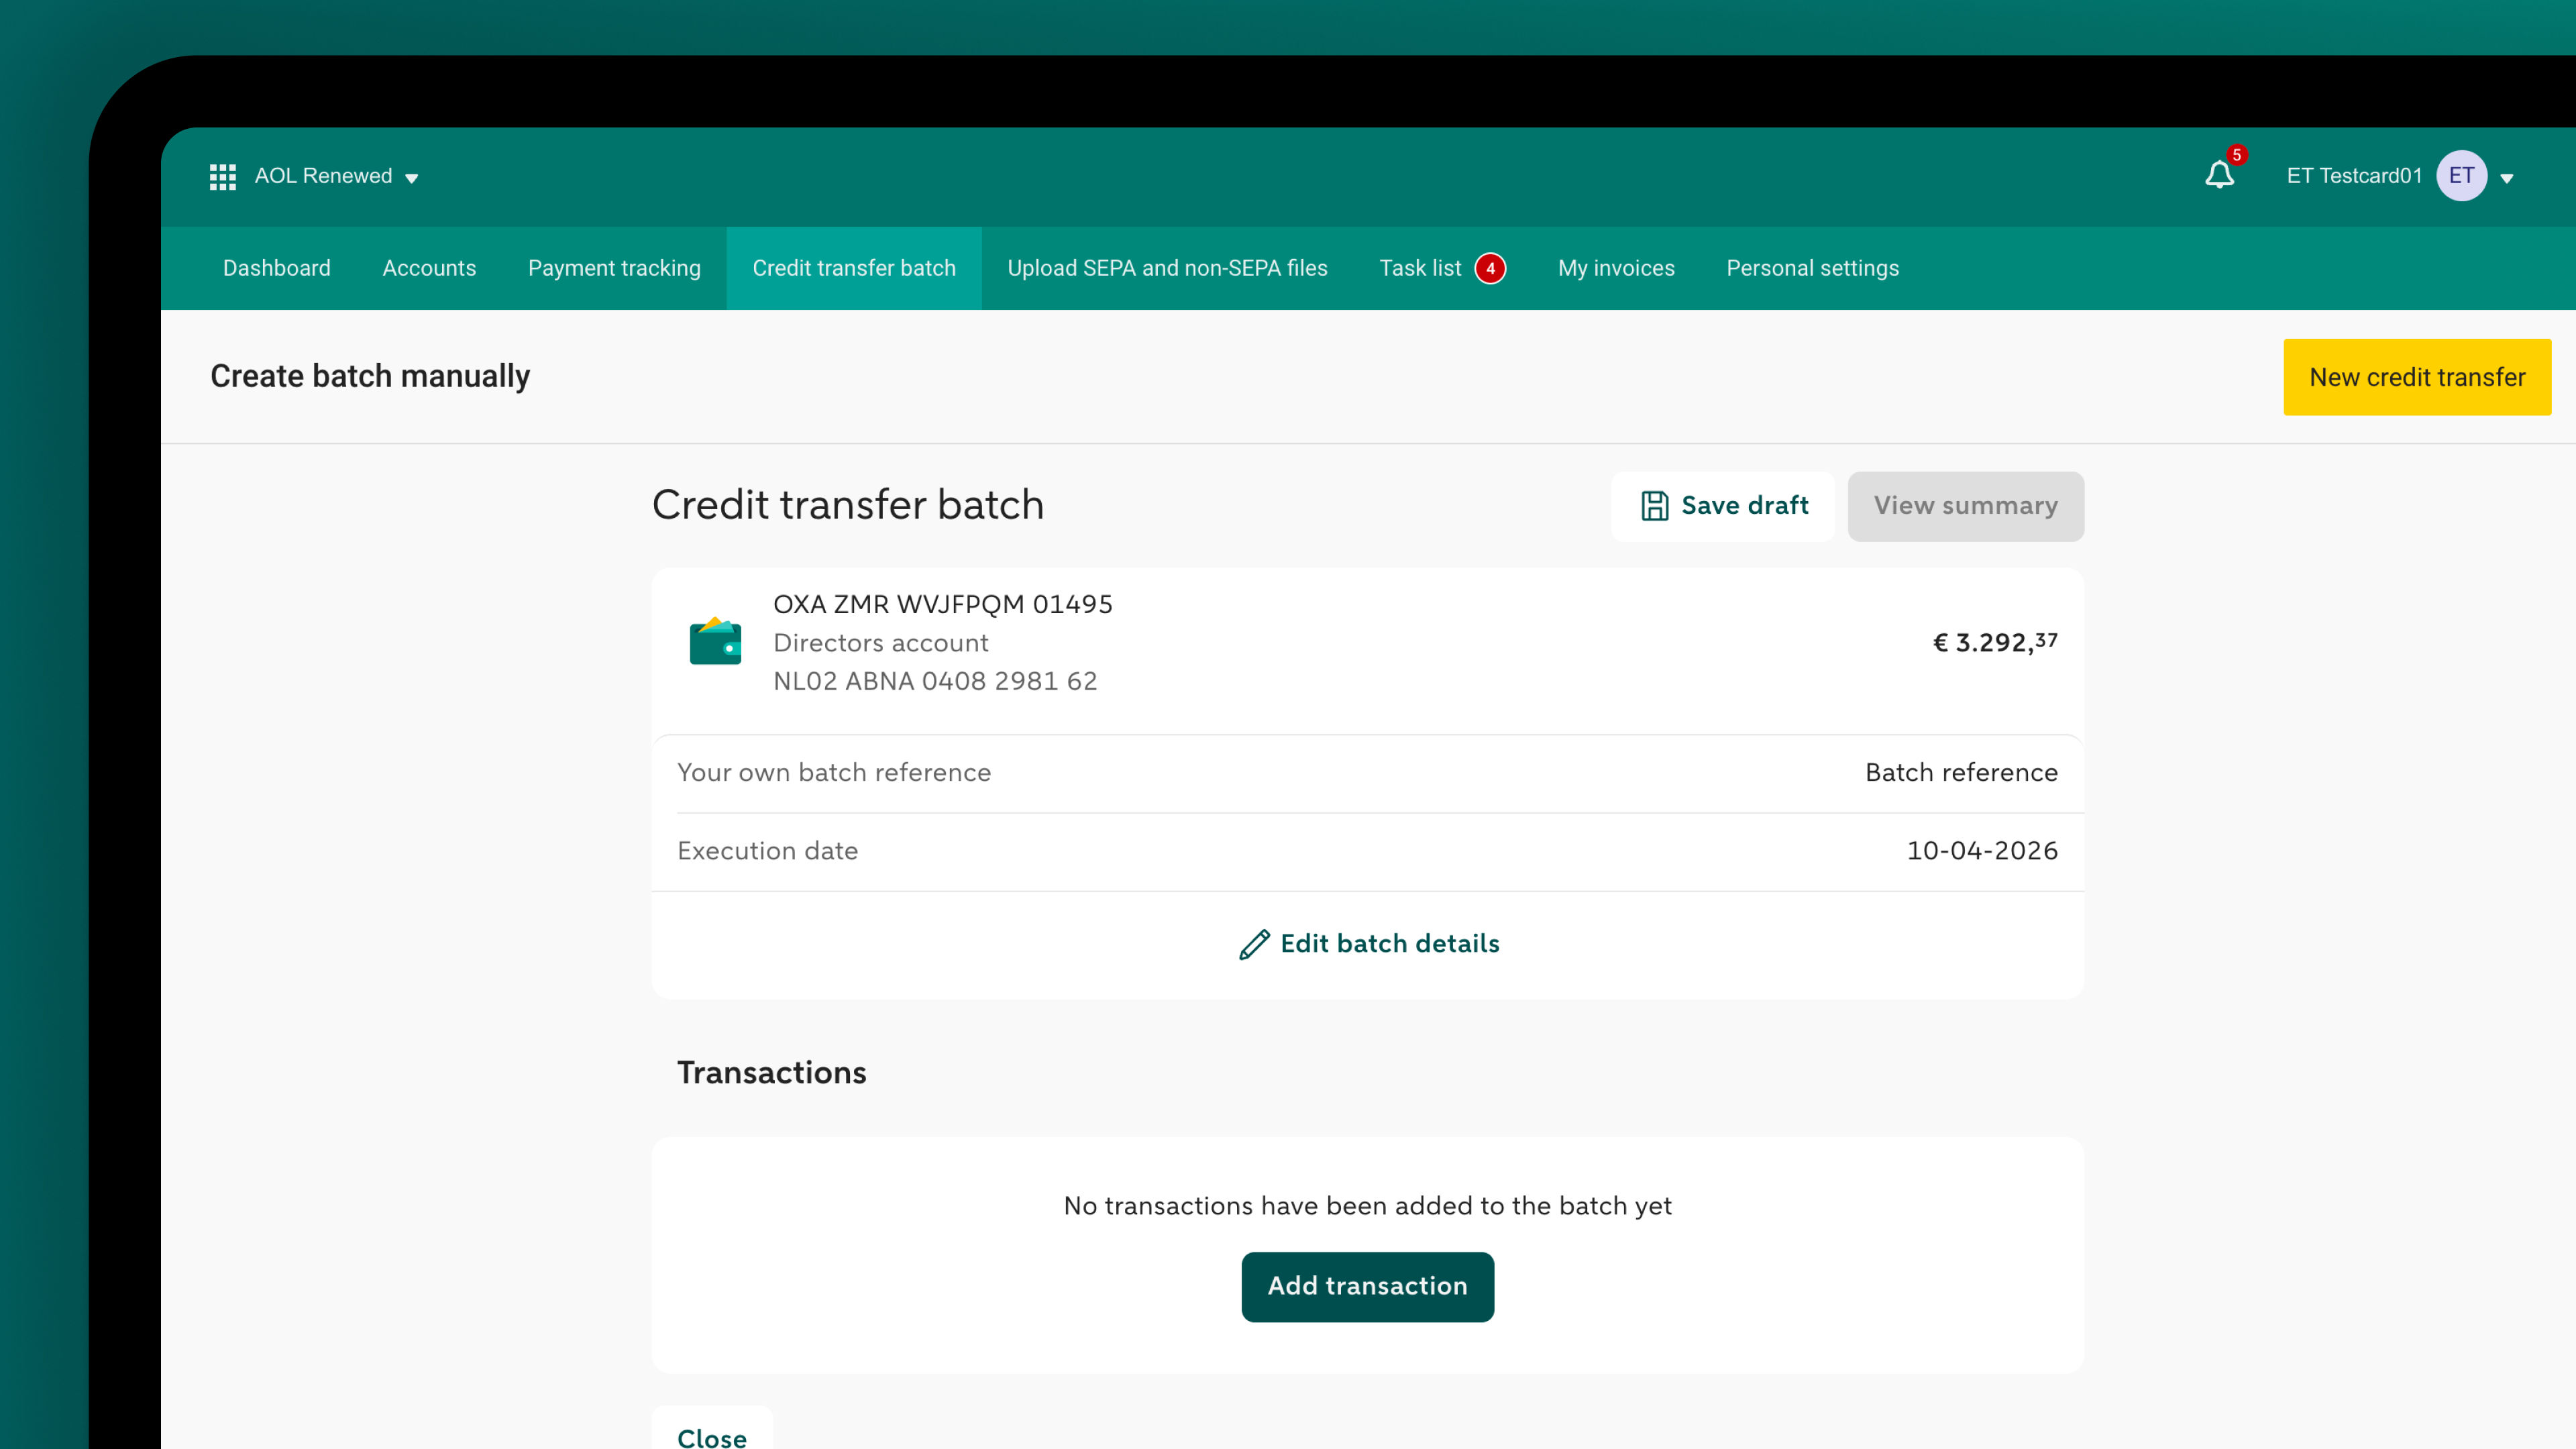
- Check the batch details you just entered
- If there's anything you want to change, click ‘Edit batch details’
- Click on 'Add transaction' to enter a credit transfer
- Or click on 'Save draft' at the top if you want to continue later
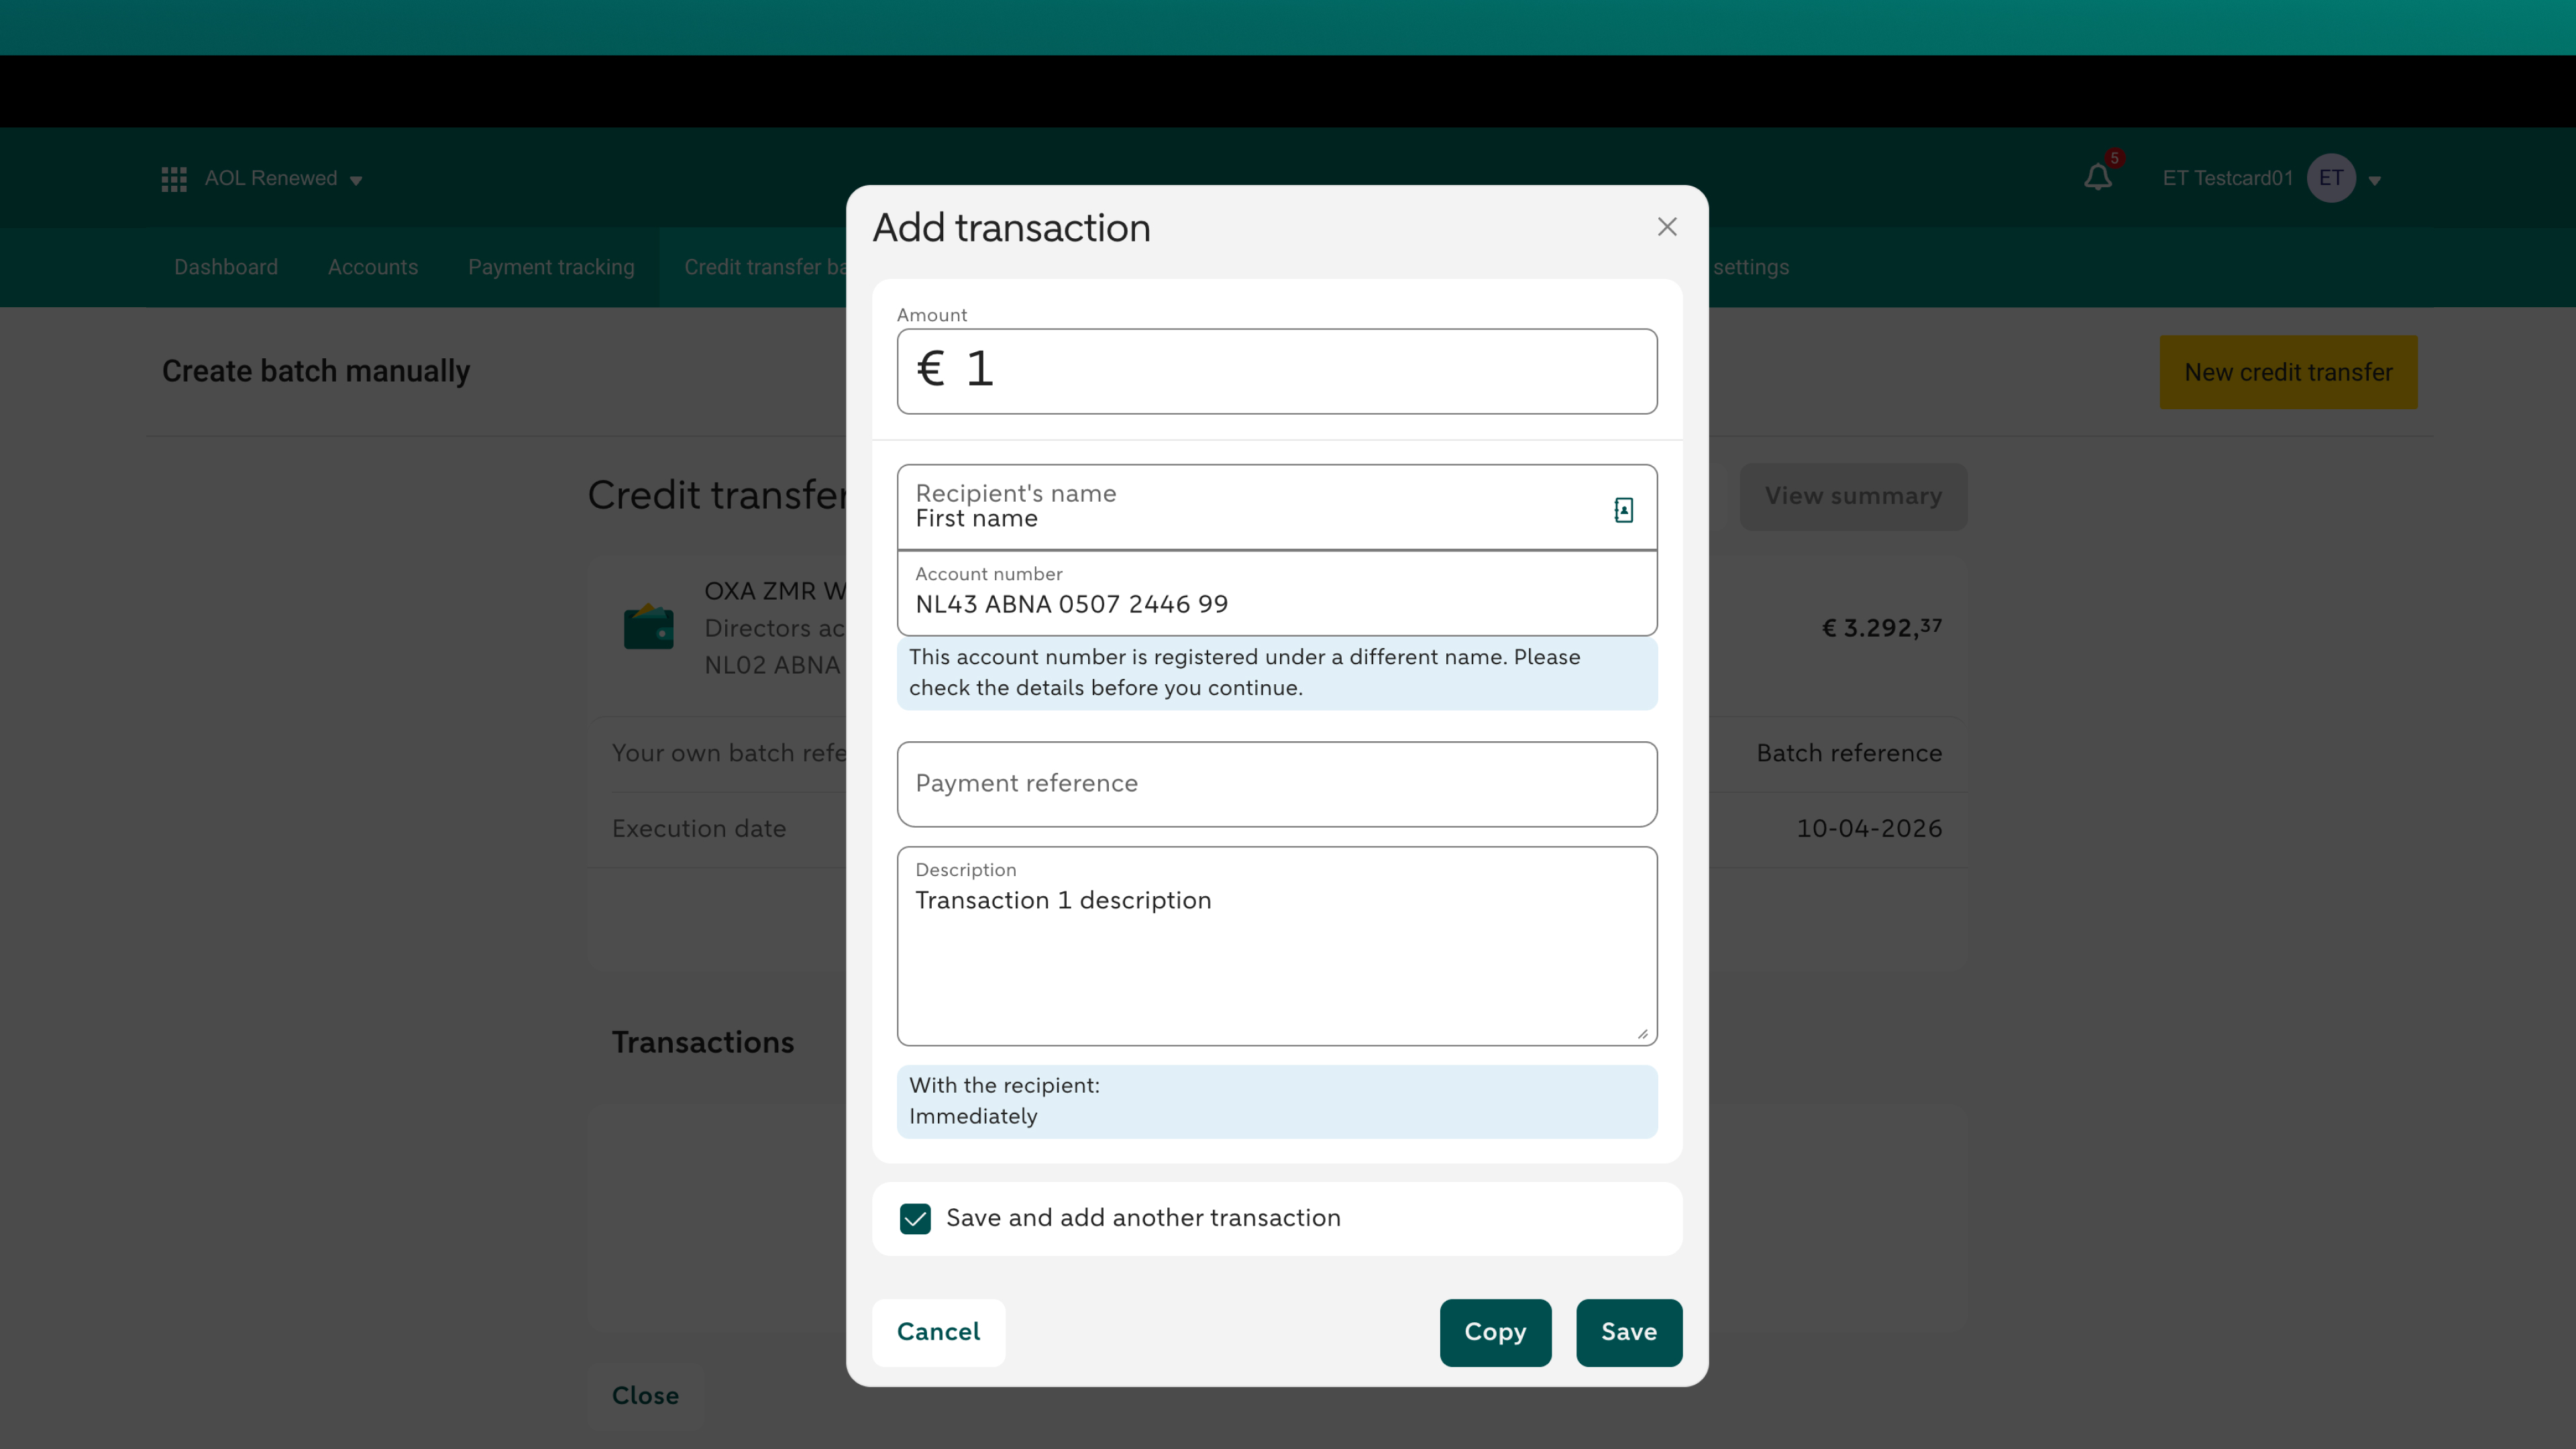
4. Add transaction
- Enter the amount
- Enter the recipient's name
- Enter the recipient's account number
- You can enter a payment reference and a description
- You can see whether the amount will arrive at the recipient 'Immediately' or 'Within 1 working day' after execution
- Check the option 'Save and add another transaction'
- Click on 'Save'
5. Add another transaction
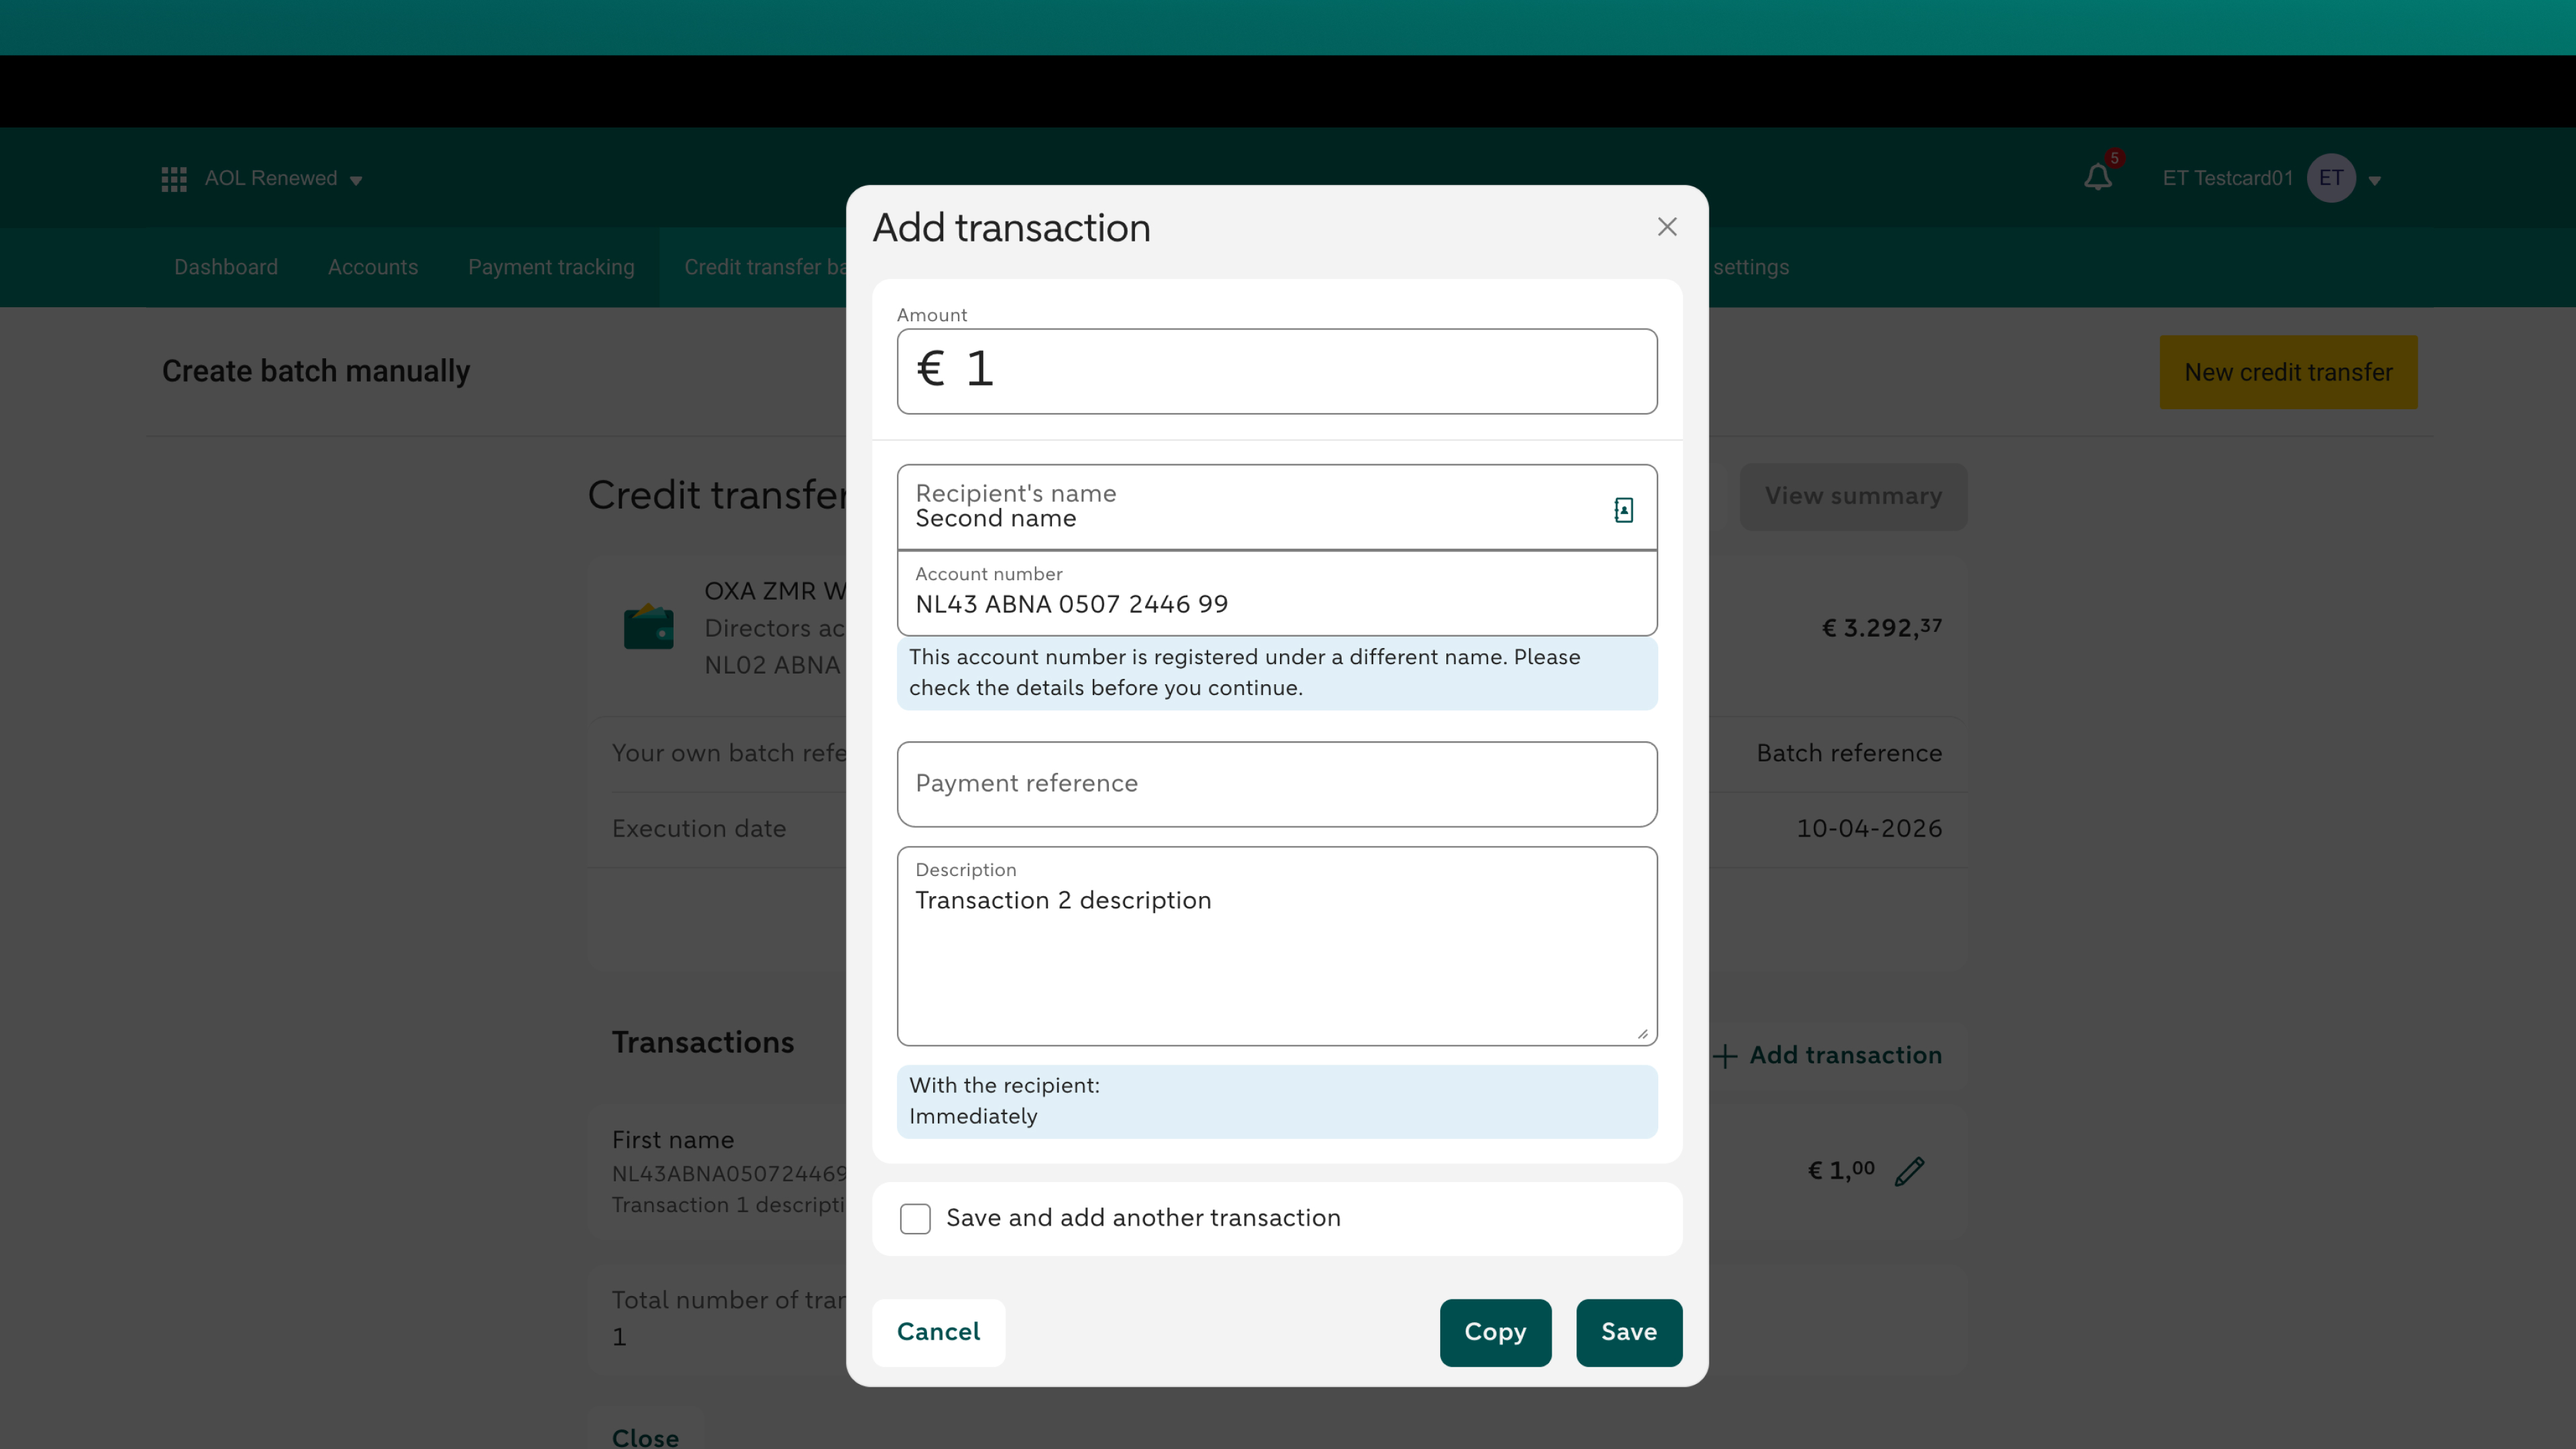
- Repeat the previous steps
- You need to add at least 2 transactions to the batch
- You can add up to 500 transactions to the batch
- If you don't want to add an additional transaction, uncheck the box next to 'Save and add another transaction' and click on 'Save'
6. Review overview
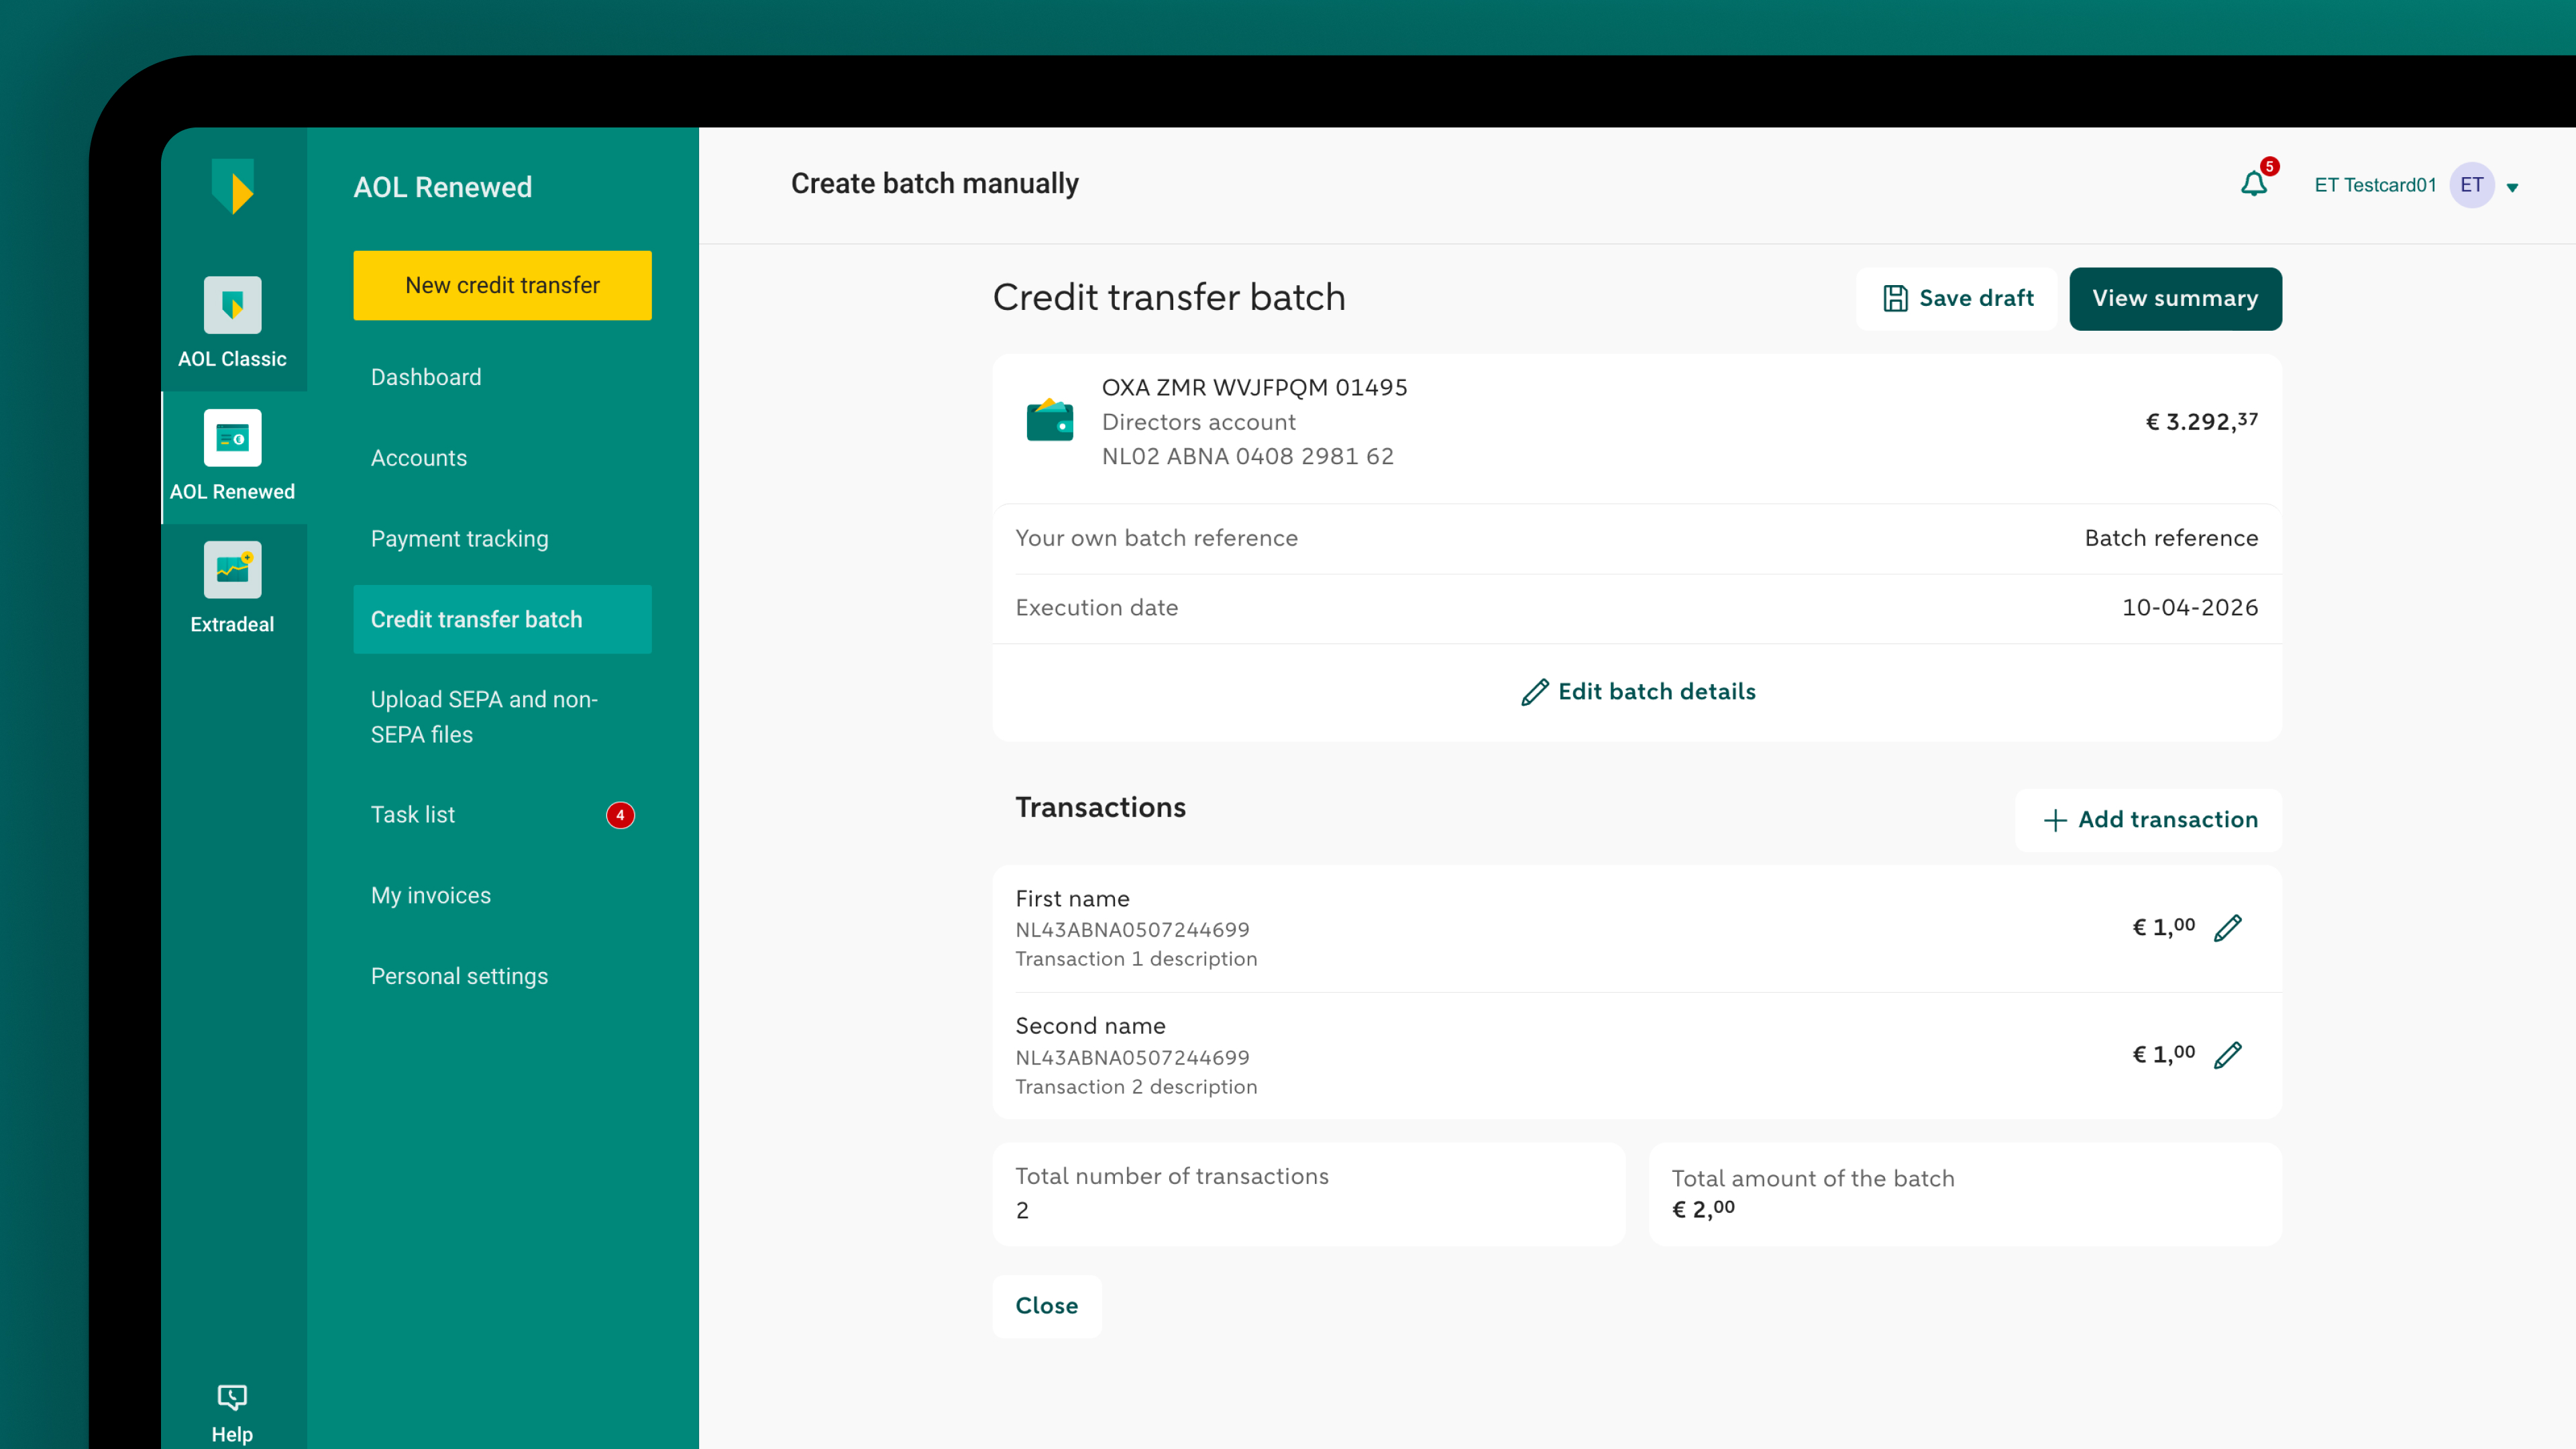
- You can see here the batch details, the added transactions, the total number of transactions in the batch, and the total amount of the batch
- Click on the pencil icon if you want to change anything
- Click ‘View summary’ when you're ready to approve and submit the batch
- Or click on 'Save draft' at the top if you want to continue later
7. View summary
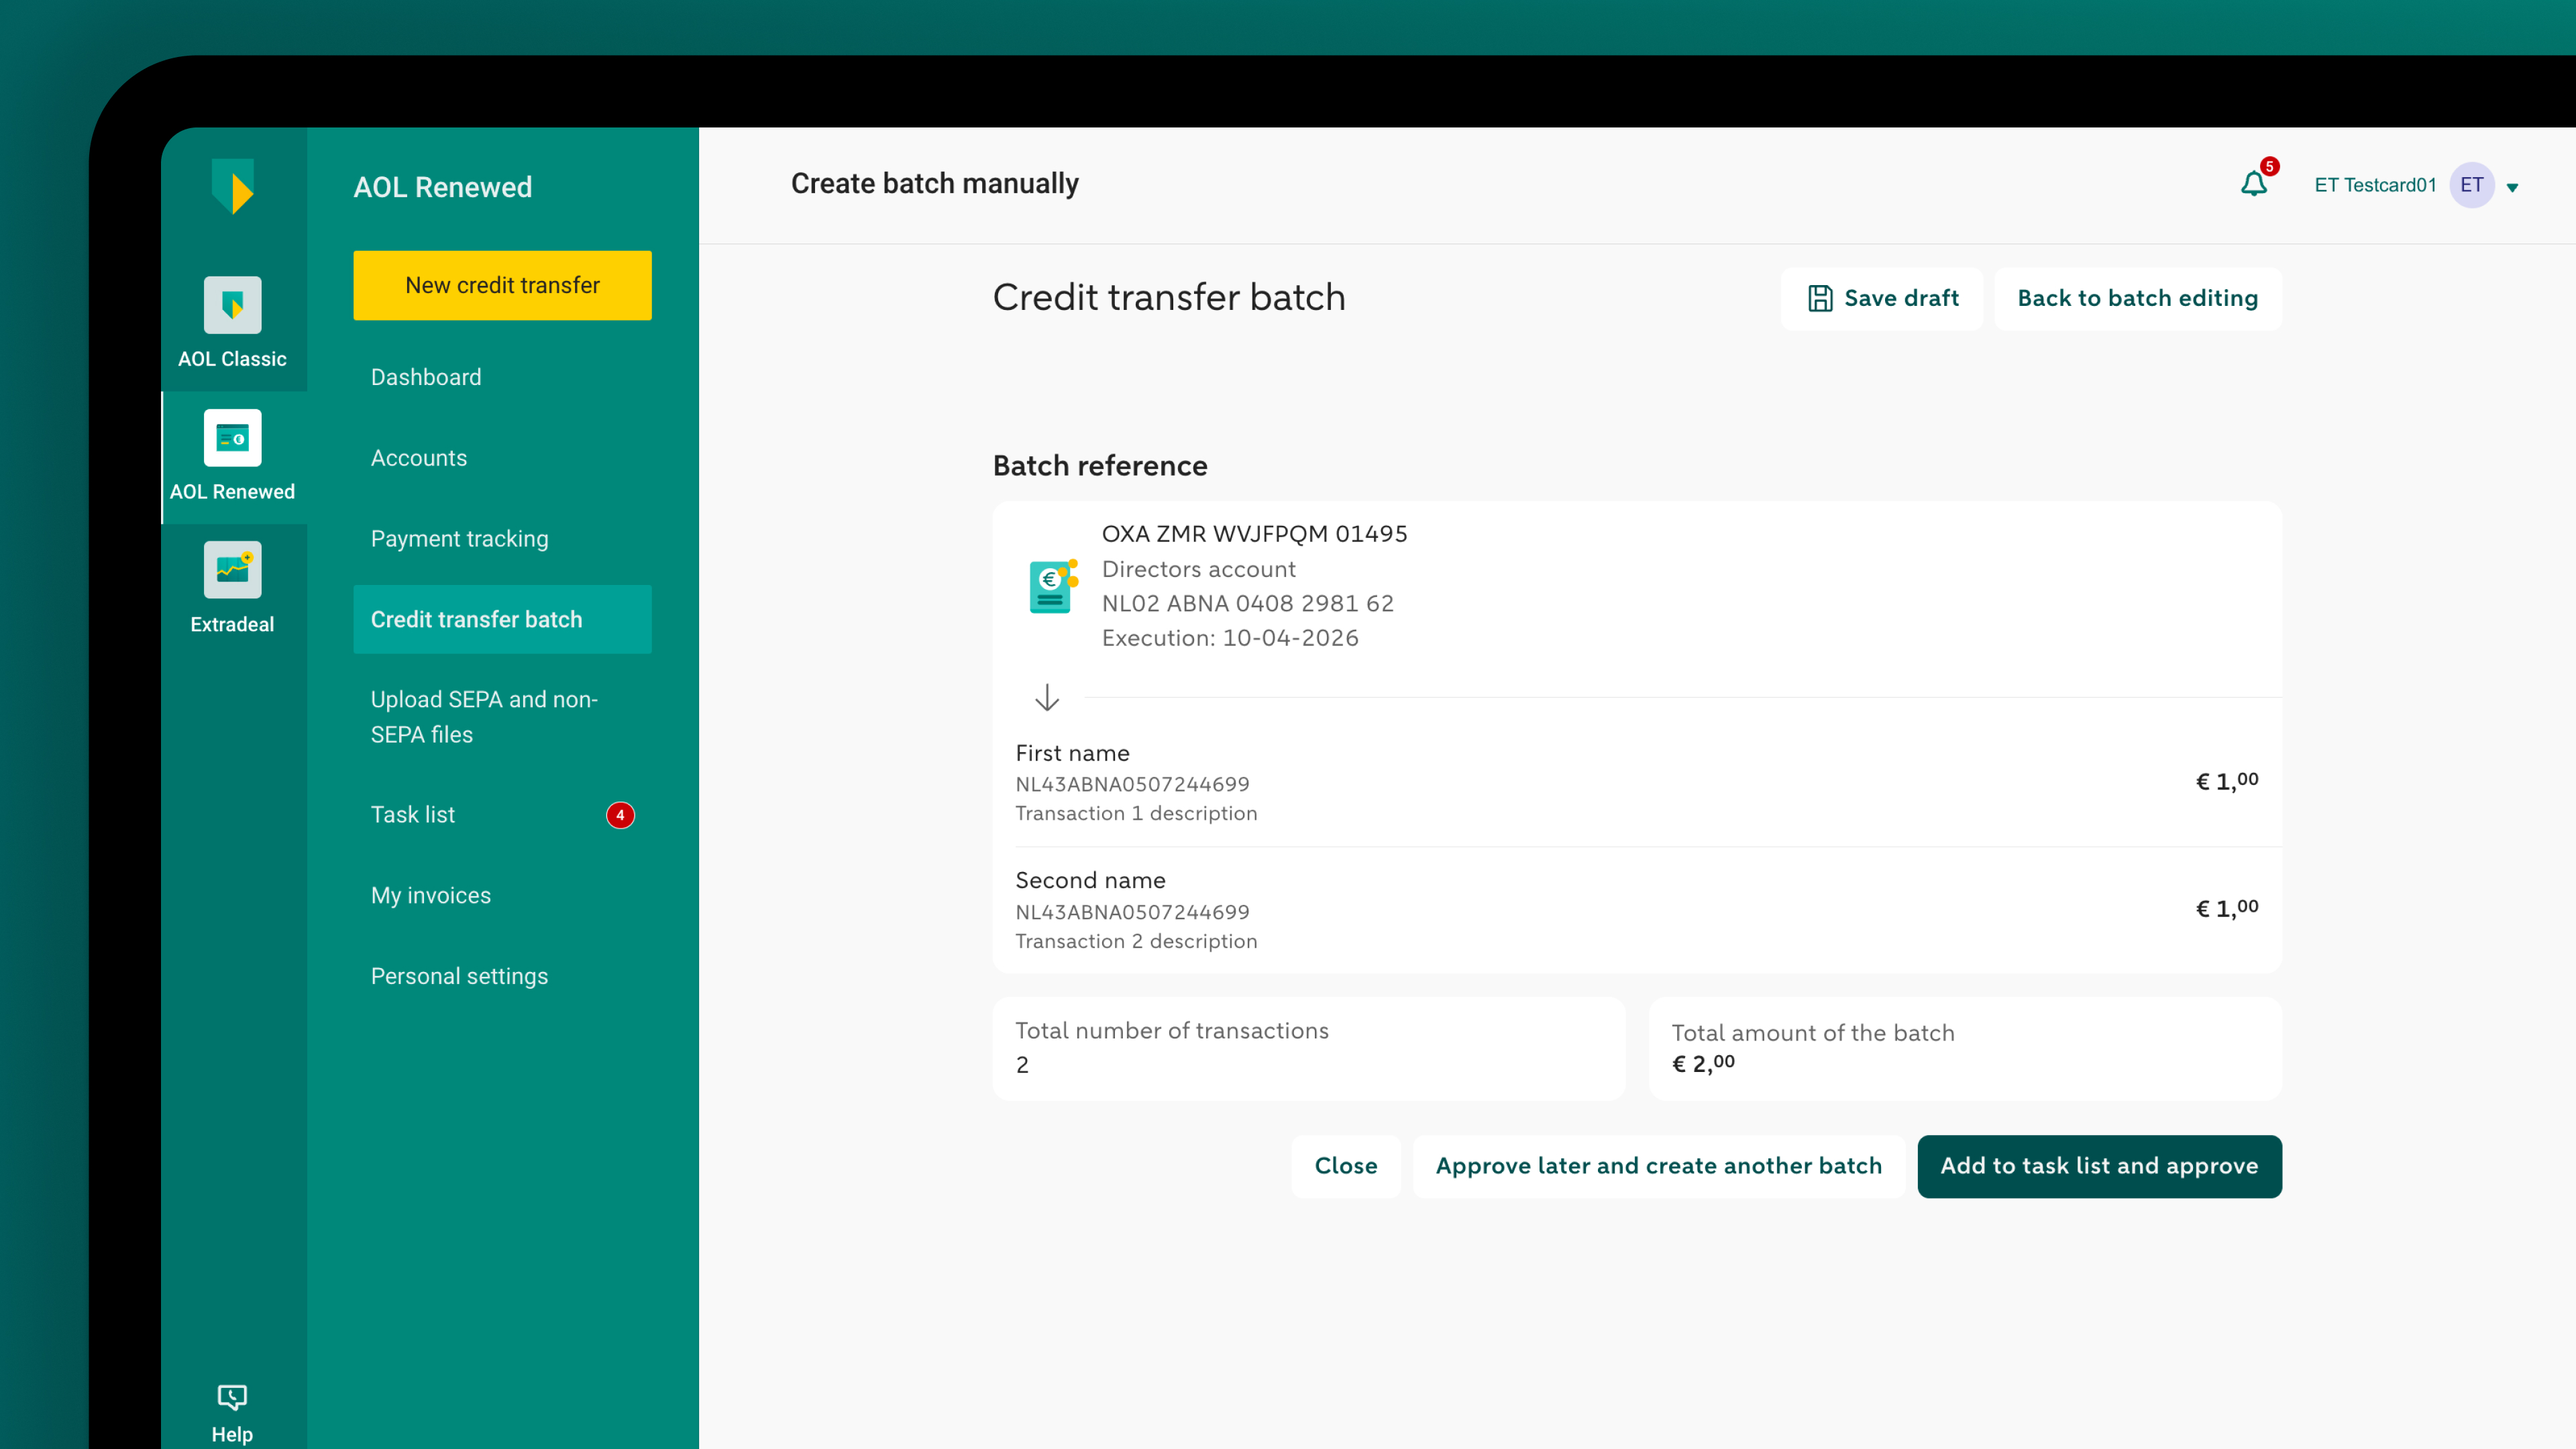
- Check again if everything is correct
- Click on 'Back to batch editing' at the top if you want to change something
- Otherwise, click ‘Add to task list and approve’
- Or click on 'Approve later and create another batch' if you want to create an extra SEPA credit transfer batch
- Do you want to continue later? Then click on 'Save draft' at the top
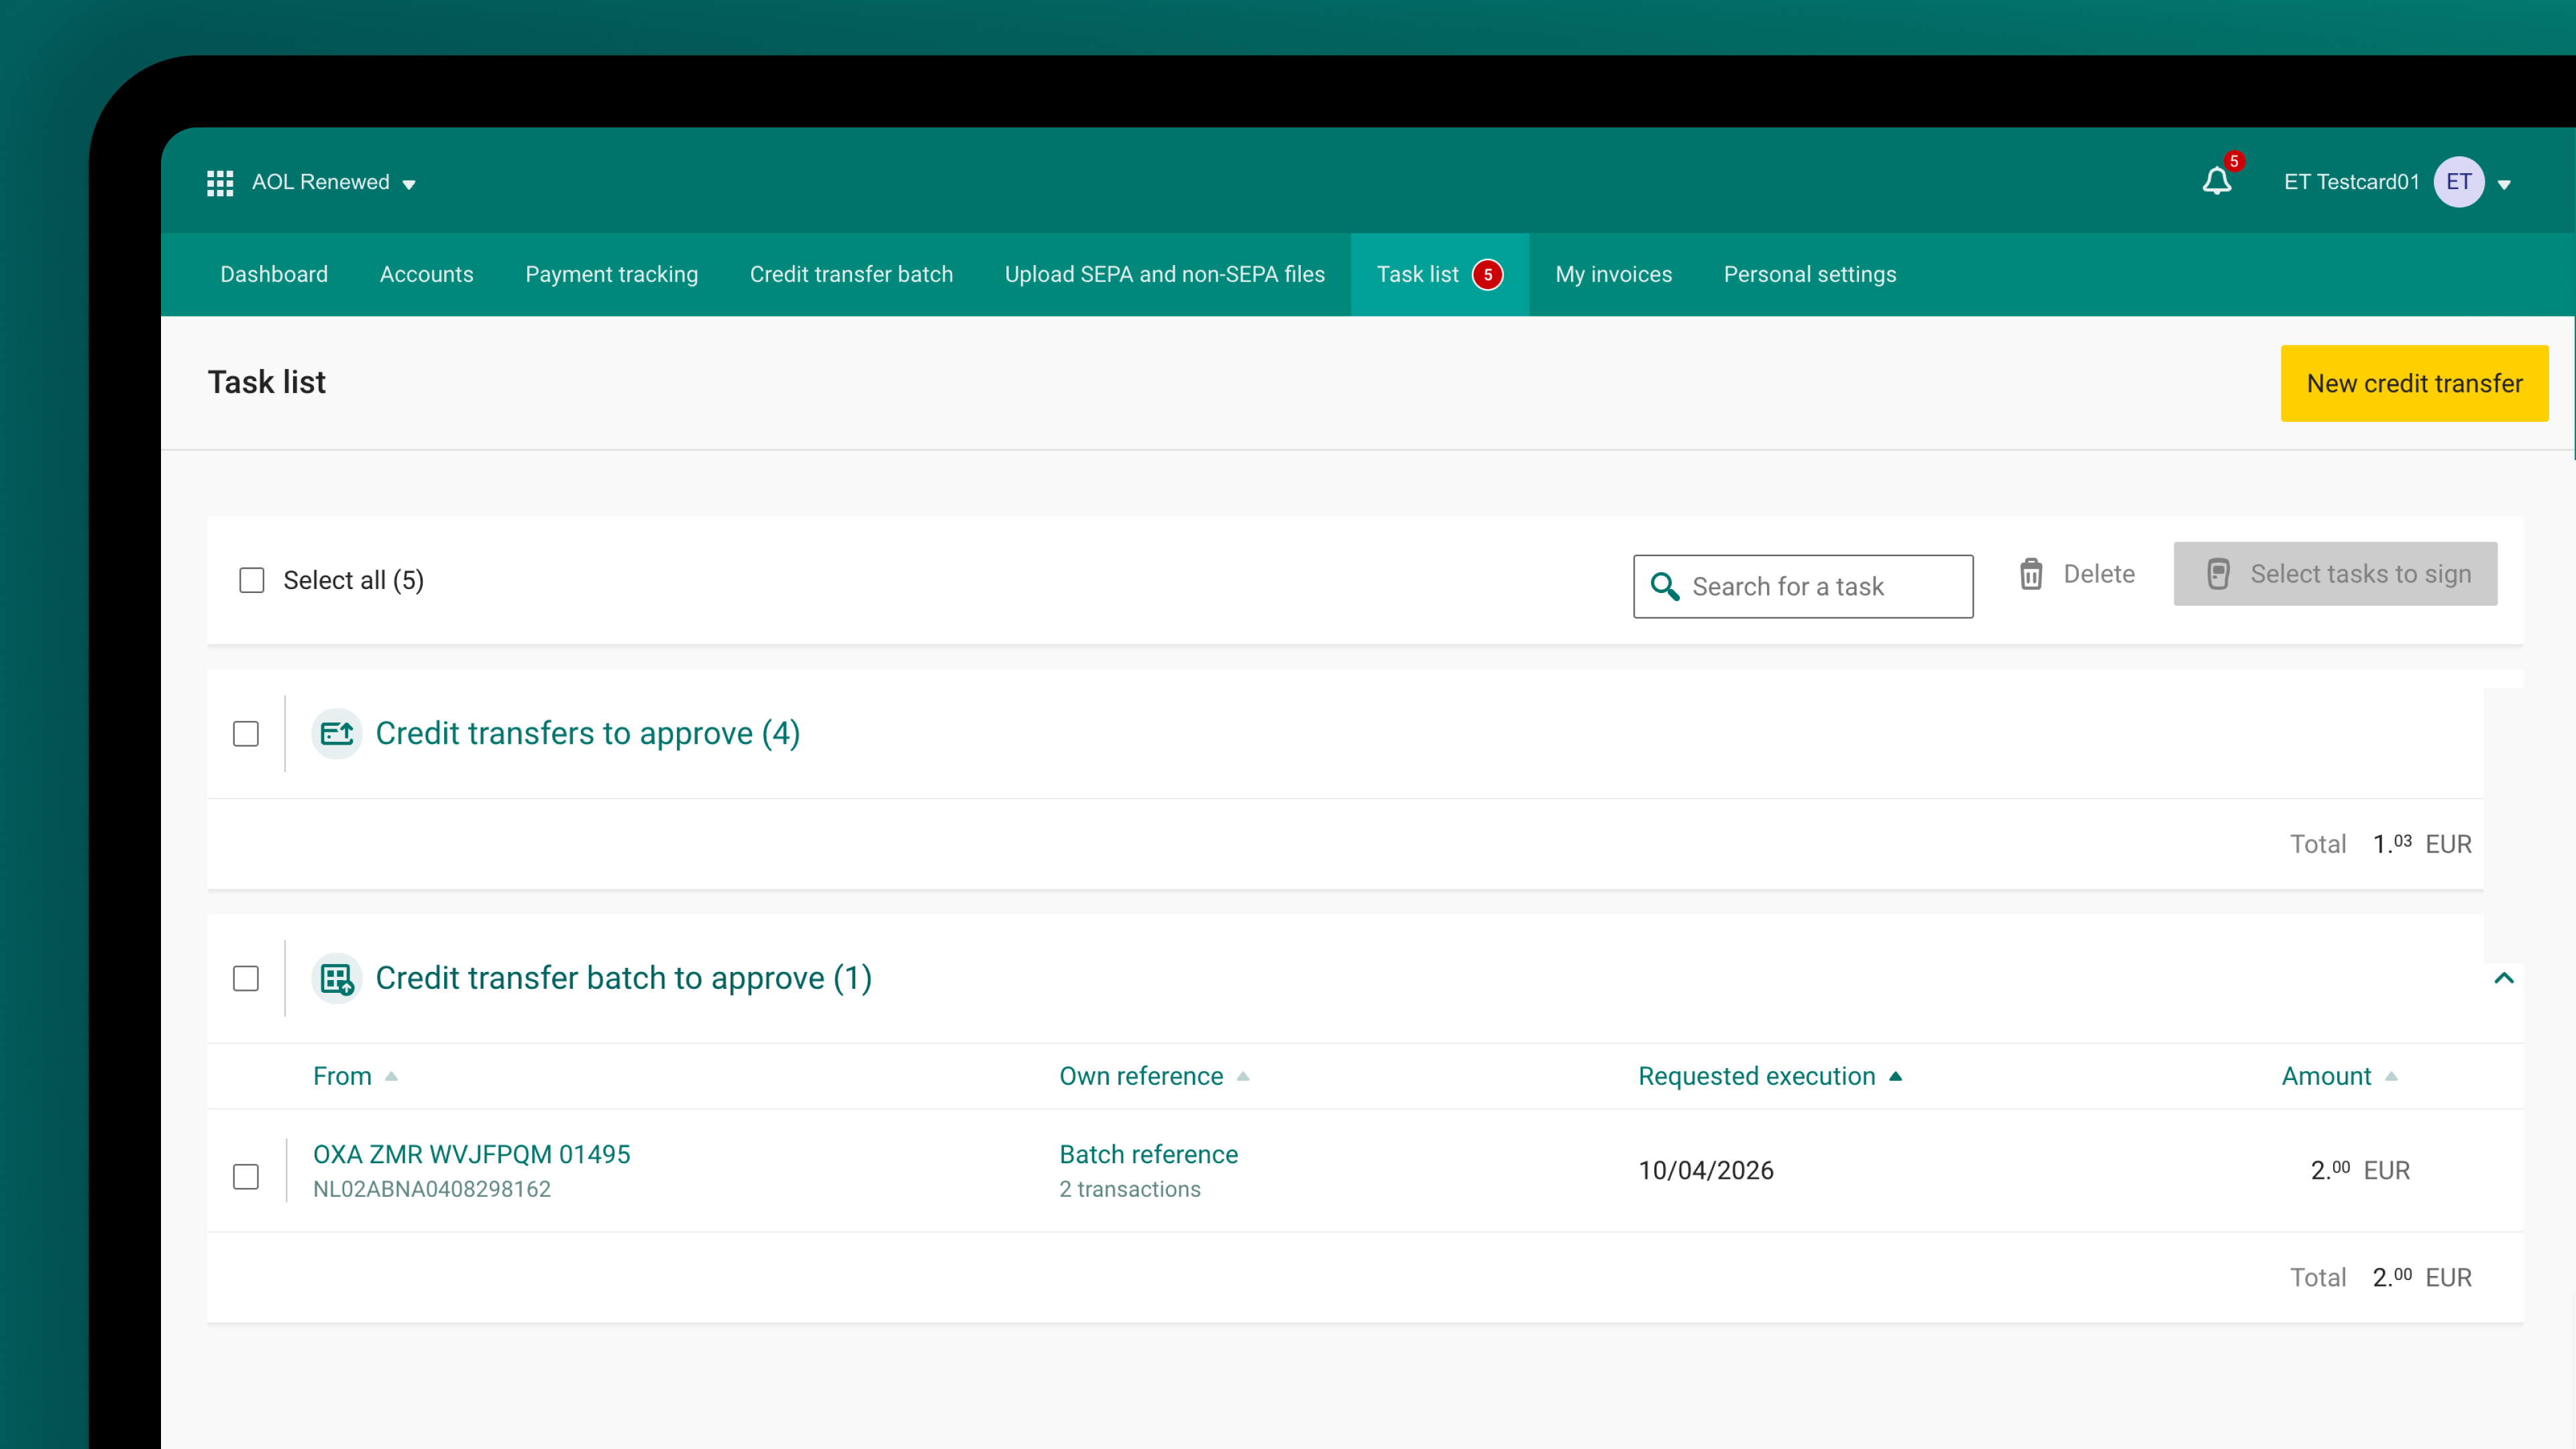
8. Task list
- In the Task list, you will find the manually created SEPA credit transfer batch under the 'Credit transfer batch to approve' section
- Check the batch you want to approve and submit
9. Approve credit transfer batch
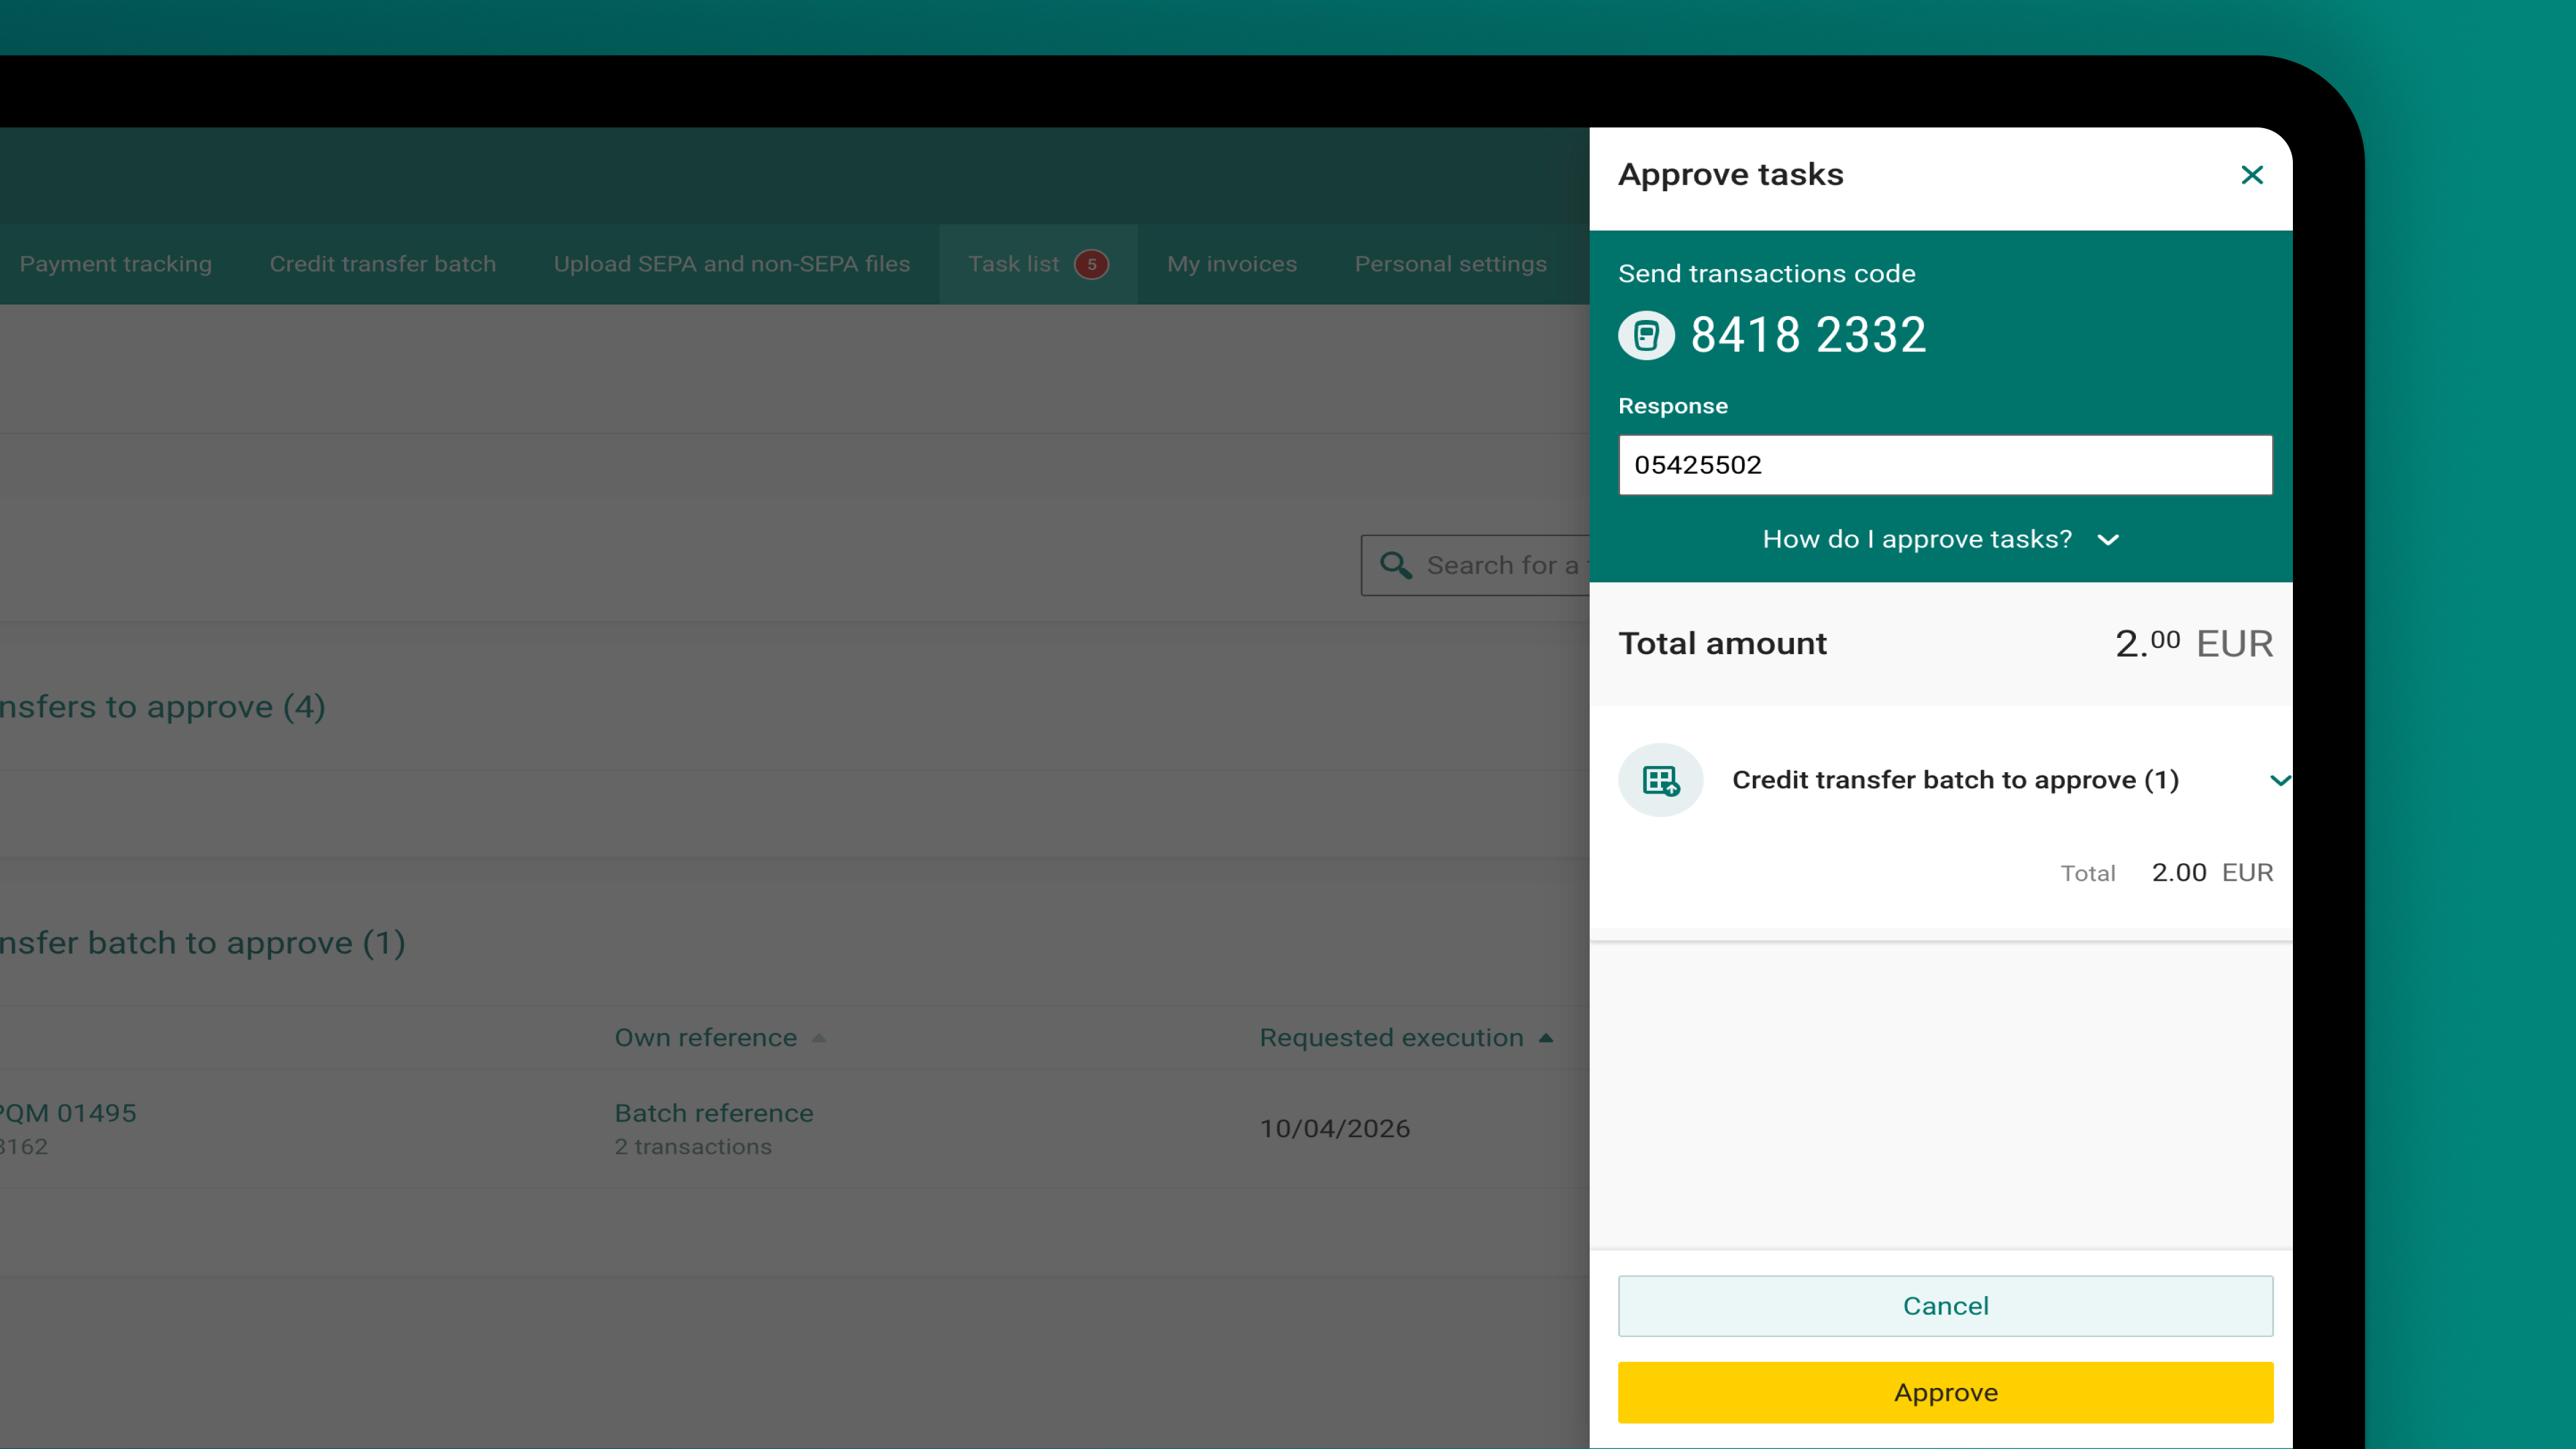
- Use the e.dentifier to approve the credit transfer batch and fill in the response
- Click ‘Approve’ to submit the batch
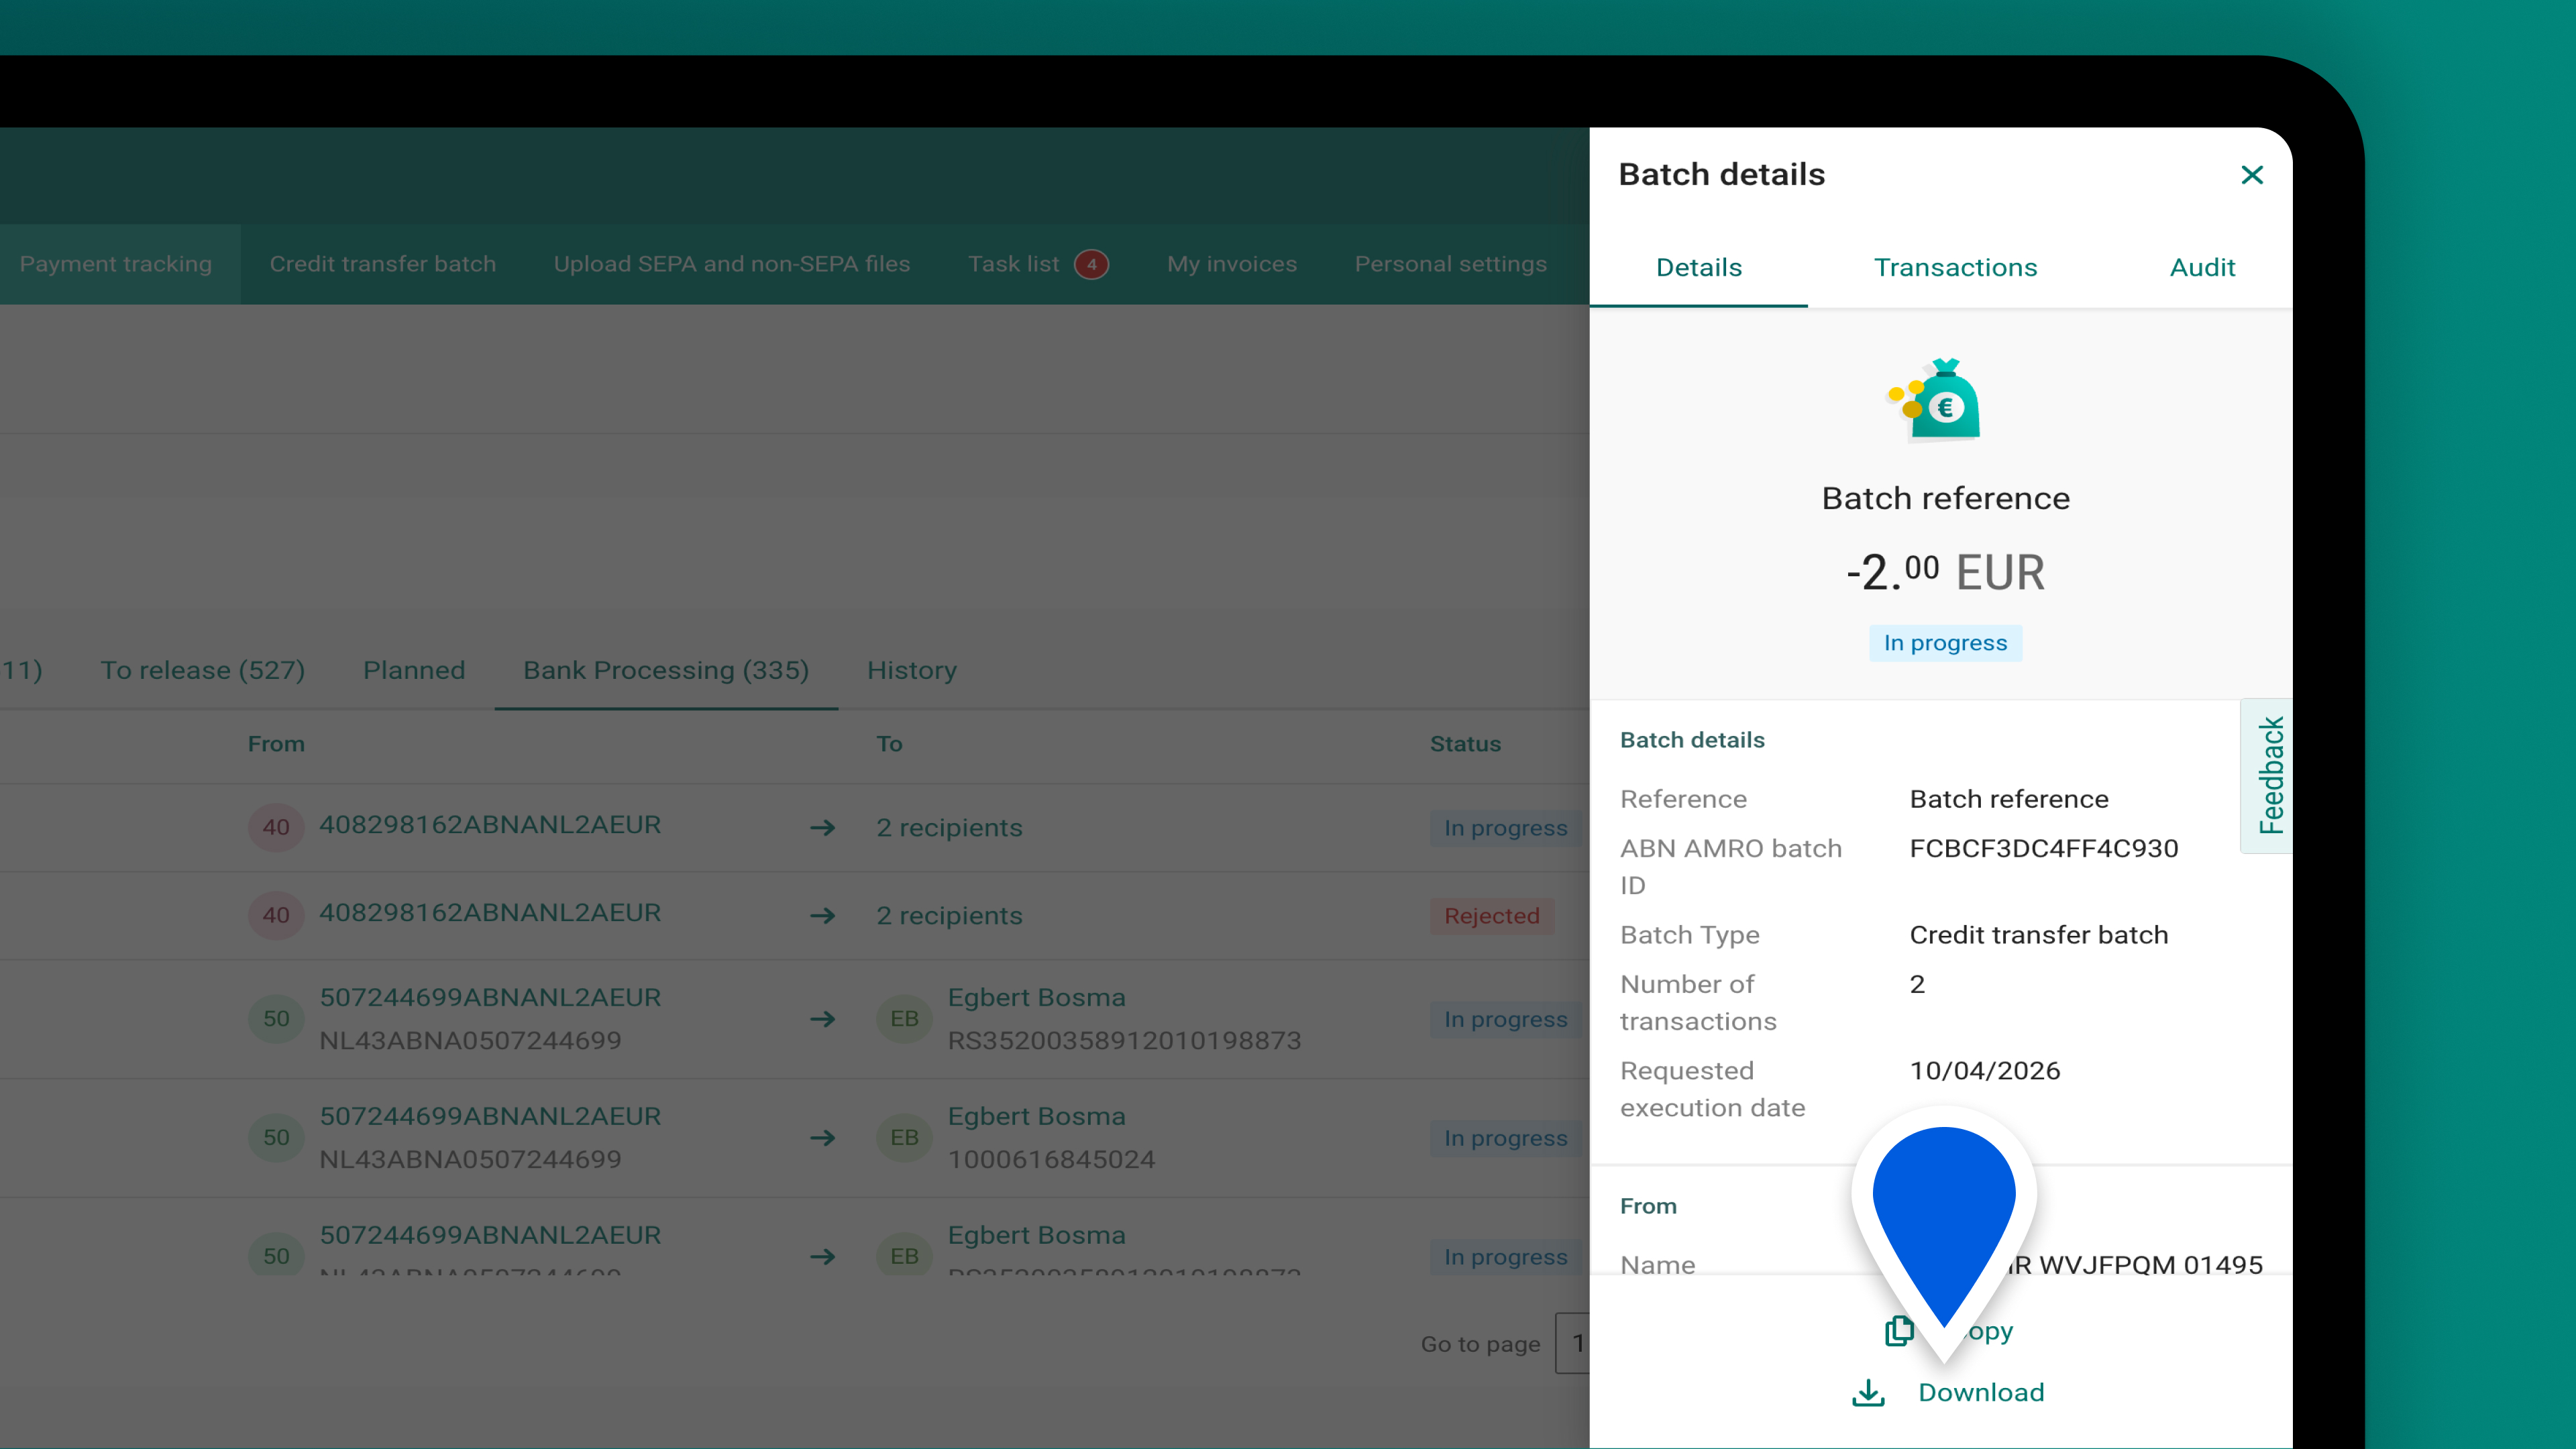
10. Payment tracking
- In the menu on top, click on 'Payment tracking'
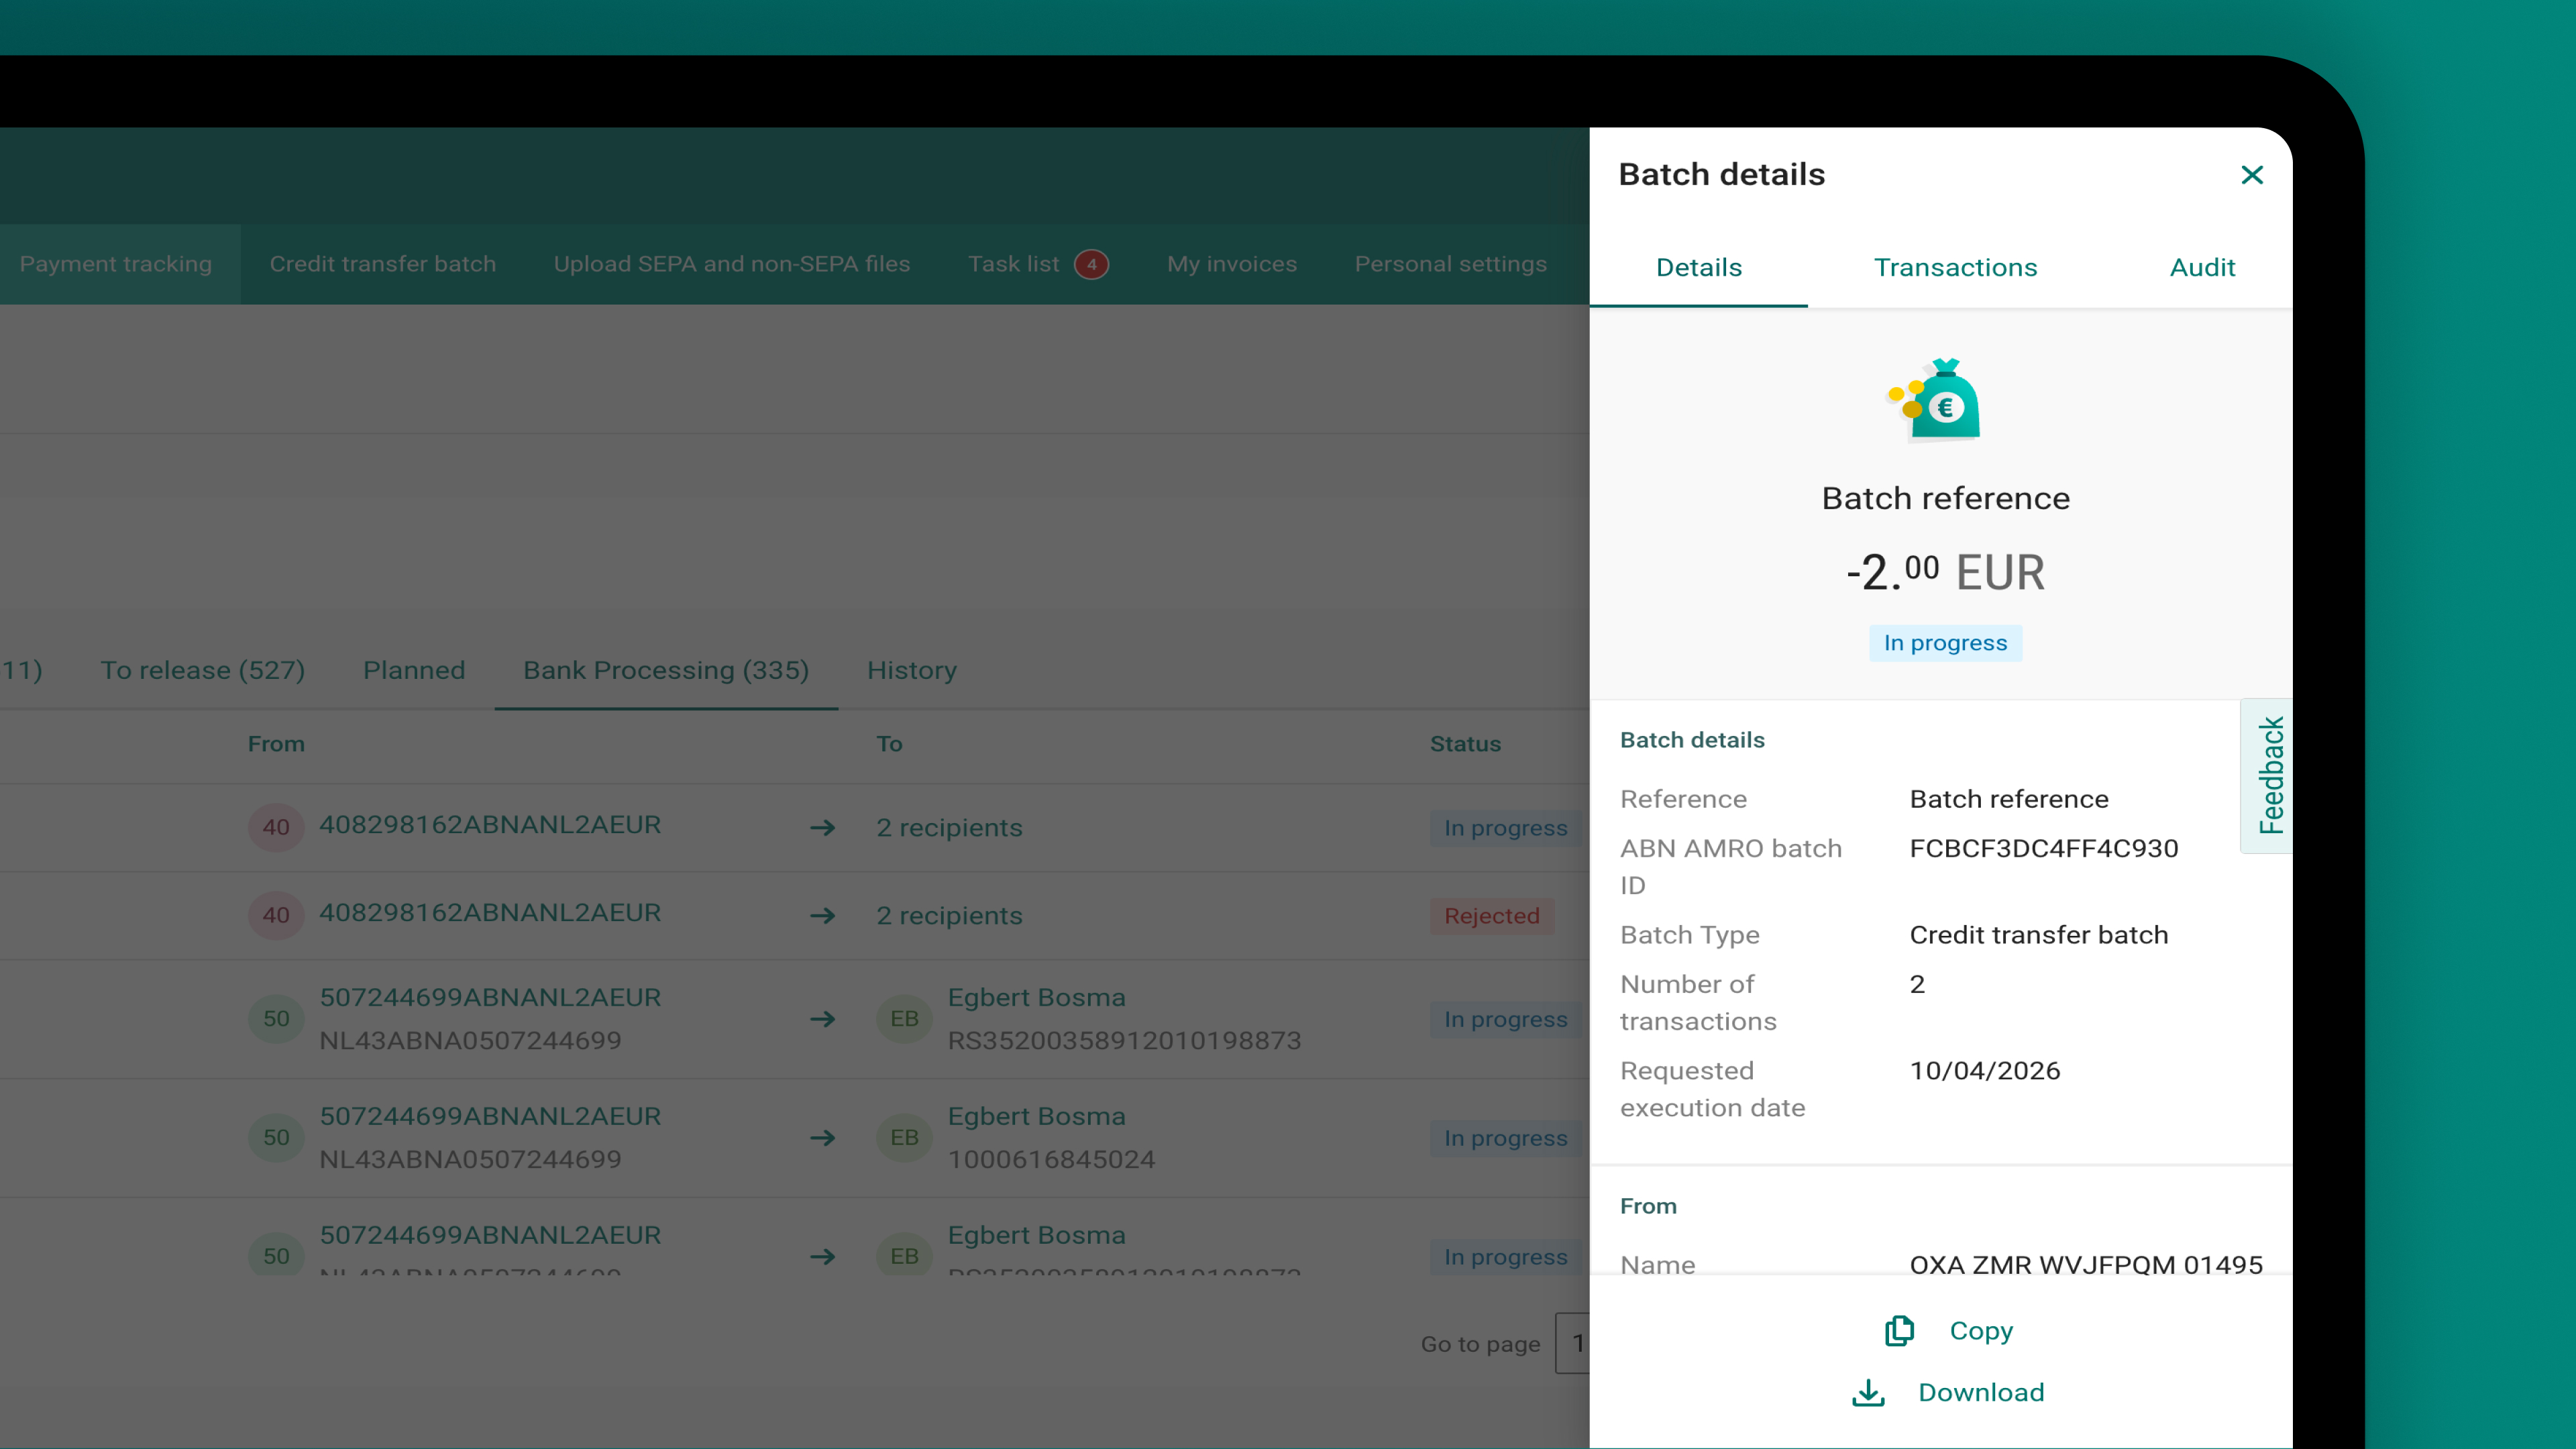
- On the ‘Payment tracking’ screen, go to the ‘Bank Processing’ tab
- Here you will find the manually created SEPA credit transfer batch that you have approved and sent
- Click on the batch to see the details. The ‘Batch details’ screen is on the right side of the screen
11. View transactions
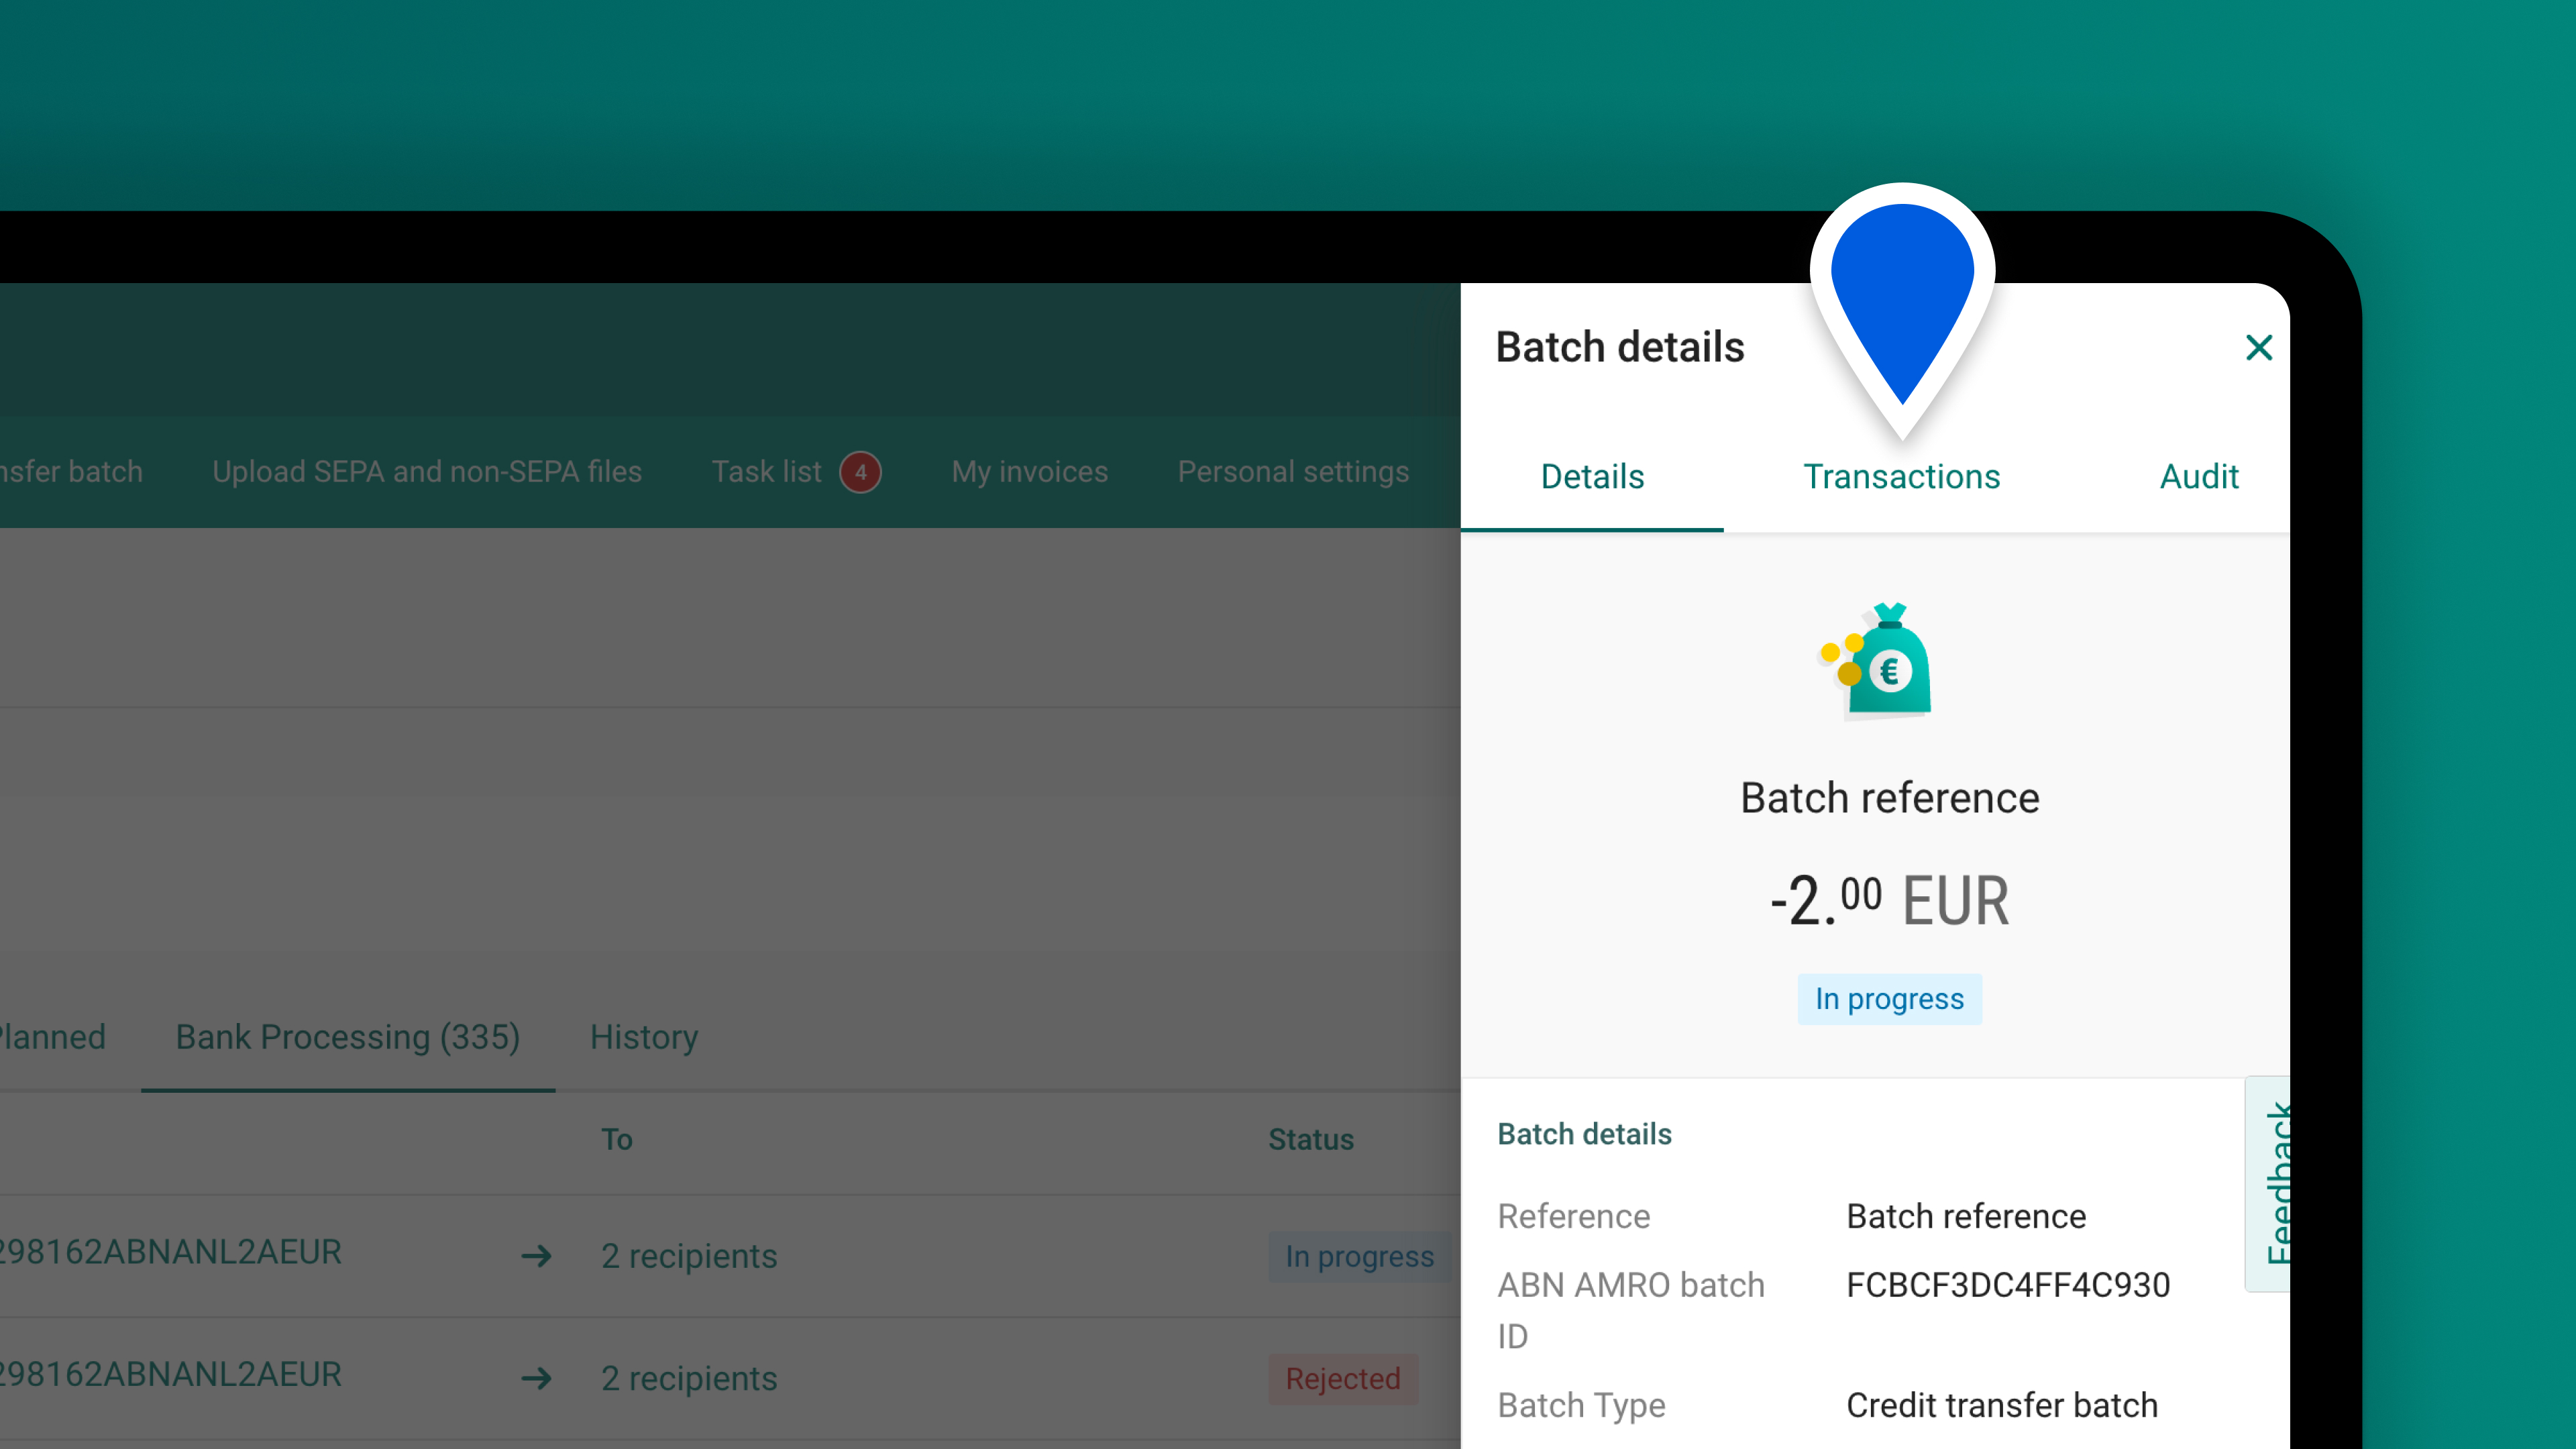
- On the ‘Batch details’ screen, click the ‘Transactions’ tab to see the list of transactions in the batch
- Click on the transaction to view the details of the transaction
12. Download credit transfer batch
- On the ‘Batch details’ screen at the bottom, click ‘Download’ to download a PDF file with the batch details and transactions
- Save the PDF file